
[Answered] Does File History Automatically Backup Subfolders?
Many Windows users rely on File History to protect important files, but a common question is does file history backup subfolders automatically. This guide explains "does file history automatically backup subfolders" and how the feature works in Windows. By adjusting these settings, you can make sure all important folders and nested files are properly covered by your backup plan.
By Aria / Updated on March 17, 2026
What Is Windows File History?
File History is a built-in backup feature in Windows designed to automatically protect personal files by saving copies to an external drive or network location. Once enabled, it regularly backs up files stored in common user locations, helping you restore previous versions if files are accidentally deleted, modified, or lost.

By default, File History mainly backs up data from Libraries, Desktop, Contacts, Favorites, and other user folders. It also keeps multiple versions of files over time, allowing users to restore earlier versions when needed.
However, many users still wonder does File History automatically backup subfolders within these locations. This article will explain whether File History backs up subfolders automatically and how to manage backup folders in Windows.
Does File History Backup Subfolders?
Yes, File History automatically backs up subfolders. When a folder is included in the File History backup scope, all of its subfolders and the files inside them are backed up as well. This means you do not need to manually add each nested folder for protection.
For example, if your Documents folder is included in File History, every subfolder inside Documents, such as project folders, photo folders, or work-related directories, will also be backed up automatically. Any new subfolders created later in that location will be included in future backups without additional configuration.
However, this automatic coverage only applies to folders that are already part of the File History backup locations. If a folder is stored outside the default libraries or user folders, it will not be backed up unless you manually include it by adding it to a library or configuring the backup settings.
How to Add a Folder to File History Backup on Windows
If an important folder is stored outside the default locations backed up by File History, you can manually include it in the backup scope. Adding the folder ensures that File History will monitor it and automatically save copies of its files and subfolders during future backup cycles. Follow these steps to add a folder to File History backup in Windows:
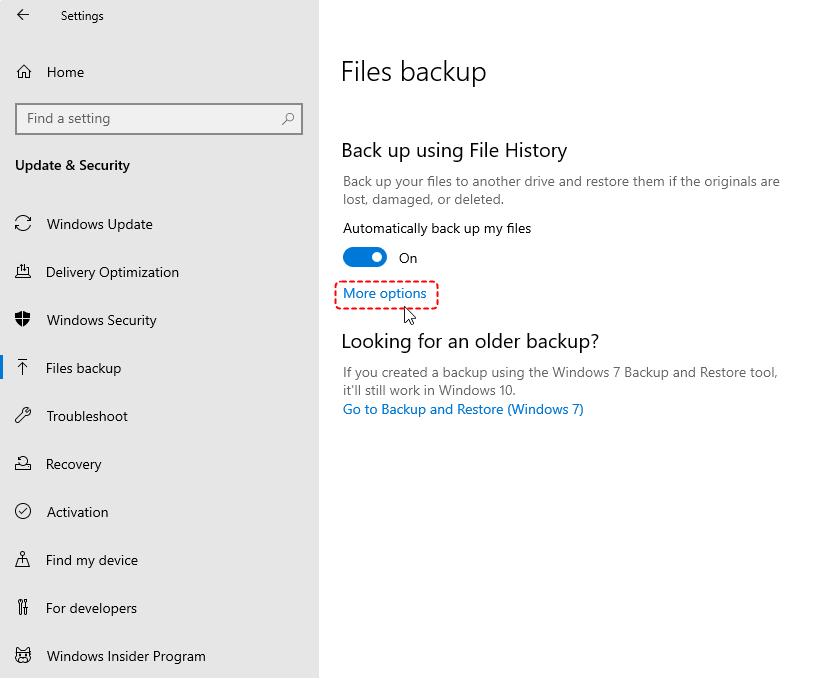
Step 1. Go to "Settings" > "Update & Security" > "Files backup".
Step 2. Under "Back up using File History", click "More options" to open the backup settings.
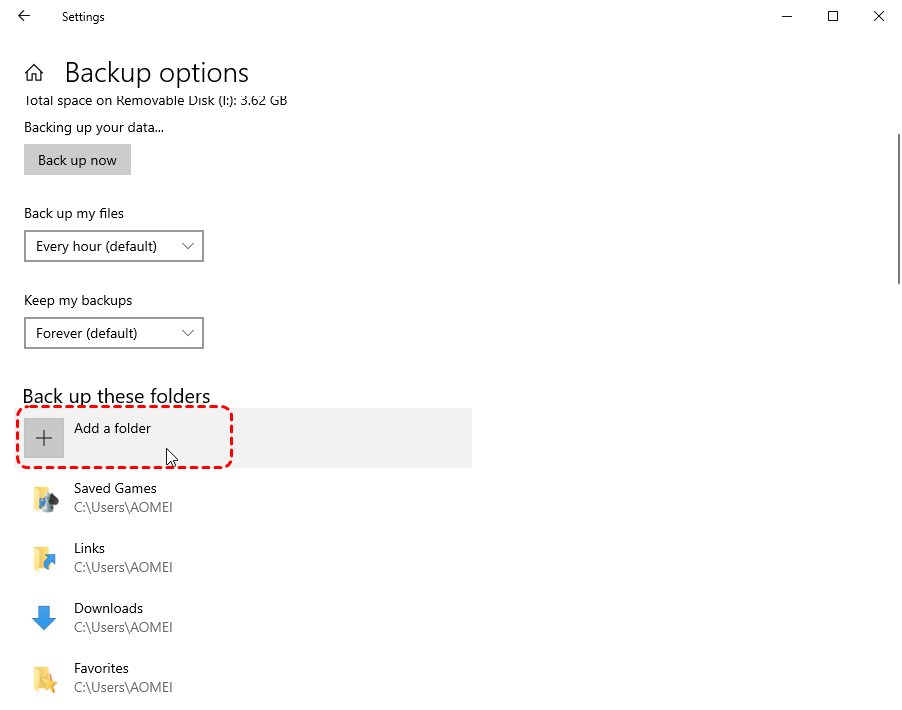
Step 3. Scroll down to the "Back up these folders" section and click "Add a folder".
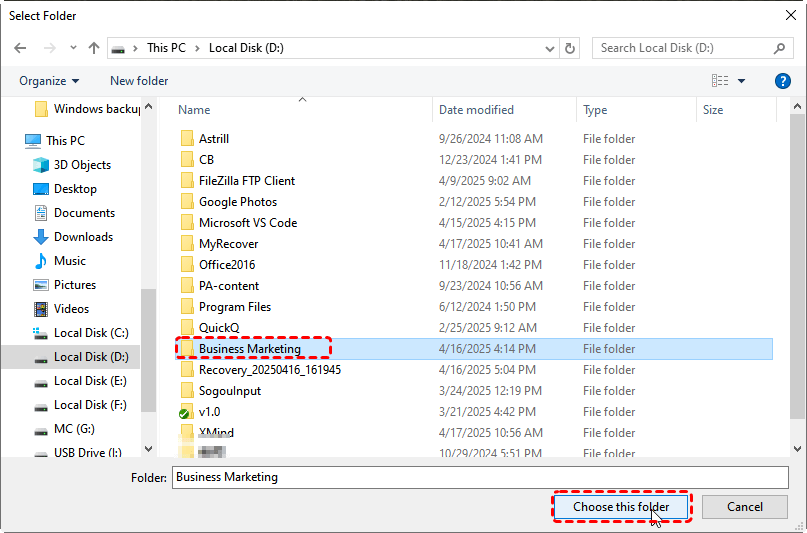
Step 4. Browse your computer and select the folder you want File History to protect.
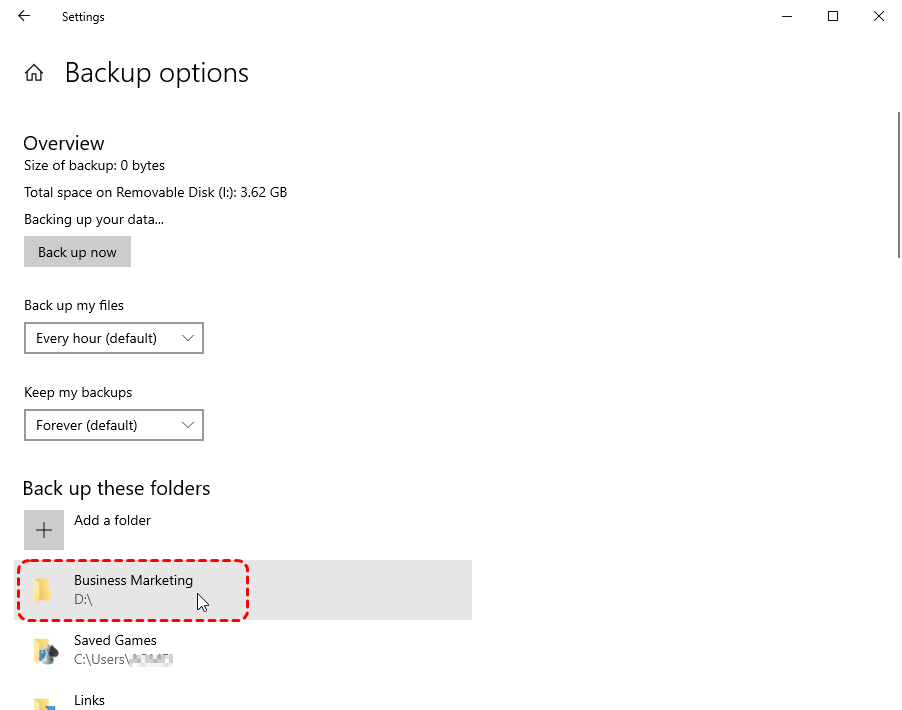
Step 5. Confirm your selection. The folder will now appear in the backup list and will be included in future File History backups. Once added, File History will automatically back up the selected folder along with all files and subfolders it contains.
How to Exclude Folders from File History on Windows
While File History automatically backs up all subfolders inside a selected folder, there may be cases where you want to exclude specific folders from the backup. For example, some folders may contain temporary files, large media files, or data that does not need version history. Excluding these folders helps reduce backup size and keeps the backup process more efficient. You can remove unwanted subfolders from the File History backup list through the backup settings.
Step 1. Open "Settings", then go to "Update & Security" and select "Files backup".
Step 2. Under "Back up using File History", click "More options" to access advanced settings.
Step 3. Scroll down to the "Exclude these folders" section.
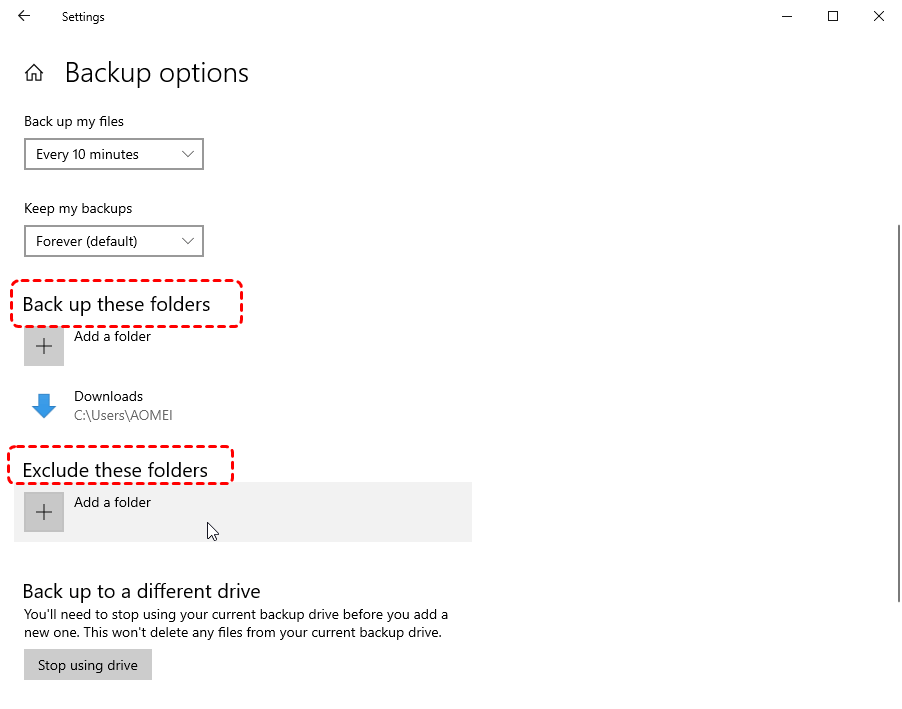
Step 4. Click "Add a folder" and browse to the subfolder you want to exclude from the backup.
Step 5. Select the folder and confirm. File History will skip this subfolder in future backups. After adding a folder to the exclusion list, File History will continue backing up the main folder but ignore the selected subfolder and its contents during the backup process.
Additionally, you can also exclude folders from File History settings that you no longer wish to back up. Here's how:
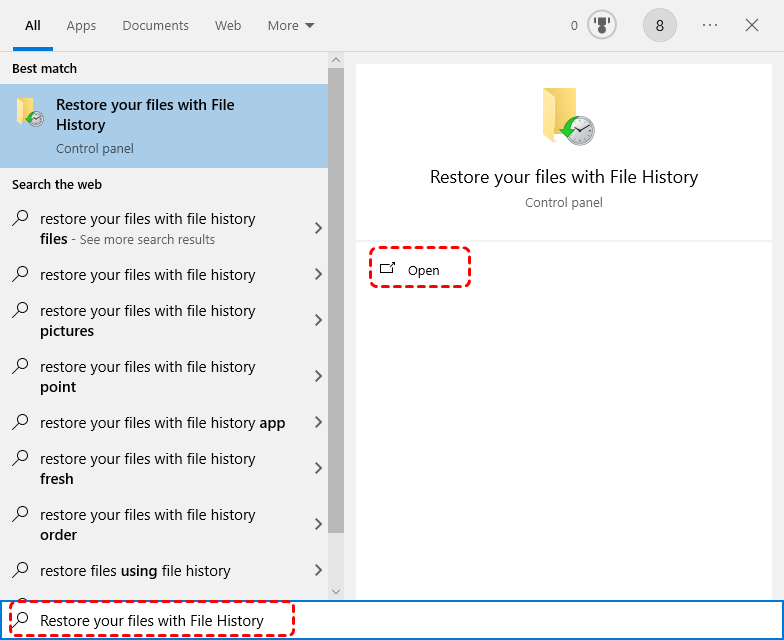
Step 1. Type "Restore your files with File History" in the Start menu and open File History.
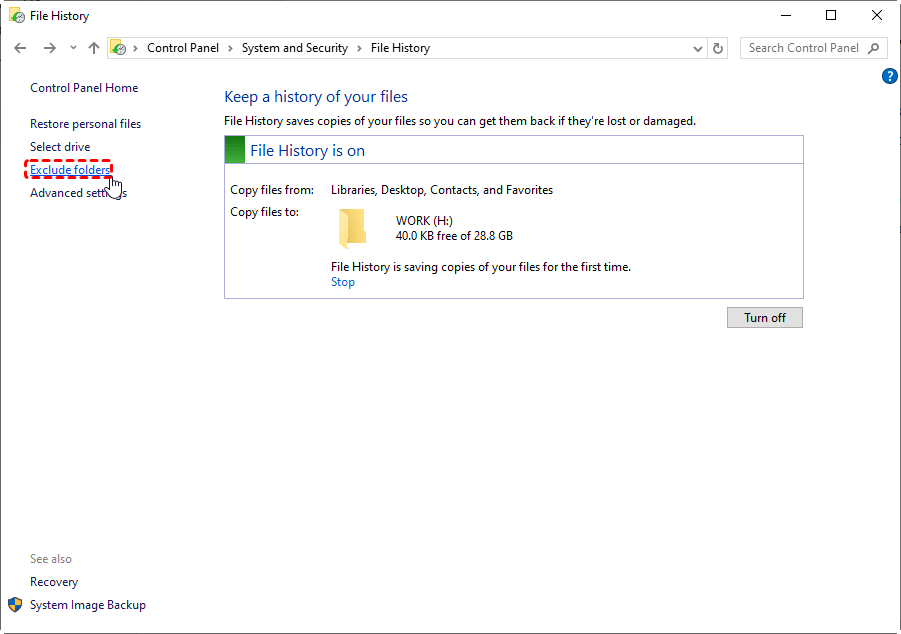
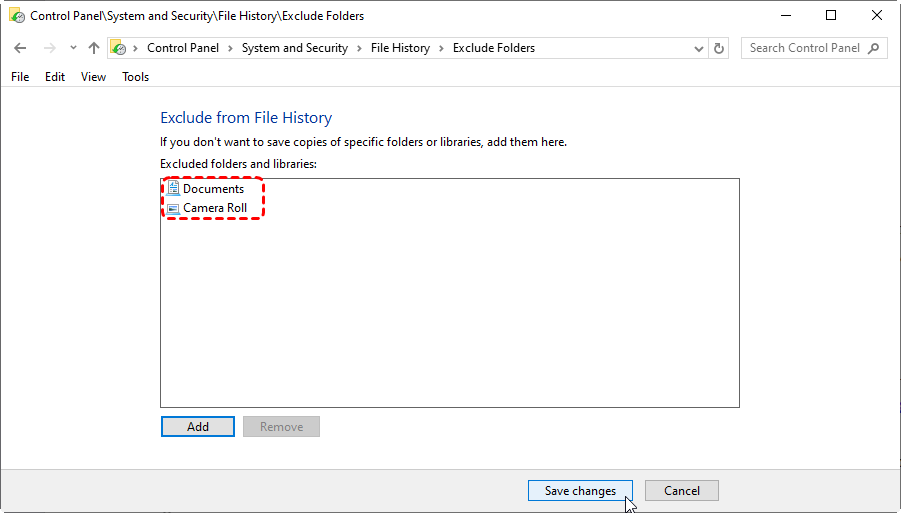
Step 2. Click "Exclude folders" and click "Add" to choose folders to exclude from File History backup.
Step 3. Click "Save changes" to confirm the exclusion.
Alternative Ways to Restore Deleted or Lost Files: Use MyRecover
Although File History is a useful backup feature, it only works after the backup has been enabled and properly configured. If File History was not turned on earlier, or if the deleted files were stored in folders that were never included in the backup scope, recovering those files through File History may not be possible. In such cases, using a professional data recovery tool like MyRecover can be a practical solution.
MyRecover is a dedicated data recovery tool designed to help users restore deleted or lost files from Windows devices. It can scan storage drives to locate recoverable data that still exists on the disk but is no longer accessible through normal system operations.
Why Choose MyRecover?
✅Recover Deleted Files Quickly: Restore files removed by accidental deletion, emptied Recycle Bin, or "Shift" + "Delete" operations.
✅Multiple Data Loss Scenarios Supported: Recover data lost due to formatting, system crashes, disk errors, virus attacks, or partition issues.
✅Wide Device Compatibility: Supports recovery from HDDs, SSDs, external hard drives, USB drives, SD cards, and other storage devices.
✅Fast Scan with Deep Recovery: Combines quick scanning and deep scanning to locate as many recoverable files as possible.
✅Preview Before Recovery: Allows you to preview files before restoring them, helping you recover only the data you actually need.
4 Steps to Recover Deleted or Lost Files with MyRecover
Step 1. Download and install MyRecover on your Windows computer, avoid installing it on the drive with lost files.
Step 2. Launch the program and select the drive where the files were originally stored, then click "Scan" to start the scanning process. For hard drives with complex data loss issues like formatted or corrupted, after a quick scan, you can run a deep scan to find more lost file fragments.

Step 3. After the scan is finished, browse and preview the scan results to find the files you want to restore. Select the target files and click "Recover" to get them back.

Step 4. Choose a different location to save the recovered files to avoid overwriting data.

Once the recovery process is completed, the message "Files have been recovered successfully" will pop up. Then, you can access the recovered files by clicking on the "Browse" button.

Conclusion
Windows File History is a practical backup feature that automatically protects files stored in selected folders, including all subfolders within those locations. Once a folder is added to the backup scope, its contents are backed up continuously, making it easier to restore previous file versions when needed.
If File History was not enabled before data loss occurred, recovering files through backups may not be possible. In such situations, using a professional recovery tool like MyRecover can provide another way to scan storage devices and retrieve deleted or lost files efficiently.
FAQs
Q1: What folders does File History backup?
File History mainly backs up files stored in default user locations such as Libraries, Desktop, Documents, Pictures, Videos, Favorites, and Contacts. It also includes any folders that have been manually added to the backup list. When a folder is included, File History automatically backs up all files and subfolders within it during scheduled backup cycles.
Q2: Does File History save everything?
No, File History does not back up everything on your computer. It mainly focuses on personal files in user folders rather than system files, installed programs, or operating system components. Only folders included in the File History backup list are protected, and files stored outside those locations must be manually added to be backed up.
Q3: Can I delete File History folders?
Yes, you can delete File History backup folders if you no longer need the stored versions. These folders are typically located on the external drive or network location used for backups. However, deleting them will permanently remove the saved file versions, so make sure you no longer need those backups before removing them.
Q4: Where does File History save files?
File History saves backup copies to the external drive or network location you selected when enabling the feature. Inside the backup drive, files are stored in a structured folder such as FileHistory > Username > ComputerName. This structure allows Windows to keep multiple versions of files and restore them when needed.


Stay Updated With Our
Latest Tips
Add us as a preferred source on Google to never miss helpful guides.