
How to Fix Windows 10 Update Error 0x80240fff
This guide explains the causes of 'Windows 10 Update Error 0x80240fff' and provides step-by-step solutions to resolve update failures. Learn how to fix the 0x80240fff Windows update error, troubleshoot version conflicts, and restore normal Windows Update functionality safely and efficiently.
By Aria / Updated on February 12, 2026
User Query: Window Update Problem.. Error Code 0x80240fff
There were some problems installing updates, but we'll try again later. if you keep seeing this and want to search the web or contact support for information, this may help: (0x80240fff).
- Question from Anonymous
What Is Error Code 0x80240fff on Windows Update?
Error code 0x80240fff on Windows Update is a Windows Update failure that typically indicates a synchronization or metadata mismatch between your system and Microsoft’s update servers. In practical terms, it means Windows cannot properly retrieve, identify, or process the update package required for installation. This error most commonly occurs in the following situations:
- Windows Update components are corrupted,
- The system build is outdated (e.g., older Windows 10 versions like 1511),
- Update services fail to communicate with Microsoft servers,
- There is a conflict between deferred updates and available feature updates.
From a technical standpoint, error 0x80240fff is often associated with issues in the Windows Update Agent (WUA) or inconsistencies in update metadata. As a result, Windows may display the 0x80240fff error messages or cause Windows updates stuck at 0% or failing repeatedly.
How to Fix Windows Update Error 0x8000ffff?
Since error 0x80240fff is usually related to update component corruption, outdated system builds, or communication failures with Microsoft servers, the solution should follow a logical progression. Below are step-by-step solutions arranged from basic to advanced.
Method 1: Restart Your Computer
Sometimes Windows Update fails due to temporary service glitches, locked update files, or pending background operations. A simple restart clears temporary system states, reloads update services, and resolves minor communication conflicts with Microsoft servers. This step is quick but surprisingly effective when the issue is caused by incomplete update initialization.
Step 1. Save all open works and programs, and click "Start" > "Power" > "Restart".

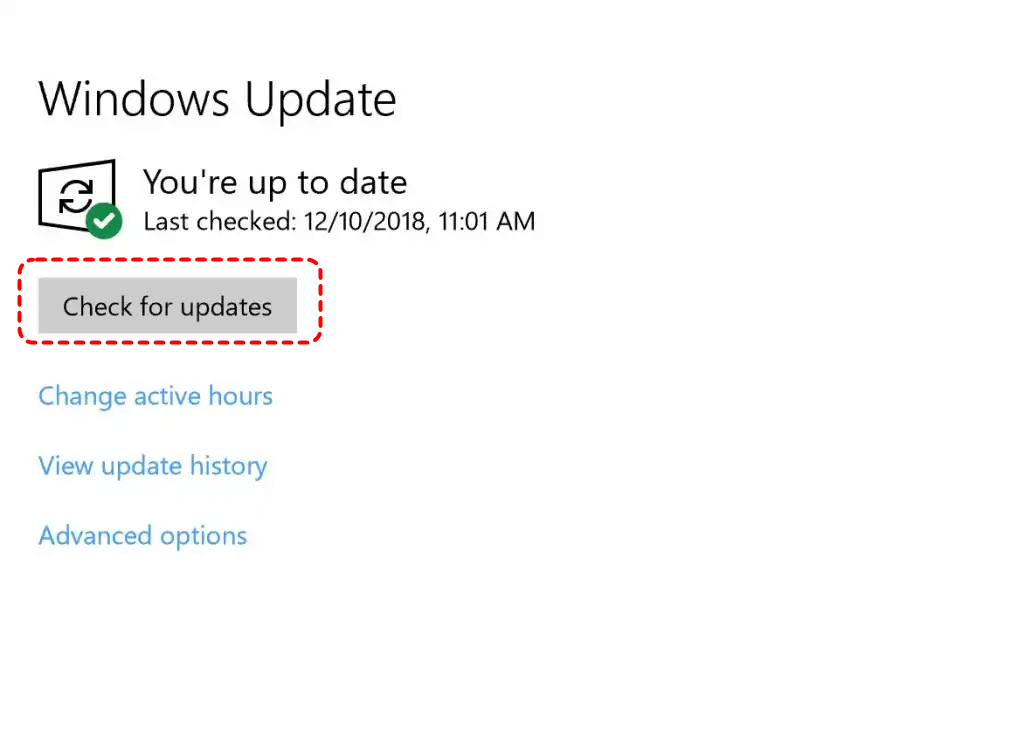
Step 2. After reboot, go to "Settings" > "Update & Security" > "Windows Update".
Step 3. Click "Check for updates" and monitor the result.
If the error remains, deeper diagnostic tools should be used.
Method 2: Run Windows Update Troubleshooter
The Windows Update Troubleshooter automatically detects and repairs common configuration issues affecting update services. It can reset misconfigured components, repair registry settings, and correct service status errors. This method is ideal for resolving basic infrastructure problems without manual intervention.
Step 1. Go to "Settings" > "Update & Security" > "Troubleshoot" > "Additional troubleshooters".
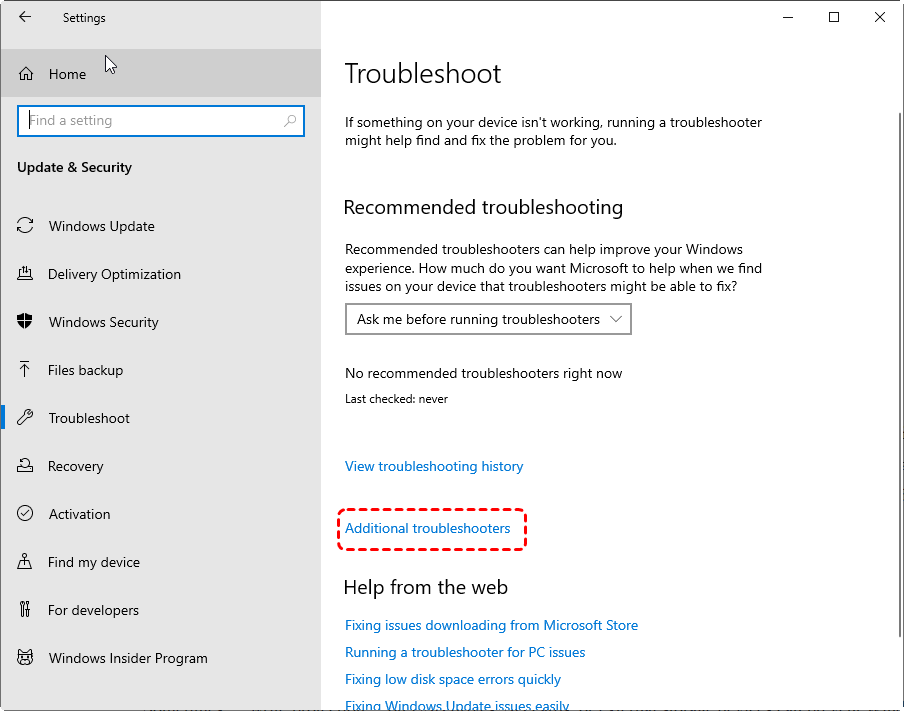
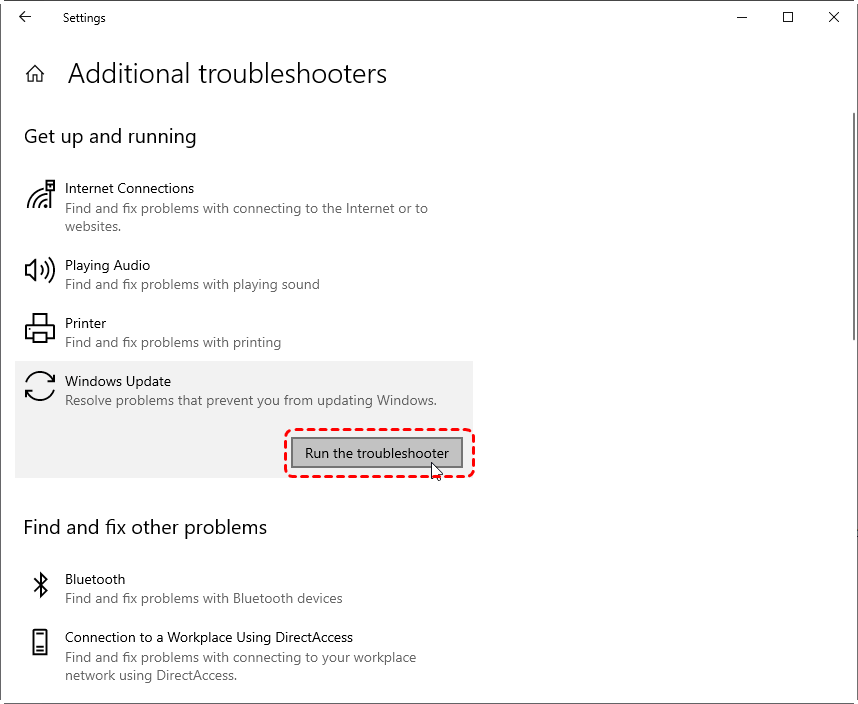
Step 2. Click "Run the troubleshooter" next to "Windows Update".
Step 3. Apply recommended fixes and restart your PC.
If troubleshooting does not resolve the error, system configuration settings may be interfering.
Method 3: Check Date and Time Settings
Incorrect system time can prevent Windows from properly validating update certificates and communicating securely with Microsoft servers. If your system clock is out of sync, update authentication may fail, triggering error 0x80240fff. Ensuring accurate time synchronization is a necessary prerequisite for secure update processing.
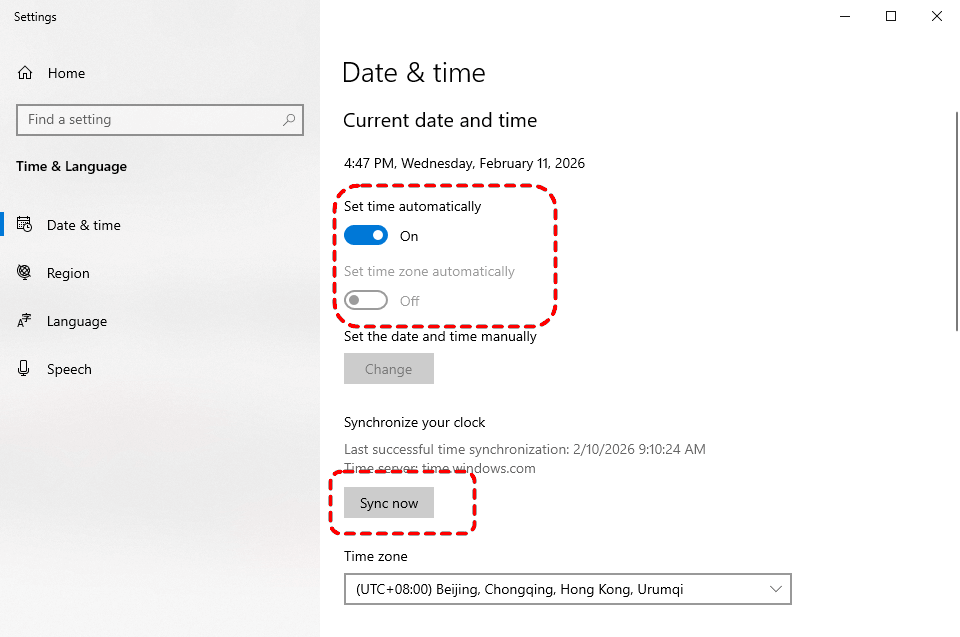
Step 1. Right-click the clock in the taskbar and select "Adjust date/time".

Step 2. Enable "Set time automatically" and "Set time zone automatically".
Step 3. Click "Sync now" under "Additional settings".
Step 4. Retry Windows Update to check if the error 0x80240fff is removed.
Method 4: Clear Windows Update Cache
The SoftwareDistribution folder stores temporary update files and metadata. If these files become corrupted or incomplete, Windows cannot properly process updates. Clearing the update cache forces Windows to download fresh update packages and rebuild its internal update database.
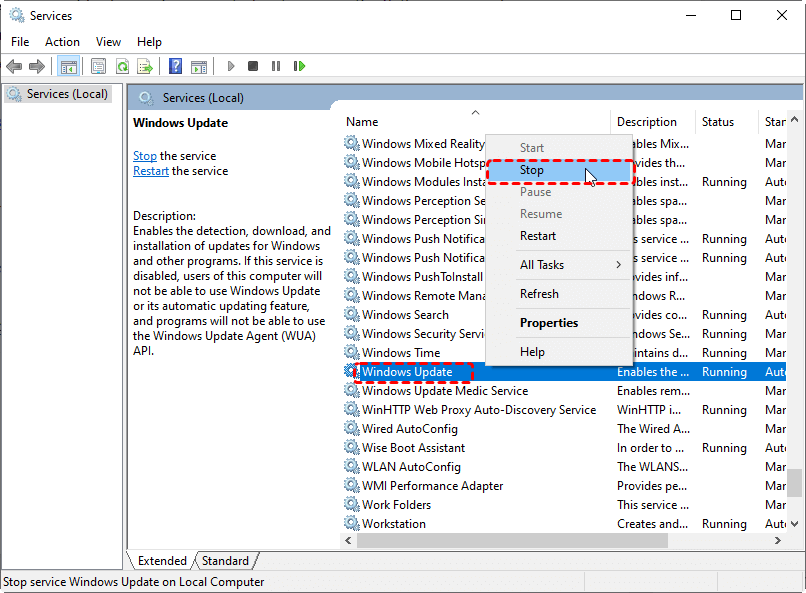
Step 1. Press "Win" + "R", type "services.msc", and press "Enter" to open Services window.

Step 2. Scroll down and locate "Windows Update", right-click on it and select "Stop".
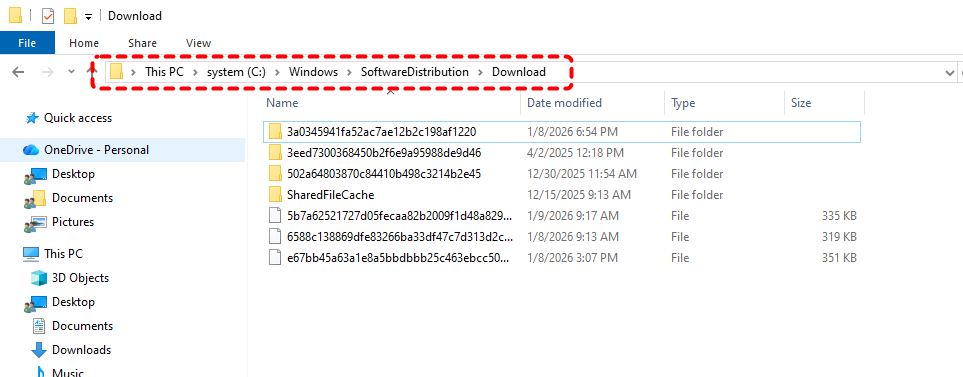
Step 3. Navigate to C:\Windows\SoftwareDistribution\Download in File Explorer and delete all contents.
Step 4. Return to Services window and restart "Windows Update". Check for updates again to see if the error is still here.
Method 5: Reset Windows Update Components (Command Prompt)
When update services or registry entries become deeply corrupted, manually resetting all related services ensures a clean restart of the update infrastructure. This process stops core update services, renames cache folders, and rebuilds system update dependencies from scratch.
Step 1. Locate Command Prompt in the Start menu and right click on it, then choose "Run as administrator".

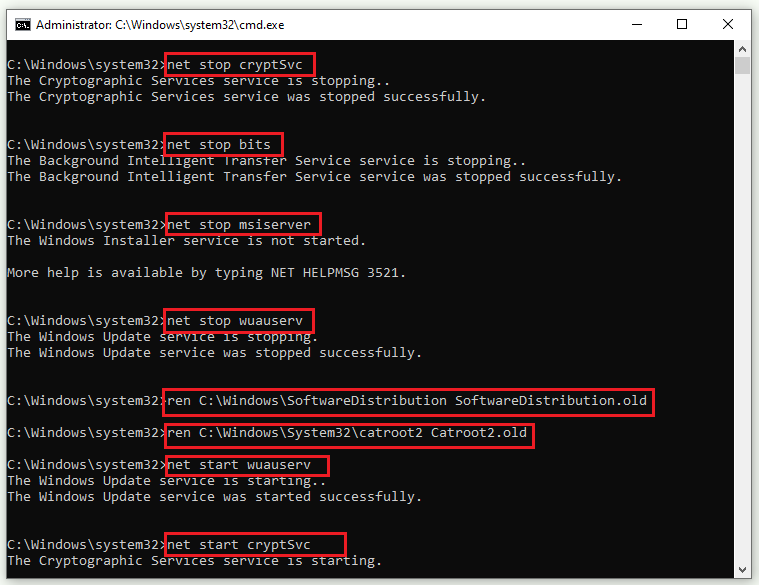
Step 2. Enter the following command to reset Windows Update components:
- net stop wuauserv
- net stop cryptSvc
- net stop bits
- net stop msiserver
- ren C:\Windows\SoftwareDistribution SoftwareDistribution.old
- ren C:\Windows\System32\catroot2 catroot2.old
- net start wuauserv
- net start cryptSvc
- net start bits
- net start msiserver
Step 3. After the command completes, restart your computer to verify if the error continues.
Method 6: Run SFC and DISM Scans
Windows Update relies on system files and servicing components. If those files are corrupted, update installation fails regardless of cache resets with the 0x80240fff error. Running SFC and DISM repairs damaged system images and restores core Windows functionality.
Step 1. Open Command Prompt as administrator.
Step 2. Type the commands one bye one and press "Enter" after each one:
DISM /Online /Cleanup-Image /RestoreHealth
sfc /scannow
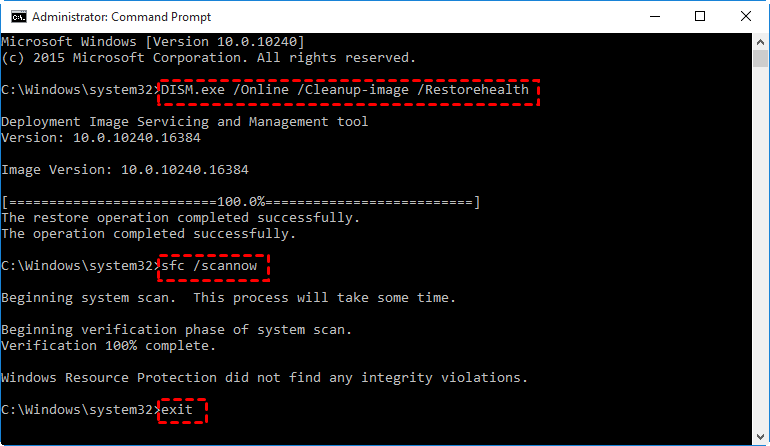
Wait for the commands to complete and reboot your computer, then retry Windows Update again.
Method 7: Update Windows in Clean Boot Mode
Third-party application running in the background can interfere with update downloads or installation processes. A clean boot disables non-Microsoft services and startup programs that may conflict with Windows Update. You can try to fix the 0x80240fff error by following these steps:
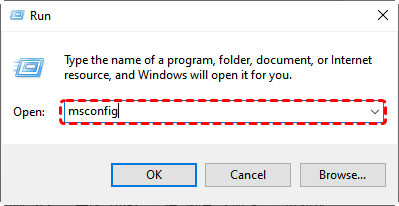
Step 1. Press "Win" + "R" and type "msconfig" in the Run dialog, then press "Enter".
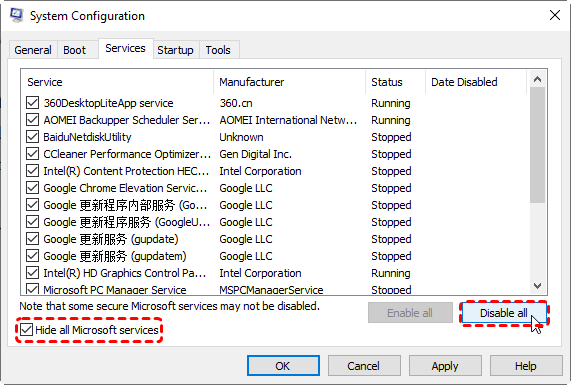
Step 2. Under "Services" tab, check the box next to "Hide all Microsoft services" and click "Disable all".
Step 3. Go to the "Startup" tab and click "Open Task Manager" to disable all startup items.
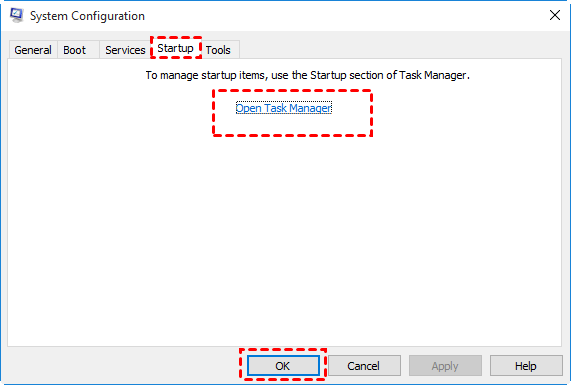
Step 4. Restart your PC and run Windows Update once again.
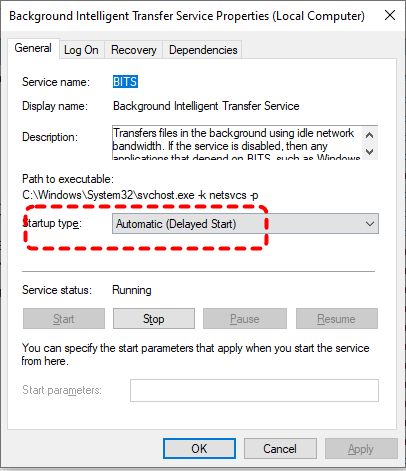
Method 8: Refresh the Background Intelligent Transfer Service (BITS)
BITS manages background data transfers for Windows Update. If BITS becomes stuck or unresponsive, updates cannot download properly. Restarting BITS can restore update data flow and resolves stalled installations.
Step 1. Open the Services window as described earlier.
Step 2: Locate "Background Intelligent Transfer Service" from the list and right click on it, then choose "Restart".
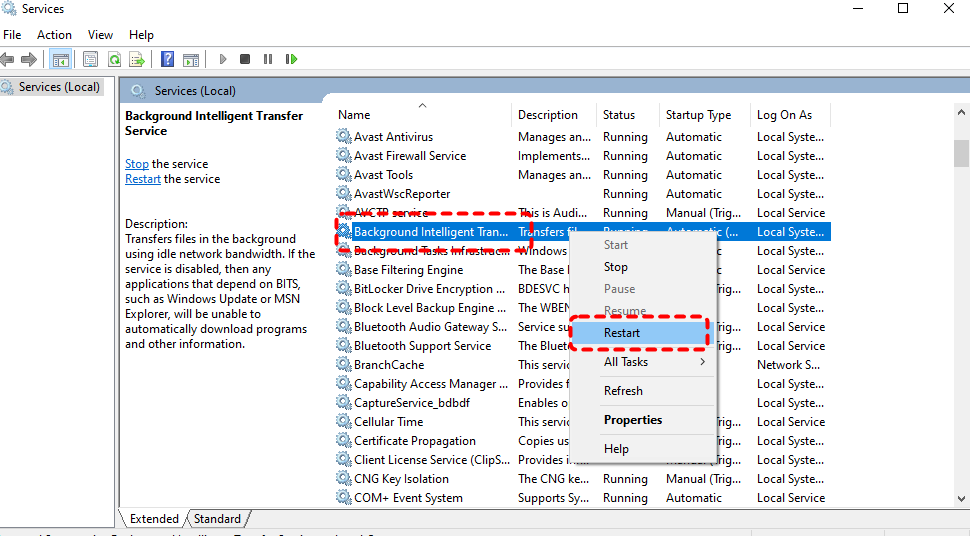
Step 4: Double click on it to ensure "Startup type" is set to "Automatic".
Method 9: Disable Additional Microsoft Product Update Settings
Enabling updates for other Microsoft products (such as Office) sometimes introduces metadata conflicts and causes the Windows Update error 0x80240ff. Disabling this setting narrows update scope and reduces synchronization complexity.
Step 1. Go to "Settings" > "Update & Security" > "Windows Update" > "Advanced options".
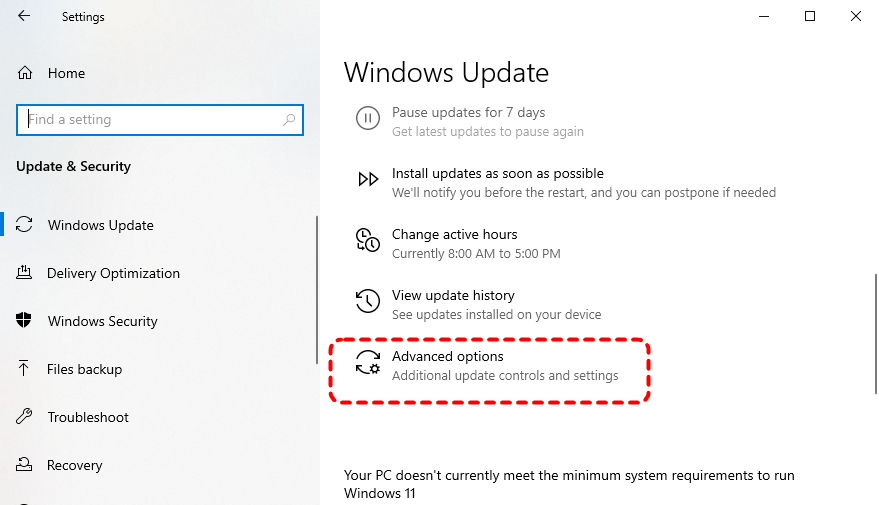
Step 2. Turn off "Receive updates for other Microsoft products when you update Windows".
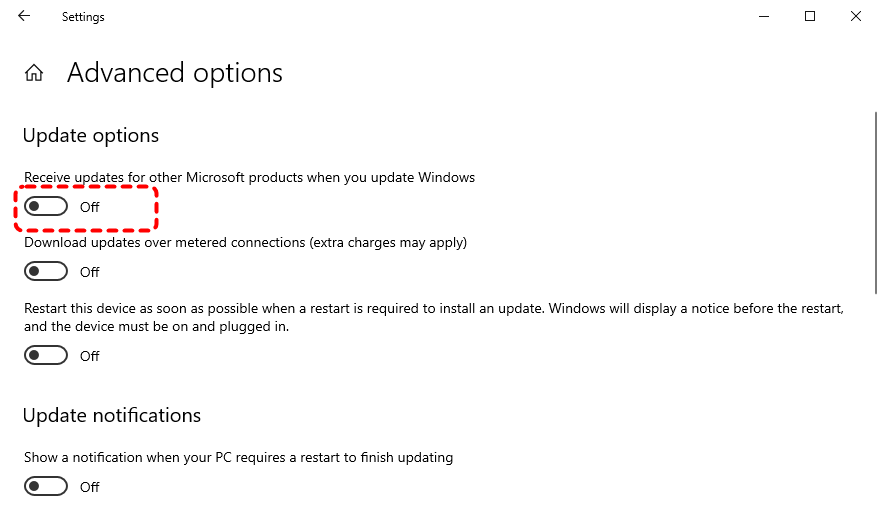
Step 3. Return and check for updates again.
Method 10: Turn to Windows Update Assistant
When internal update services repeatedly fail, the Windows Update Assistant provides a direct upgrade path. It downloads and installs the latest feature update independently of the Windows Update interface, bypassing metadata synchronization issues and the error 0x80240fff. Visit Microsoft’s official website and download the Windows Update Assistant. Then, click "Update Now" and follow on-screen instructions to download the installation.
Last Resort: Reinstall Windows 10 From Scratch
If none of the previous methods resolve Windows Update error 0x80240fff, the issue may stem from deeply corrupted system components, broken servicing stacks, or irreparable update metadata. In such cases, reinstalling Windows 10 becomes the most reliable way to fully restore update functionality.
However, a clean installation of Windows 10 will erase the system partition and all personal files stored on the OS drive. If performed incorrectly, especially without backups, it can result in permanent data loss. Therefore, before proceeding, safeguarding your important files is critical.
Protect Your Data with MyRecover Before Reinstalling
MyRecover is a professional data recovery tool that helps you retrieve your important files from various complex data loss scenarios. It features a user-friendly GUI interface, allowing even novice users to complete data recovery easily without any additional professional knowledge. Furthermore, MyRecover’s AI-embedded file recognition and recovery technology ensures that no lost files are ever missed. You can get your files following these steps:

- Supports recovery from HDDs, SSDs, USB drives, and SD cards.
- Compatible with NTFS, FAT32, exFAT, ReFS, and even Ext file systems.
- Allows quick filtering by specific file types for faster targeting.
- Offers both Quick Scan and Deep Scan for comprehensive recovery.
Step 1. Download and install MyRecover on your computer from Microsoft Store or its official website, avoid installing it on the drive with lost files.
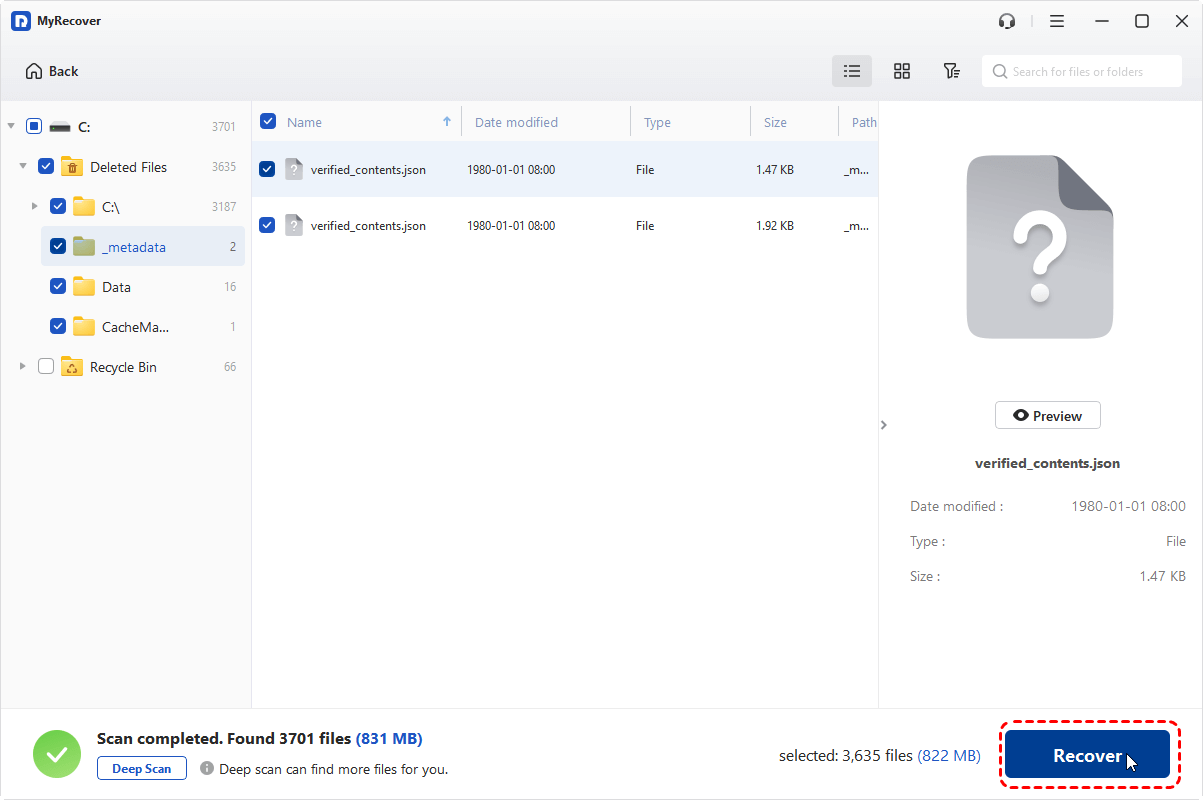
Step 2. Run the app and select the system drive to scan, then click "Scan" to search for recoverable files. If needed, you can click "Deep Scan" to find more lost file fragments.

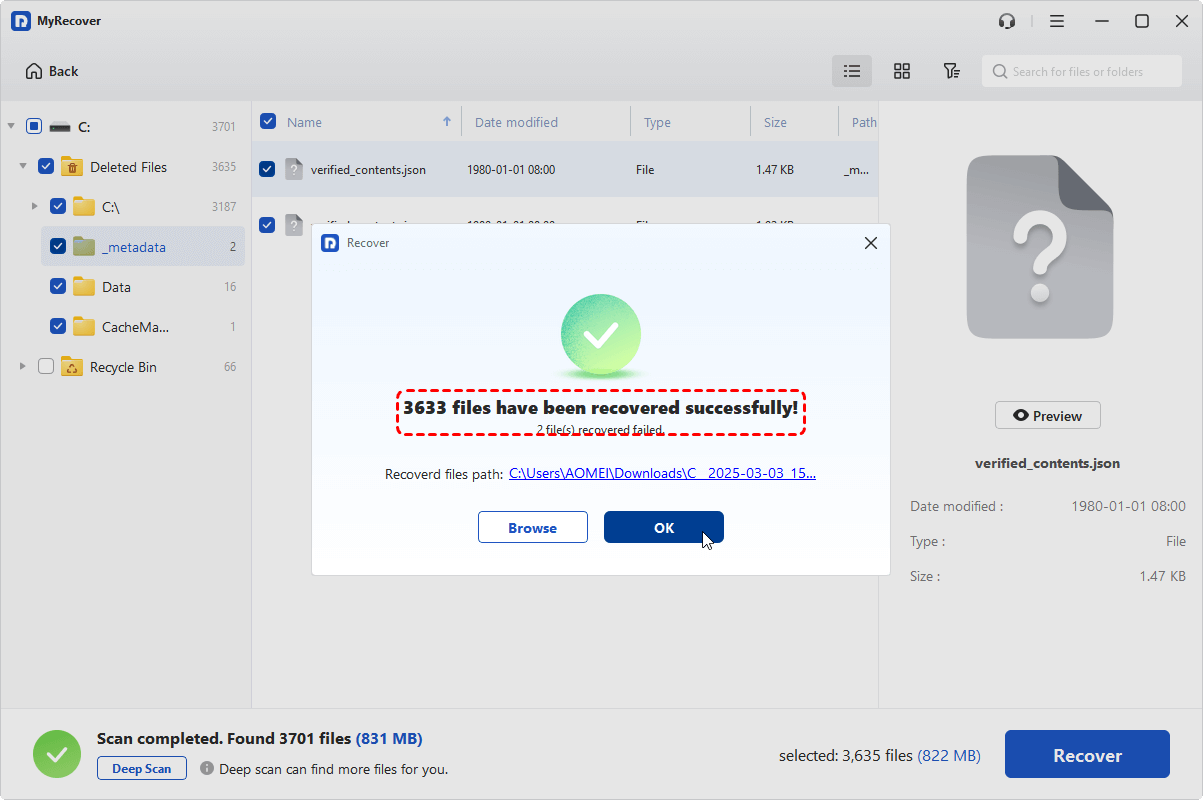
Step 3. After the scanning completes, choose the files you would like to recover and click "Recover".
-
If no lost files want to recover, you can select the "Existing Files" folder under the "Path" tab to extract all files from the drive.
-
Start with MyRecover Free to recover up to 500MB of data at no cost. For users who need more like unlimited recovery and the ability to preview files before restoring, MyRecover Professional edition is the ideal choice, offering a complete recovery solution. It even provides powerful recovery from unbootable systems.
Step 4. Select a safe location (preferable an external hard drive) to save the recovered files.
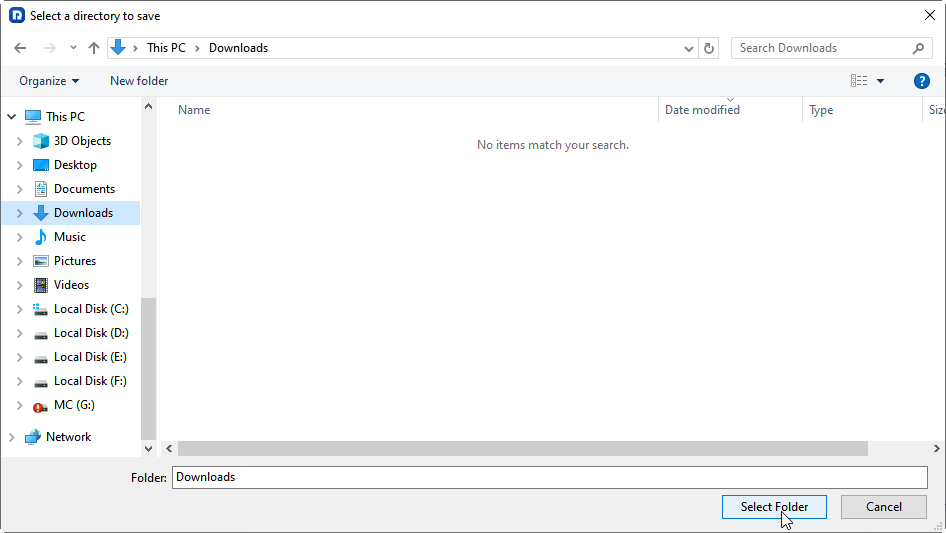
When the process is done, you can view the recovered files in the destination folder by clicking on the "Browse" button.
How to Reinstall Windows 10 Safely
Once your data is fully backed up or recovered, proceed with reinstallation carefully. This method installs a completely new Windows system, ensuring that the newly installed computer will no longer be affected by update error 0x80240fff.
Step 1. Download the Windows 10 Media Creation Tool from Microsoft’s website and create a bootable USB drive.
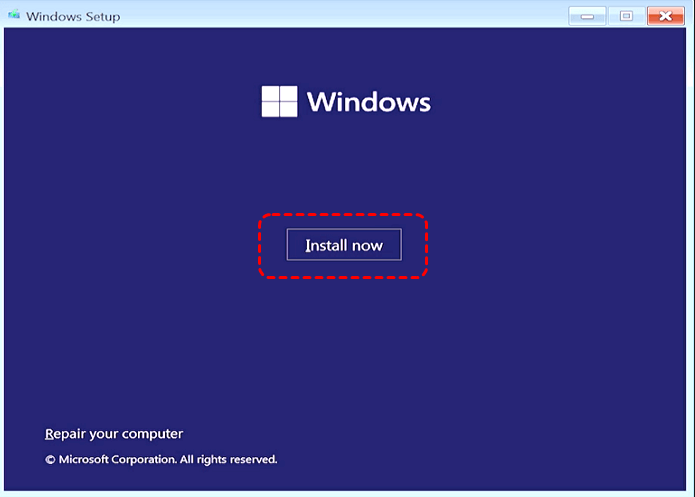
Step 2. Boot the computer from the USB and click "Install Now" to start the process.
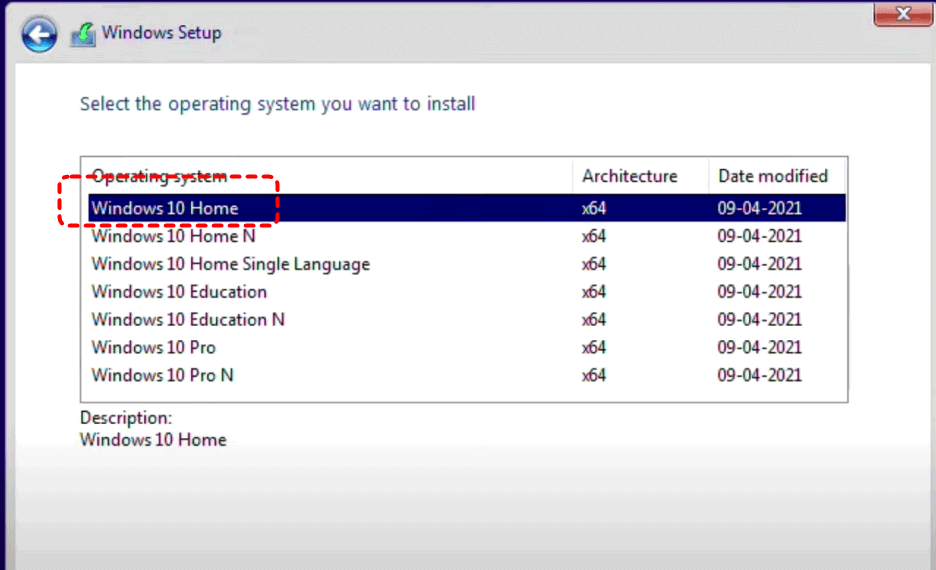
Step 3. Select a desired Windows version and click "Custom: Install Windows only". Then follow the on-screen instructions to complete the reinstallation.
Summary
Windows Update error 0x80240fff is primarily caused by various reasons. By applying the solutions mentioned above, the error can be fixed effectively. When all methods fail, a Windows reinstallation may be necessary, but safeguarding data beforehand is critical. With MyRecover, you can minimize the risk of data loss when troubleshooting the Windows update errors.
FAQs-More Common Windows Update Error Codes
Q1: How to Repair a Corrupted Windows Update?
To repair a corrupted Windows Update, running the Windows Update Troubleshooter and resetting update components are one of the most effective methods. If the issue persists, damaged system files may be the main causes, you can try to run SFC command to repair them.
Q2: How Do I Fix Windows Update Error Code 0x80070643?
Error 0x80070643 is often related to .NET Framework corruption or failed security updates. You can try to repair or reinstall the .NET Framework, restart Windows Installer service, and run SFC and DISM scans. If the issue involves a specific update, manually download and install it from the Microsoft Update Catalog.
Q3: How to Fix a Windows Update That Won’t Install?
If a Windows update won’t install, the main causes are likely insufficient disk space and unstable network connections. Ensure you have enough free disk space and a stable network. If the problem persists, you can try the Windows update failure fixes mentioned above.


Stay Updated With Our
Latest Tips
Add us as a preferred source on Google to never miss helpful guides.