
How to Backup Files in Laptop Before Formatting
Before reinstalling Windows or macOS, learn how to backup files before formatting a laptop with proven methods, clear steps, and tips for choosing storage so you can restore everything quickly after formatting without data loss or stress every time.
By Vera / Updated on May 7, 2026
Why Backing Up Files Before Formatting Is Crucial
Formatting a laptop or performing a factory reset is like demolishing a house to rebuild it from the ground up—anything left inside gets destroyed. Whether you are fixing a sluggish system, removing a stubborn virus, or preparing your device for sale, the process wipes your hard drive clean.
Backing up your files ensures:
- No permanent data loss: Your unique documents and memories remain safe.
- Smooth system reinstall: You can get back to work immediately without hunting for lost files.
- Peace of mind: You can proceed with the format confidently, knowing your "digital life" is secure elsewhere.
Skipping this step is like jumping out of a plane without checking your parachute. Even if you are confident, mistakes happen—which is why knowing how to backup data before factory reset laptop is the most important skill for any PC user.
🤔What Happens If You Format Without a Backup
Once formatting starts, the file system pointers are deleted. While the data might physically exist on the disk for a short time, it becomes invisible to Windows. If you continue to use the laptop, new system files will overwrite that data, making it unrecoverable.
Can You Recover Files After a "Mistaken" Format?
If the unthinkable happens and you realize you’ve formatted without a backup, a professional tool like MyRecover is your best line of defense. Unlike standard backup tools, MyRecover specializes in Formatted Disk Recovery. It uses a "Deep Scan" algorithm that can reconstruct file structures even after a partition has been wiped or a factory reset has been performed.

- ✨Format-Specific Recovery: High success rate in retrieving data from "Quick Formatted" drives and RAW partitions.
- ✨Original Structure Preservation: It doesn't just find the data; it attempts to recover files with their original names and directory paths.
- ✨Versatile Support: Whether it’s an SSD, HDD, or external drive, it supports 1000+ file formats including NTFS, FAT32, and exFAT.
How to Backup Files in Laptop Before Formatting [Step-by-Step]
The whole process covers 6 parts.
Part 1: Identify What Needs to Be Backed Up
Before learning how to back up files on pc before factory reset, you must prioritize your data. You don't need to save system files (which will be reinstalled), but you must save user-generated content.
- ✔️Documents and Work Files: Word documents, Excel sheets, and PDFs. Please check your "Downloads" folder; users often forget important tax forms or receipts stored there.
- ✔️Photos and Videos: These are priceless. Ensure you check the hidden "Pictures" and "Videos" libraries inside your User folder.
- ✔️Software Settings and Licenses: You cannot "back up" an installed program, but you can save the Product Keys. Use a key-finder tool to note your Windows and Office licenses.
- ✔️Browser Data: If you don't use Chrome/Edge sync, export your Bookmarks as an HTML file manually to avoid losing years of saved links.
Part 2: Choose Your Backup Method
Logic dictates that your backup should be stored on a device other than the one being formatted. You have three main paths:
- External Hard Drive: Best for massive data (High speed, high capacity).
- USB Flash Drive: Best for essential documents (Portable, limited space).
- Cloud Storage: Best for "Offsite" security (Accessible anywhere, protected from physical damage).
Part 3: How to Backup Files in Laptop Before Formatting [4 Ways]
If you are looking for how to backup data before factory reset laptop, follow these four proven methods based on your specific needs.
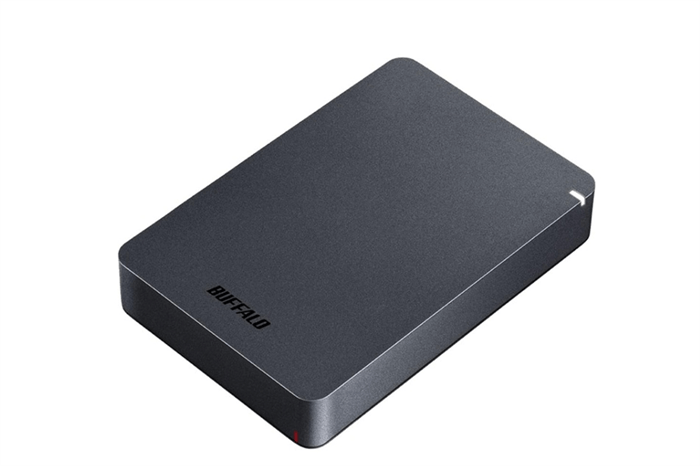
🎈Way 1: Backup Using an External Hard Drive (The "Comprehensive" Method)
This is the most reliable method for full system migrations. Because external drives use high-speed USB 3.0 or USB-C, you can move hundreds of gigabytes in minutes without relying on internet stability.
Steps:
1. Connect your external hard drive to your laptop.
2. Open File Explorer and navigate to C:\Users\[YourUsername].
3. Select folders like Desktop, Documents, Pictures, and Music.
4. Right-click and select Copy, then navigate to your external drive and select Paste.
5. Wait for the progress bar to finish. Do not unplug the drive until the transfer is 100% complete.
Pros: Fast, can store large files.
Cons: Physical device can be lost or damaged.
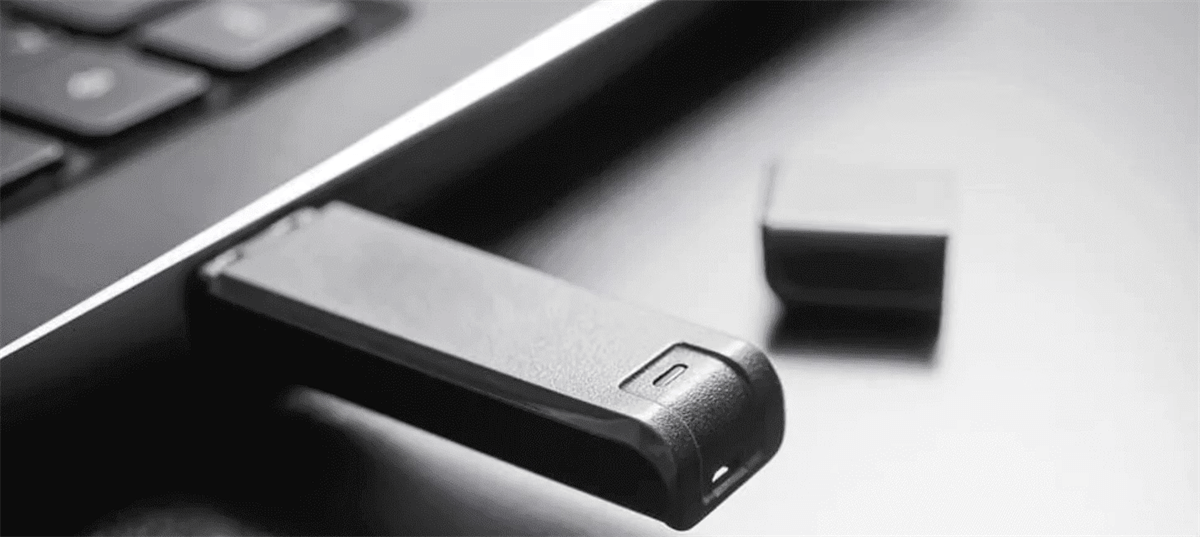
🎈Way 2: Backup Using a USB Flash Drive (The "Selective" Method)
Use this if you only have a few gigabytes of critical files. It is faster to set up than an external HDD but requires you to be selective about what you save.
Steps:
1. Plug the USB drive into your laptop.
2. Manually navigate to specific project folders or high-priority files.
3. Drag and drop the files directly onto the USB drive icon in File Explorer.
4. Verification: Open one or two files directly from the USB to ensure they weren't corrupted during the move.
Pros: Portable and easy to use.
Cons: Limited storage; easy to misplace.
🎈Way 3: Backup Using Cloud Storage (The "Modern" Method)
If you want your files to be available on your smartphone or a new PC immediately, the cloud is the best solution. This protects you from physical hardware failure (like dropping your external drive).
Steps:
1. Log into your preferred cloud service, like Google Drive, OneDrive, or Dropbox.
2. Select the "Upload" button and choose your most important folders.
3. Ensure the "Sync" icon turns green (on Windows) before you start the factory reset.
Pros: Accessible anywhere, safe from physical damage.
Cons: Dependent on internet speed; large uploads may take time.
🎈Way 4: Using Windows Built-in Backup Tools (The "Automated" Method)
Windows "File History" is designed to create a continuous snapshot of your files. This is the professional way to handle how to back up files on pc before factory reset because it ensures every version of a file is captured.
1. Go to Settings > Update & Security > Backup.
2. Click Add a drive and select your external hard drive.

3. Toggle "Automatically back up my files" to ON.
5. Click "More options" and select "Back up now" to trigger an immediate sync of all your libraries.
Part 4: Organizing and Verifying (Don't Skip!)
A backup is useless if you can't find what you need or if the files are corrupted.
- ✔️Organization: Create a root folder named "Laptop_Backup_[Date]" and subfolders for "Work," "Personal," and "Drivers."
- ✔️Size Check: Right-click your source folder and select Properties. Do the same for your backup folder. The "Size on Disk" should be nearly identical.
- ✔️The "Safety Net" Check: If you realize after formatting that you forgot a specific folder that wasn't in your backup, this is the moment to run MyRecover. It can scan the "free space" of your newly formatted drive to find those missing pieces before they are overwritten.
Part 5: Create a System Image (Optional but Recommended)
A system image is a "clone" of your entire drive. If the new format goes wrong, you can restore this image and have your laptop exactly how it was 5 minutes ago.
Benefits:
- Restore your laptop to its exact previous state.
- Saves time reinstalling apps and reconfiguring settings.
Steps:
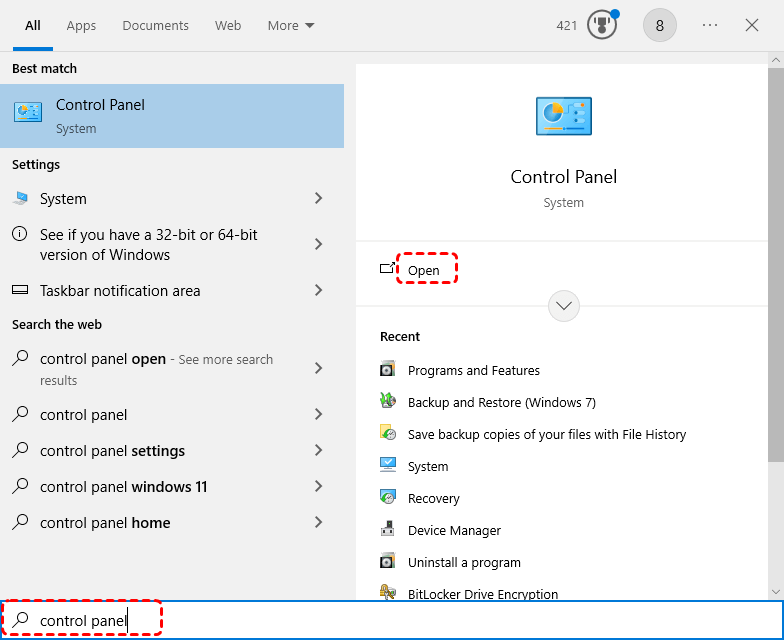
1. Click Windows + S, search and open "Control Panel".
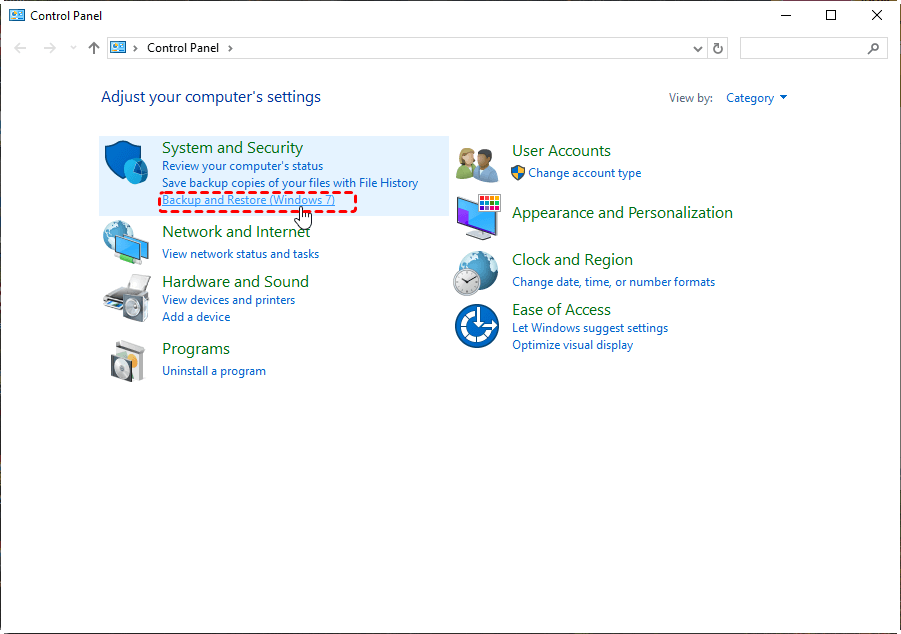
2. Navigate to "System and Security"> "Backup and Restore (Windows 7)".
3. On the left, click Create a system image.
4. Select the backup destination (external drive recommended).
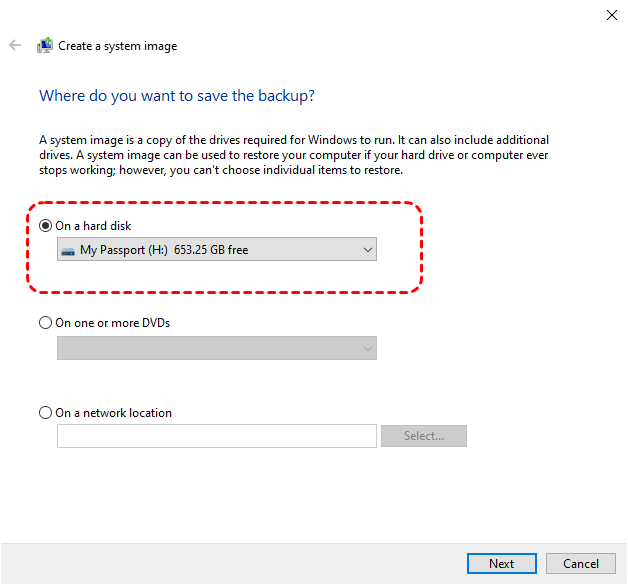
5. Follow prompts to create the image.
Conclusion
Backing up your laptop before formatting is not just a good habit—it’s essential. By identifying important files, choosing the right backup method, organizing files, and verifying the backup, you can format your laptop confidently without losing anything valuable. Tools like MyRecover also provide an extra layer of protection in case something slips through the cracks. Think of backups as your safety net: they give you peace of mind, save time, and protect your digital life from disaster.
Frequently Asked Questions (FAQ)
1. What is the difference between a "Quick Format" and a "Full Format"?
A Quick Format removes the file system pointers but leaves the data physically on the platters/chips (making recovery with tools like MyRecover very likely). A Full Format scans the drive for bad sectors and overwrites data with zeros, making data recovery nearly impossible. For a standard OS reinstall, a Quick Format is sufficient. >> know more details about Quick Format vs Full Format
2. Can I recover files if I accidentally clicked "Format" without a backup?
Yes, provided you haven't written much new data to the drive. Use MyRecover immediately. It bypasses the "empty" file system created by the format to locate the raw data remnants. The sooner you run the scan, the higher your recovery rate.
3. Should I backup my programs and software?
Generally, no. You cannot simply copy-paste installed programs (like Photoshop or Office) because they have registry entries and system dependencies. You should back up the installers (.exe or .msi files) and the license keys, then reinstall them fresh after formatting.
4. How much storage space do I need for a full backup?
Check your used disk space by right-clicking your C: drive and selecting Properties. Your backup drive should have at least 20% more space than your "Used Space" to account for file system overhead and system images.
5. Will formatting my laptop remove viruses?
Yes, in 99% of cases, formatting the drive and reinstalling the OS will wipe out malware. However, be careful when restoring your backup; scan your backup files with an antivirus before moving them back to the clean system.
6. I backed up my files, but my external drive isn't showing up after the format. What do I do?
This is common. The new Windows installation might need a driver update or a drive letter assignment. Right-click the Start button, go to Disk Management, find your external drive, right-click it, and select "Change Drive Letter and Paths" to make it visible in File Explorer.


Stay Updated With Our
Latest Tips
Add us as a preferred source on Google to never miss helpful guides.