
How to Remove Virus from SD Card Using Laptop Without Data Loss
Viruses on SD cards often disguise themselves as shortcuts, hidden files, or system errors, pushing users toward risky actions like formatting. This article will walk you through how to remove virus from SD card on laptop while keeping original data intact.
By Aria / Updated on February 2, 2026
Overview
SD cards are widely used to store photos, videos, documents, and application data across phones, cameras, drones, and computers. Their portability and frequent switching between devices make them extremely convenient, but also highly vulnerable to malware. In many cases, users unknowingly connect an SD card to a compromised laptop, download files from unsafe sources, or disable security protections for convenience.
Because SD cards lack built-in security mechanisms, malware can easily disguise itself as shortcut files, hidden folders, or autorun scripts. This makes infections hard to notice until files suddenly disappear or become inaccessible. If you ignored it, it may cause irreversible damage to your files, laptop, camera and other devices.
What Happens When an SD Card Gets Infected?
An infected SD card may still appear usable at first, but subtle warning signs usually emerge. Typical symptoms include:
- files turning into shortcuts (.lnk files),
- original data becoming hidden or unreadable,
- error messages when opening the SD card like "SDC, please format",
- slower transfer speeds or freezing,
- antivirus alerts triggered upon insertion.
In more serious cases, malware can reinfect the SD card repeatedly if the laptop itself remains compromised. Deleting infected files at random or simply formatting the SD card may seem like a good way to remove the virus, but it actually fails to solve the problem completely.
How to Remove Virus from SD Card Using Laptop Without Data Loss
If your SD card is also infected with a virus, follow these methods below to safely and completely remove the virus and restore both your computer and SD card to a healthy state. Let's explore them one by one.
Important First Steps
Before attempting any virus removal, you should minimize the risk of further damage or reinfection. This preparation step is often overlooked but extremely important. These steps ensure the malware does not spread and significantly improves your success rate to remove the virus from SD card.
- Stop using the SD card immediately.
- Remove the SD card from camera or other devices and connect it to your laptop with a card reader or slot.
- Enable and update antivirus software on your laptop.
- Do not open suspicious files once the SD card is connected.
- Avoid copying files from the SD card to other drives.
Method 1. Scan the SD Card with Microsoft Defender
Microsoft Defender is a reliable built-in solution for detecting common SD card malware, including shortcut and autorun viruses. It requires no third-party software and can quarantine or remove malicious files while preserving intact data.
Step 1. Locate the SD card in File Explorer and right click on it, then choose "Scan with Microsoft Defender" from the context menu. This will automatically perform a quick scan for the SD card.
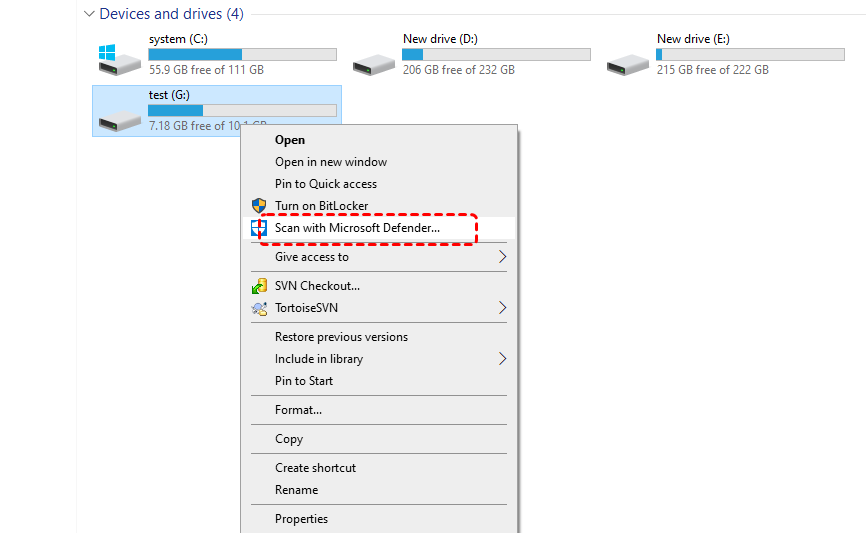
Step 2. If any threat is detected, remove or quarantine it.
If needed, you can also click "Full scan" under the "Scan option" to run a more comprehensive scan after the initial scan is completed.

Method 2. Use the ATTRIB Command
Many SD card viruses simply hide files instead of deleting them. The Windows ATTRIB command can safely restore visibility by removing hidden, system, and read-only attributes, making hidden files visible again. It’s a crucial technique for users who want to remove virus from SD card without formatting.
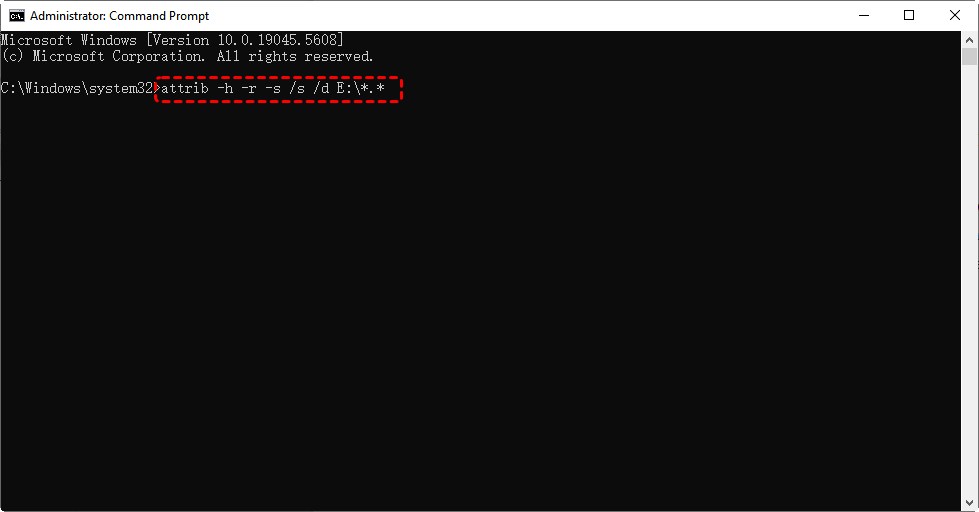
Step 1. Locate Command Prompt in the Start menu and right click on it, then choose "Run as administrator".

Step 2. Enter the following command "attrib -h -r -s /s /d E:\*.*" and hit the "Enter" key. Replace the drive letter "E" with your actual SD card letter.
Wait for the process to complete and check if the hidden files reappear in your SD card.
Method 3. Use Third-Party Antivirus Software
When built-in tools are not enough, the professional antivirus programs offer stronger detection and removal capabilities. If you’re searching for a reliable SD card virus remover for PC, especially for stubborn or advanced malware strains, third-party antivirus software is a good option.
Method 4. Format the SD Card (Last Option)
If all removal attempts fail, formatting the SD card may be unavoidable. It will forcibly delete all files on the drive, including virus-infected malicious files. This is especially true if you use a more thorough full format, which overwrites the original data multiple times. However, it also makes it far more difficult to recover lost data from a formatted SD card.
Step 1. Open Disk Management and select the infected SD card.
Step 2. Right click on it and choose "Format" from the context menu.
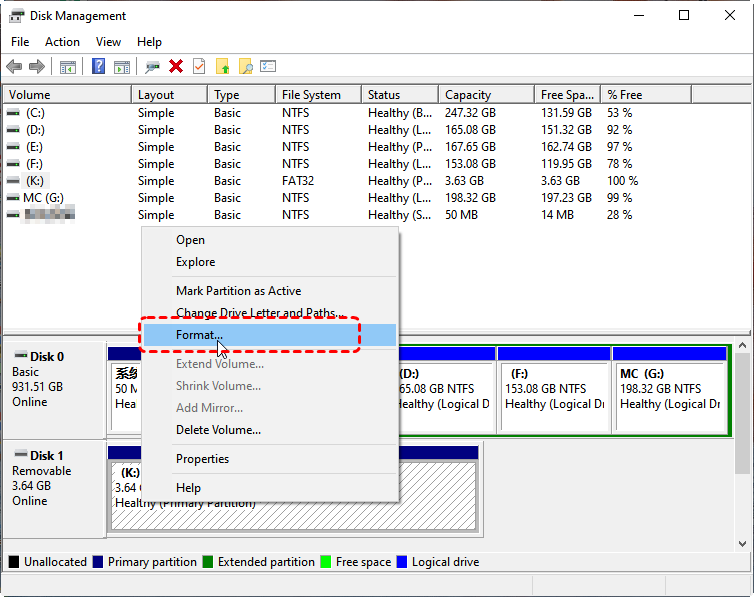
Step 3. Choose a file system like NTFS based on your needs and check the "Perform a quick format" to begin the process.

How to Recover Files from Virus Infected SD Card
Even after virus removal or formatting, deleted files often remain recoverable. Professional data recovery software like MyRecover scans the SD card to locate files that are no longer visible in File Explorer. It can not only recover data from virus-infected drives, but also retrieve data from corrupted SD cards, emptied Recycle Bins, deleted partitions, inaccessible disks and more.
Let's explore the remarkable advantages of MyRecover:
✅500+ Devices Support: Recover files from all types of devices like SSD, HDD, USB flash drive, SD card, cameras, game console drives and more.
✅Handle 500+ Data Loss Scenarios: Recover from deleted partition, formatted hard drive, emptied Recycle Bin, system crash, virus attack, etc.
✅Supports over 1,000 file types: Including documents, photos, videos, audio, archives, and Outlook data files.
✅Smart scan modes: Choose from Quick Scan for recent deletions or Deep Scan for formatted/corrupted drives.
✅Read-Only Scan Mode: Ensures 0 damage or overwriting to source drive during recovery.
✅OS Compatibility: Work not only on Windows 11 /10, but also on Windows 8.1/ 8/ 7 and all Servers.
Step 1. Download and install MyRecover on your computer from Microsoft Store or its official site, avoid installing it on the infected hard drive.
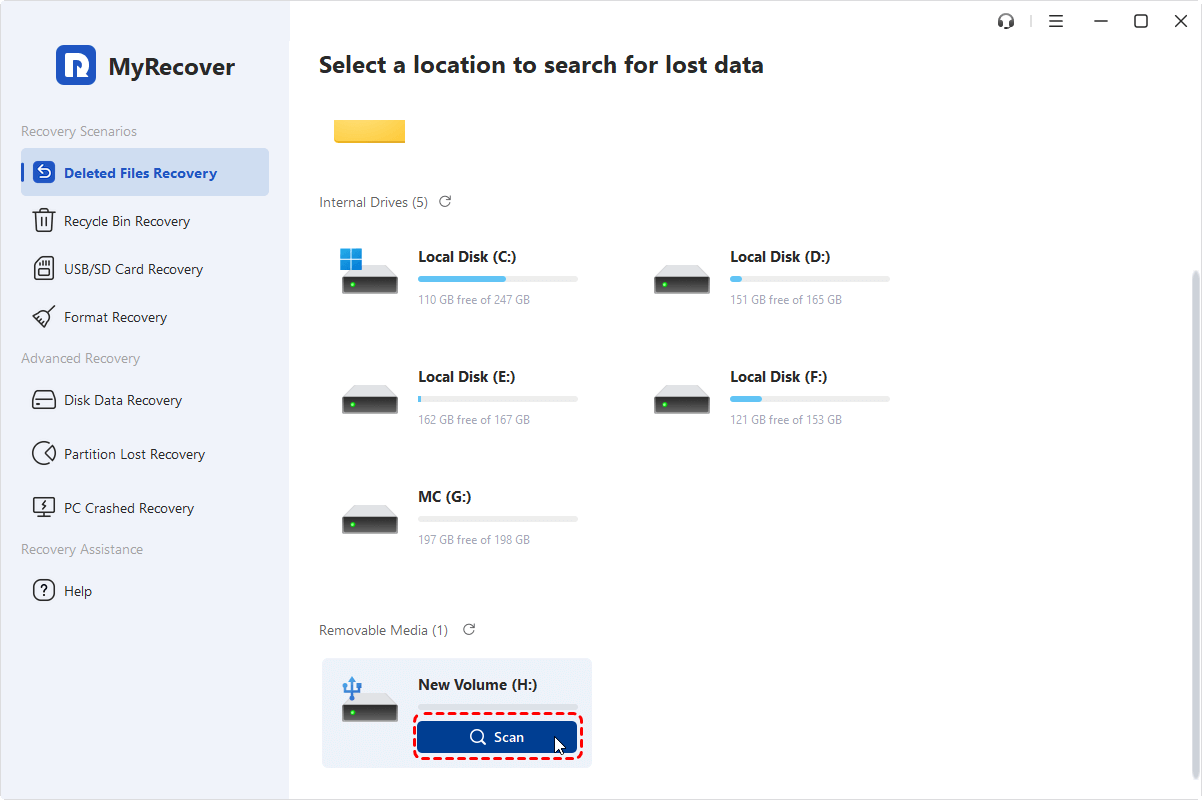
Step 2. Run the program and select the SD card to scan, then click "Scan" to search for recoverable files.
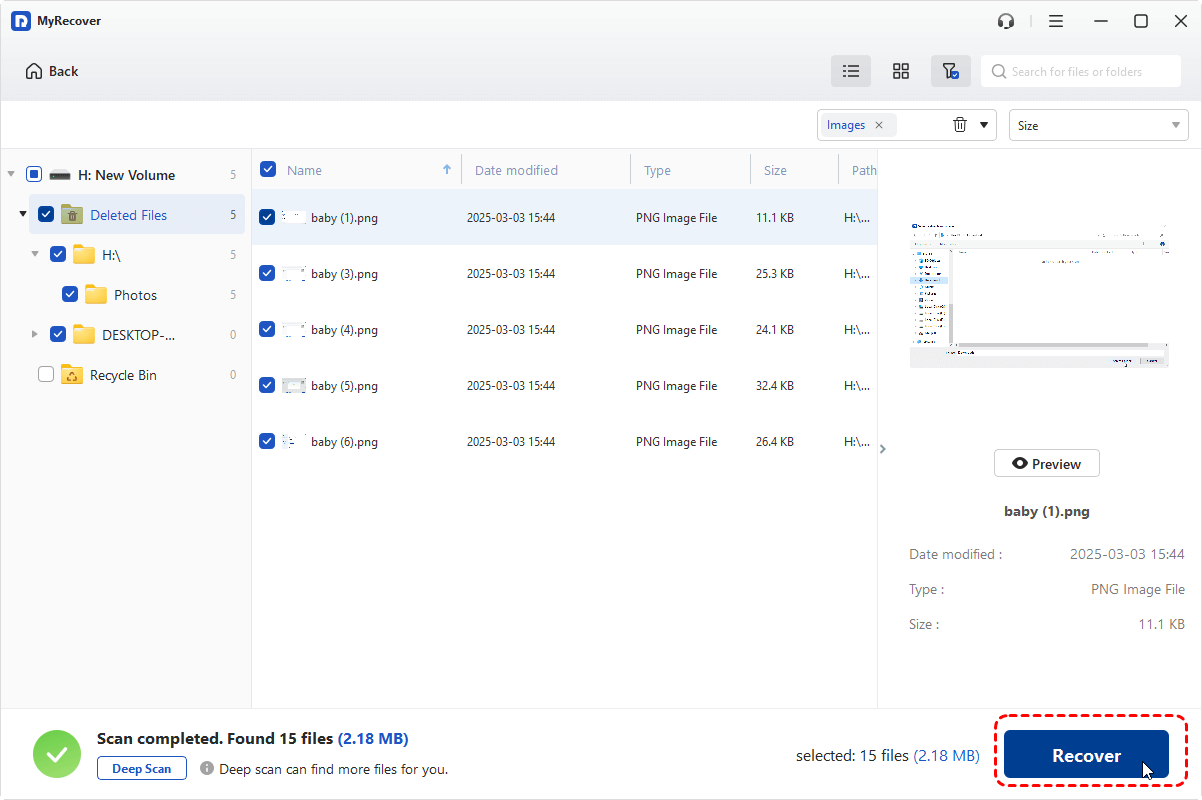
Step 3. After the scan is completed, choose the files you wish to recover from the recoverable lists and click "Recover".
Step 4. Select a safe location to save the recovered files.

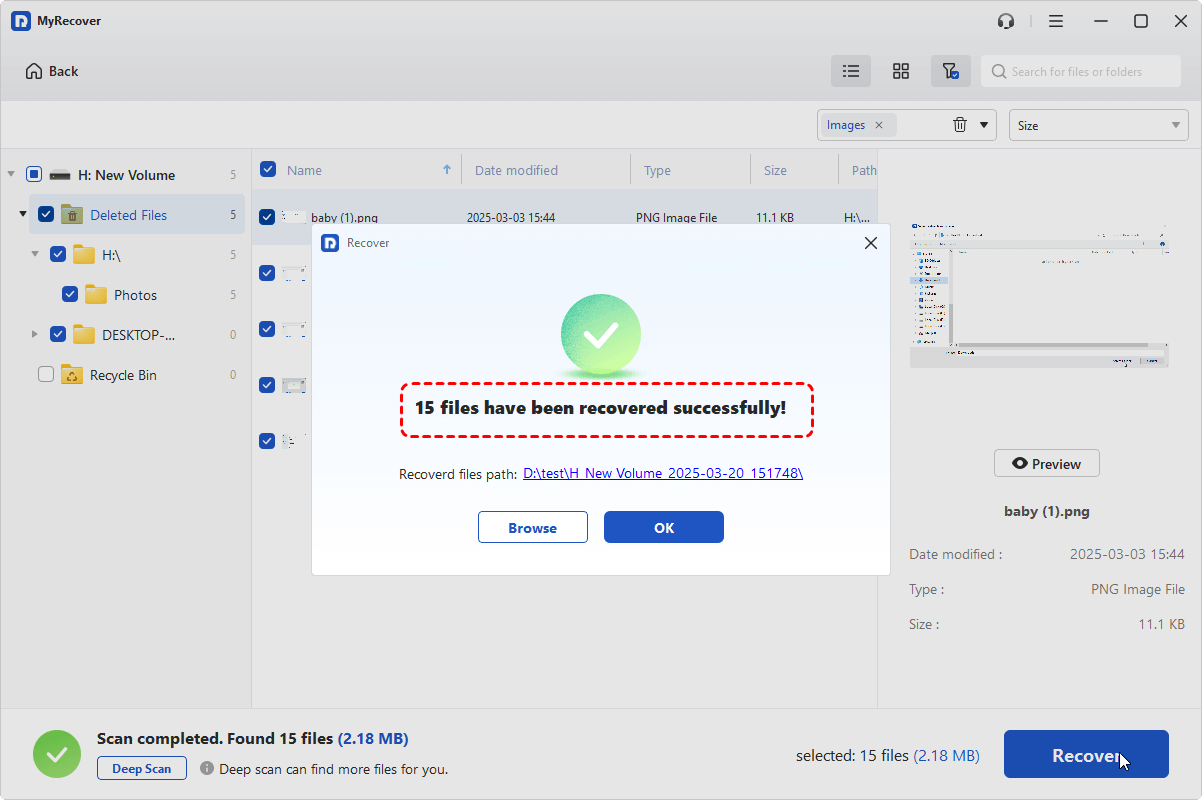
Once the process is done, the message "Files have been recovered successfully" will pop up. Then, you can access the recovered files in the destination folder path or the "Browse" button.
Conclusion
A virus-infected SD card doesn’t automatically mean permanent data loss. With the careful step-by-step removal process, it’s entirely possible to clean the SD card while preserving your files. Whether you rely on Microsoft Defender, command-line tools, or advanced antivirus software, you can restore your SD card to a clean state.
When data recovery becomes necessary, professional solutions like MyRecover help retrieve your data. If you're looking for unlimited recovery, real-time file previews, and the capability to recover data from a system that won’t boot, MyRecover Professional edition gives you everything you need to ensure your data is safe.


Stay Updated With Our
Latest Tips
Add us as a preferred source on Google to never miss helpful guides.