
Windows Server 2019 Recovery Disk: How to Create and Use It Step by Step
This article provides a comprehensive, step-by-step guide on how to create a recovery disk for Windows Server 2019. Whether you’re preparing for potential server failures or need to troubleshoot an existing issue, this guide helps you handle recovery with confidence and security.
By Aria / Updated on December 1, 2025
Introduction
For Windows Server 2019 users, maintaining data integrity and system stability is essential, especially for businesses that depend on uninterrupted server operations. However, even the most reliable system can fail due to unexpected issues like system crashes, drive corruption, or accidental deletion. In some cases, critical files such as project files or other server-related data might get lost due to hardware malfunctions or misconfigured updates.
That’s where a Windows Server 2019 recovery disk comes in. It acts as your system’s safety net, allowing you to boot your computer and troubleshoot or restore it when the system becomes unresponsive.
The Function of Recovery Disk
A Windows Server 2019 recovery disk is a bootable USB or DVD that contains essential system recovery tools. It helps you repair startup issues, restore system images, fix corrupted files, or even reinstall Windows Server entirely. Here’s what you can do with a recovery disk:
- Boot into Windows Recovery Environment (WinRE) when the Server fails to start.
- Access repair tools for advanced repair operations.
- Restore from system image backups if a previous restore point exists.
- Recover lost or damaged partitions in certain cases.
Having a recovery disk ensures that when disaster strikes, you can regain access to your system quickly and minimize downtime. It's a critical advantage for business environments where every minute matters.
Before Creating: The Necessary Preparation
Before you start creating your Windows Server 2019 recovery disk, there are some preparations you should complete to ensure a smooth process.
1️⃣A USB Drive (At Least 16 GB)
The recovery disk requires sufficient storage space. Make sure your USB drive is empty or back up all of the files, as the process will erase all existing data.
2️⃣Administrator Privileges
Only users with administrator rights can create or use a recovery disk on Windows Server systems.
3️⃣Stable Internet Connection (Optional)
If you plan to create recovery media using the Windows Server 2019 ISO file, you may need to download it from Microsoft’s official website.
4️⃣Backup Important Data
Before proceeding, back up crucial server files, including configuration settings and business data. This prevents potential loss during the recovery disk creation process.
How to Create Windows Server 2019 Recovery Disk
Once you’ve completed these preparations, you’re ready to create your recovery disk. There are three main methods for creating a Windows Server 2019 recovery disk. You can choose the most suitable one based on your actual situation.
Method 1. Create a Recovery Drive
If your computer is working normally, this process will be very straightforward and simple. Windows offers a feature "Create a recovery drive" that allows you to create a recovery disk in just a few steps.
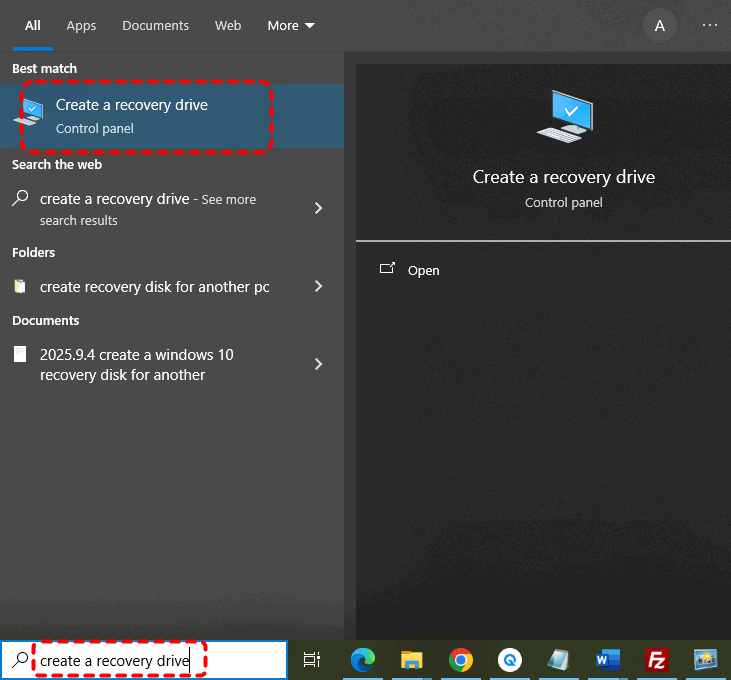
Step 1. Type "Create a recovery drive" in the Start menu and open it.
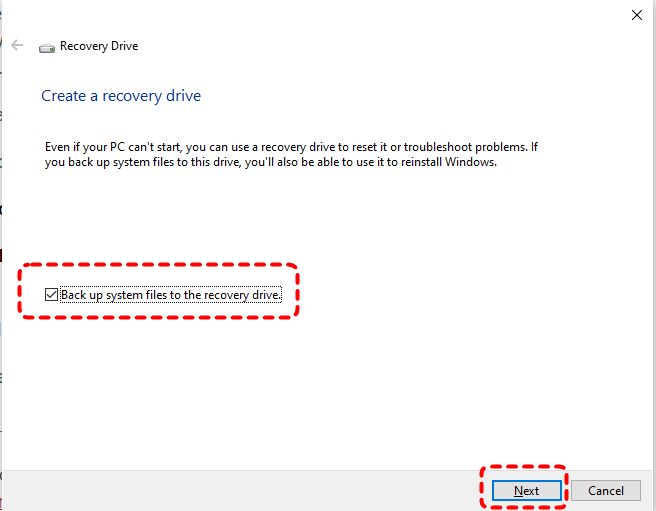
Step 2. When the tool opens, make sure "Back up system files to the recovery drive" is selected and then select "Next".
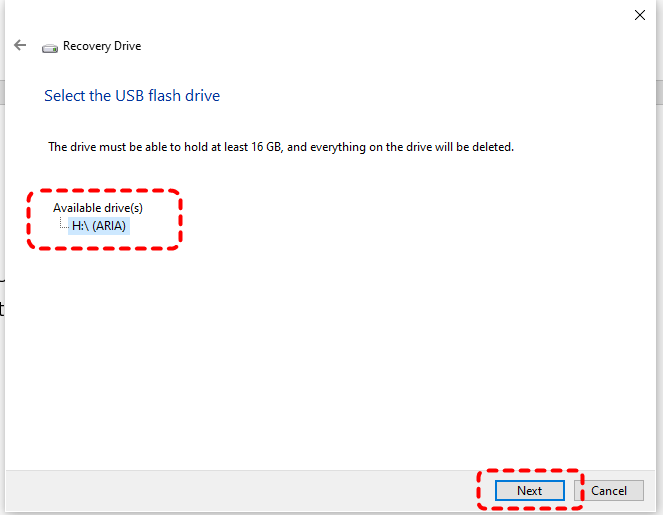
Step 3. Connect the prepared USB drive to your PC, select it, and then click "Next".
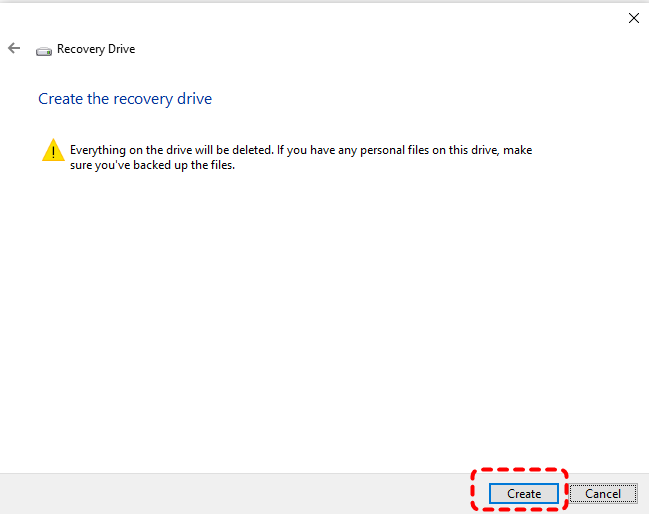
Step 4. Select "Create". Many files need to be copied to the recovery media, so this might take a while.
Method 2. Use the Windows Server 2019 ISO Files
Unlike client operating systems such as Windows 10/11, Microsoft does not provide users with an official Media Creation Tool for Windows Server. Here’s another reliable tool, Rufus, which allows you to create a recovery disk using a Windows Server 2019 ISO file. Follow these steps:
Step 1. Go to Microsoft official website and choose a desired Server 2019 ISO version and language to download it.
Step 2. Download and install Rufus on your computer, then connect the prepared USB to the PC.
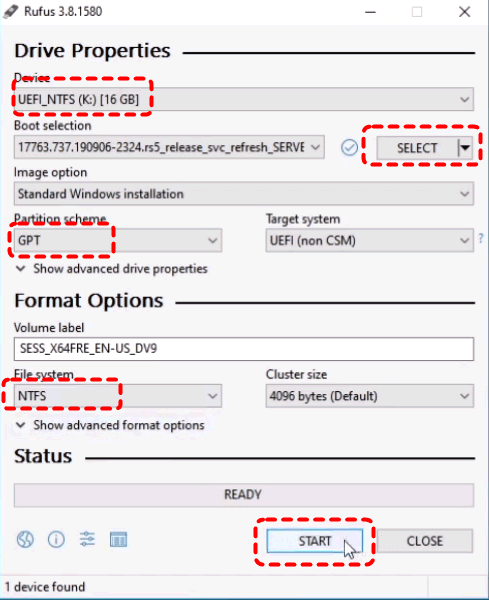
Step 3. Launch Rufus and click "SELECT", choose the downloaded ISO file and click "Open".
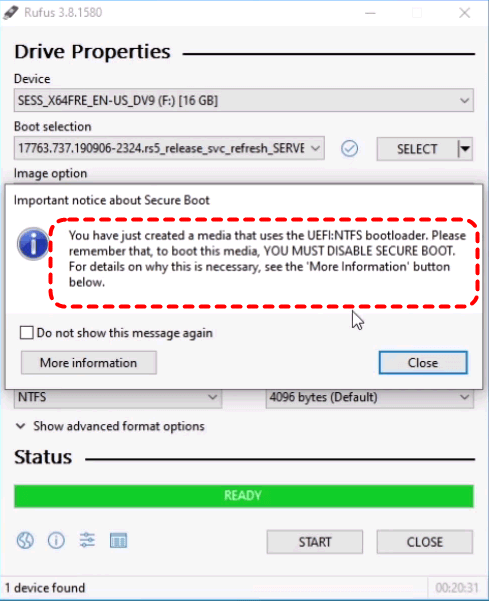
Step 4. Select the partition table and file system based on your needs, then click "START" to begin the process.
Step 5. Wait for the process to complete, now you get a Windows Server recovery disk.
Method 3. Create a Recovery Disk with MyRecover
The recovery disks created by the above two methods mainly function to help you boot your computer and attempt to fix boot issues. If you want to fully recover data from unbootable Server 2019, the recovery disk created by MyRecover can help you. As a powerful data recovery tool, MyRecover can not only recover data from Servers but also create recovery media to help you retrieve data from laptop that fails to boot.

- Intuitive interface requiring no technical expertise.
- Faster scanning compared to command-line tools.
- Higher success rate for permanently deleted files.
- Compatible with all Windows operating systems.
- Work on HDD, SSD, USB flash drive, memory card, etc.
Step 1. Download and install MyRecover on a working computer from Microsoft Store. Connect the prepared USB to the computer.
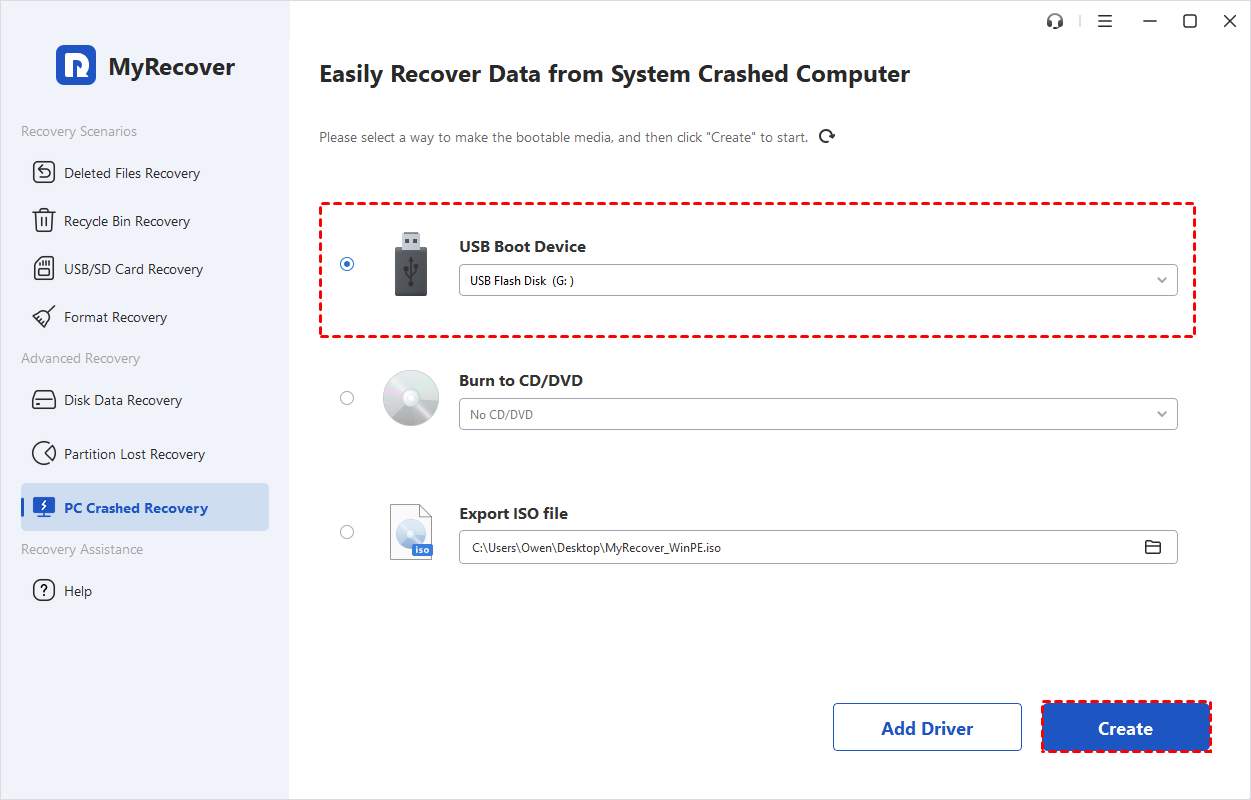
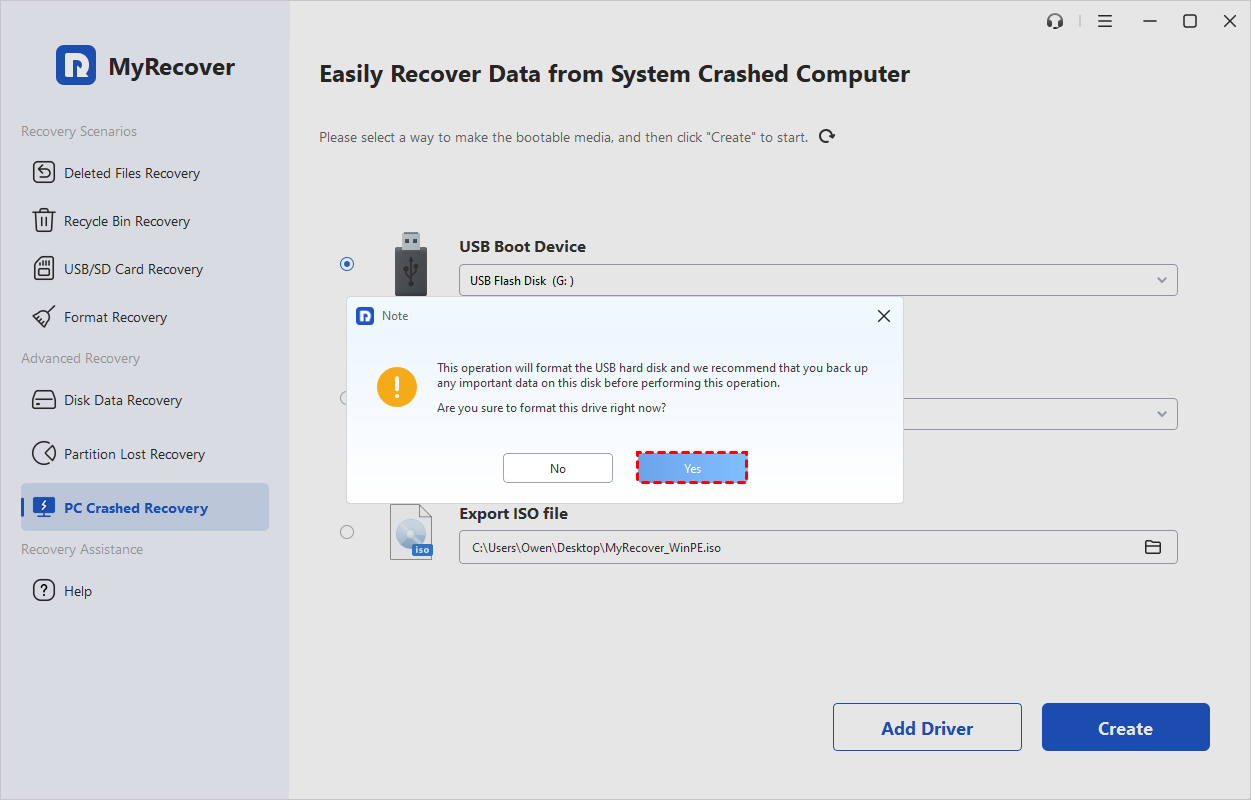
Step 2. Launch the program and select "PC Crashed Recovery", then click "USB Boot Device" and "Create" to begin the process.
Step 3. A pop-up window will prompt you that the drive for creating the recovery disk will be formatted, click "Yes".
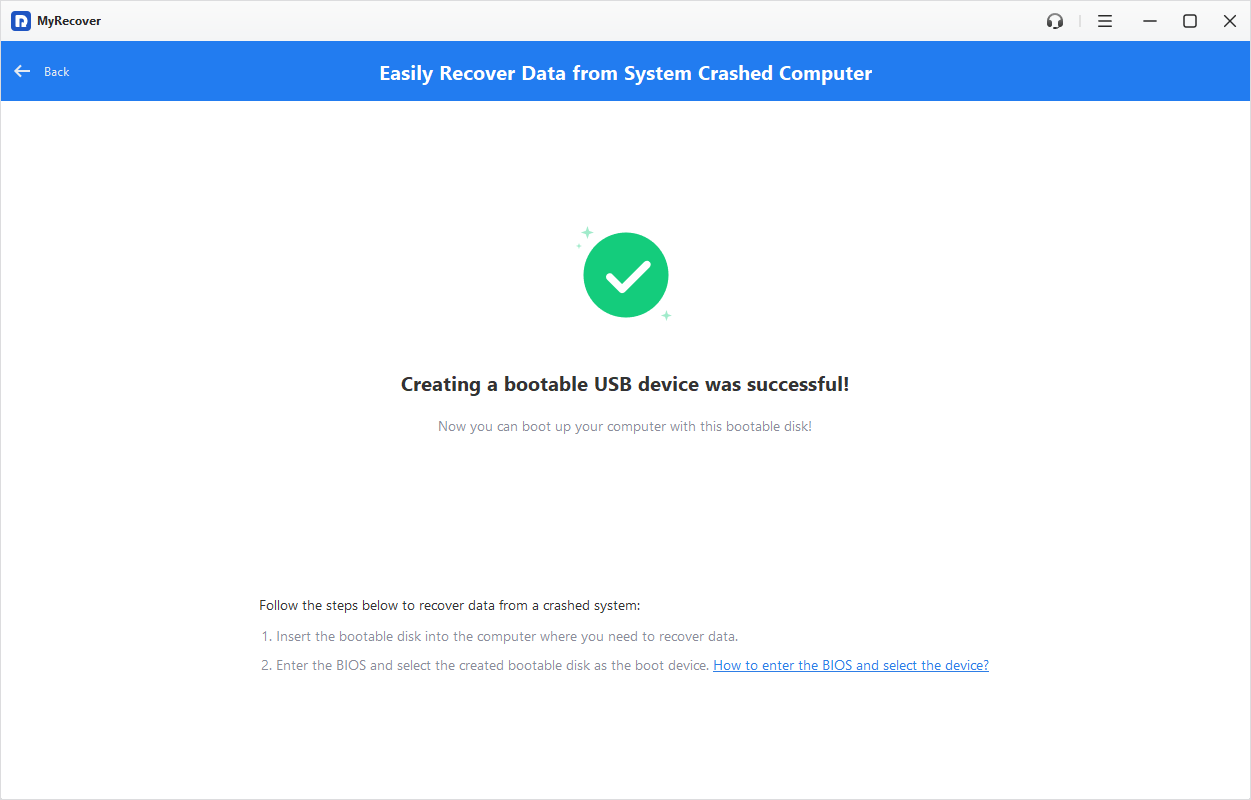
Step 4. Wait a few minutes until the USB recovery disk is successfully created.
How to Use Windows Server 2019 Recovery Disk
After creating your Windows Server 2019 recovery disk, the next step is knowing how to use it effectively in case of system failure or other critical issues. Whether your server is experiencing boot problems, system corruption, or other errors, the recovery disk will allow you to restore your system and data.
For Other Recovery Disk
Recovery disks created via Windows built-in tools and ISO files can help you boot the system and regain access to repair tools. You can use these tools to attempt fixing system boot issues, perform system restore, or reinstall the system.
Step 1. Plug the recovery disk into the unbootable computer.
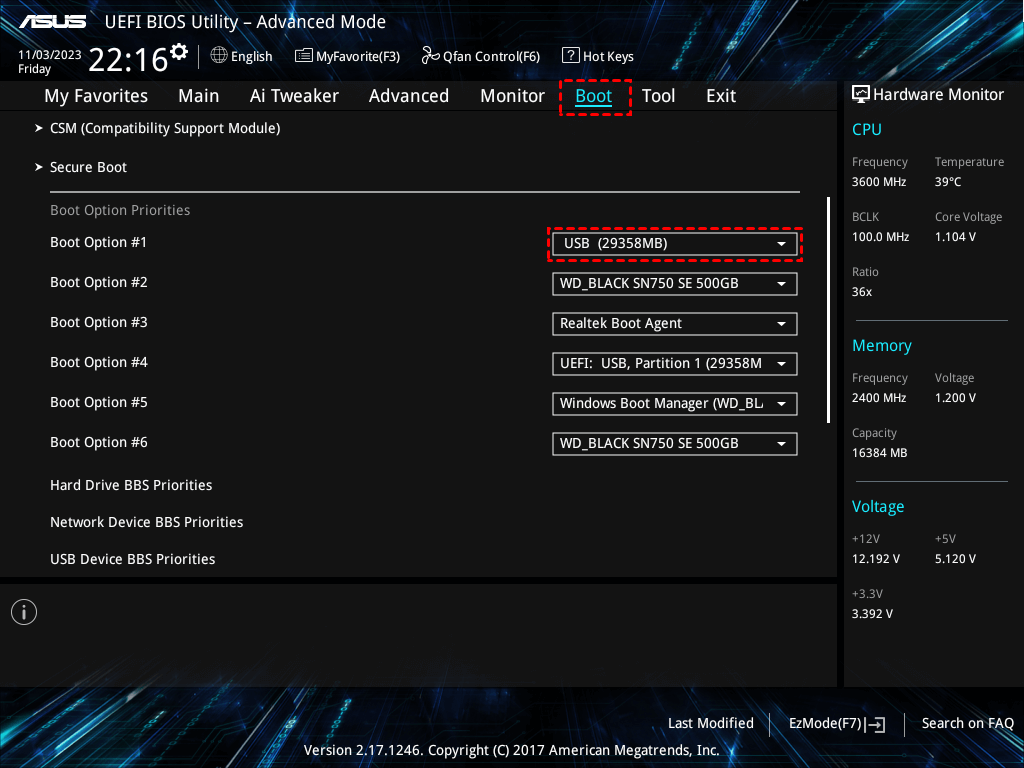
Step 2. Power on the computer and press F2, F10 or Del (depends on your computer brand) repeatedly to enter Boot Menu.
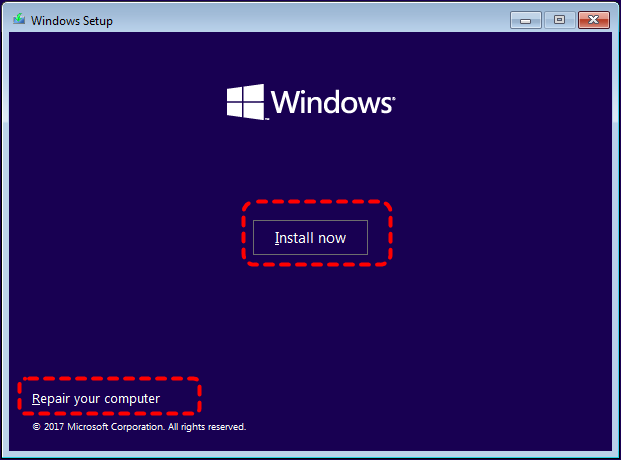
Step 3. Choose the created recovery disk to boot your computer and choose "Repair your computer". If you intend to directly install an entirely new system, you may also click the "Install Now" button.
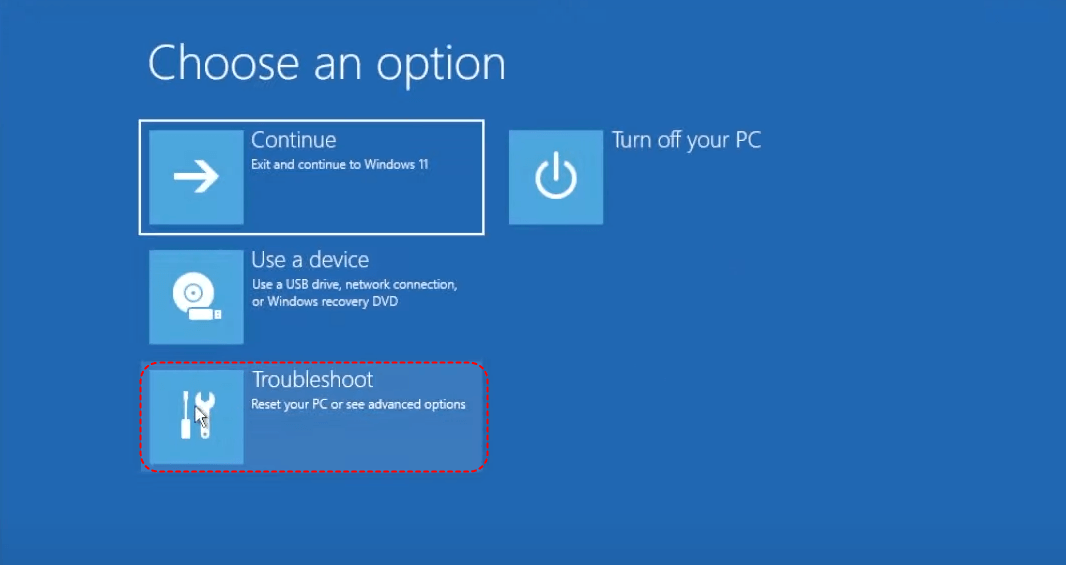
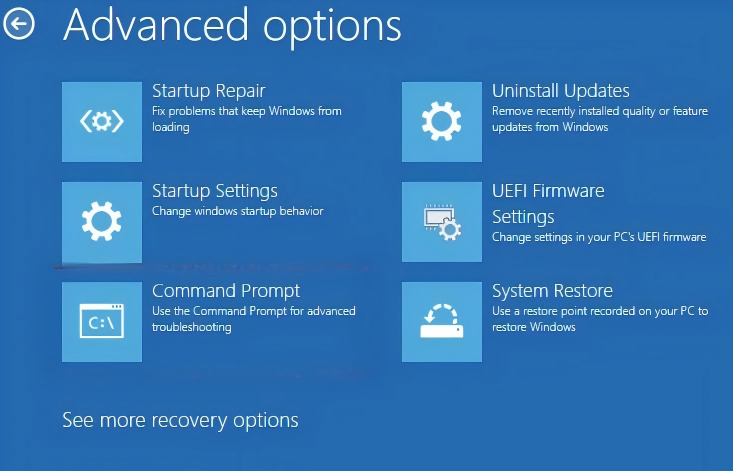
Step 4. When you enter WinRE, click "Troubleshoot", you will have the access of main repair tools. Then you can choose the tool to execute the operation you want based on your actual situation.
-
Startup Repair: It can diagnose and fixe common problems that prevent Windows from starting.
-
System Restore: This tool rolls your PC back to a previous point in time called a restore point.
-
Command Prompt: It allows you to run commands to manually repair the system, manage files and drives, and execute powerful troubleshooting utilities.
-
Startup Settings: This option lets you restart your PC in special advanced modes, such as Safe Mode.
For MyRecover Recovery Disk
Unlike other recovery disks, the one created by MyRecover cannot fix computer boot issues. However, it is designed for data recovery from unbootable Windows systems including Servers. Below are the detailed steps:
Step 1. Insert the USB into the unbootable Server 2019 and restart it, then interpret the process 2-3 time to enter the Boot Menu.
Step 2. Choose the USB recovery disk to boot the computer. Then your computer will automatically enter the interface of MyRecover.
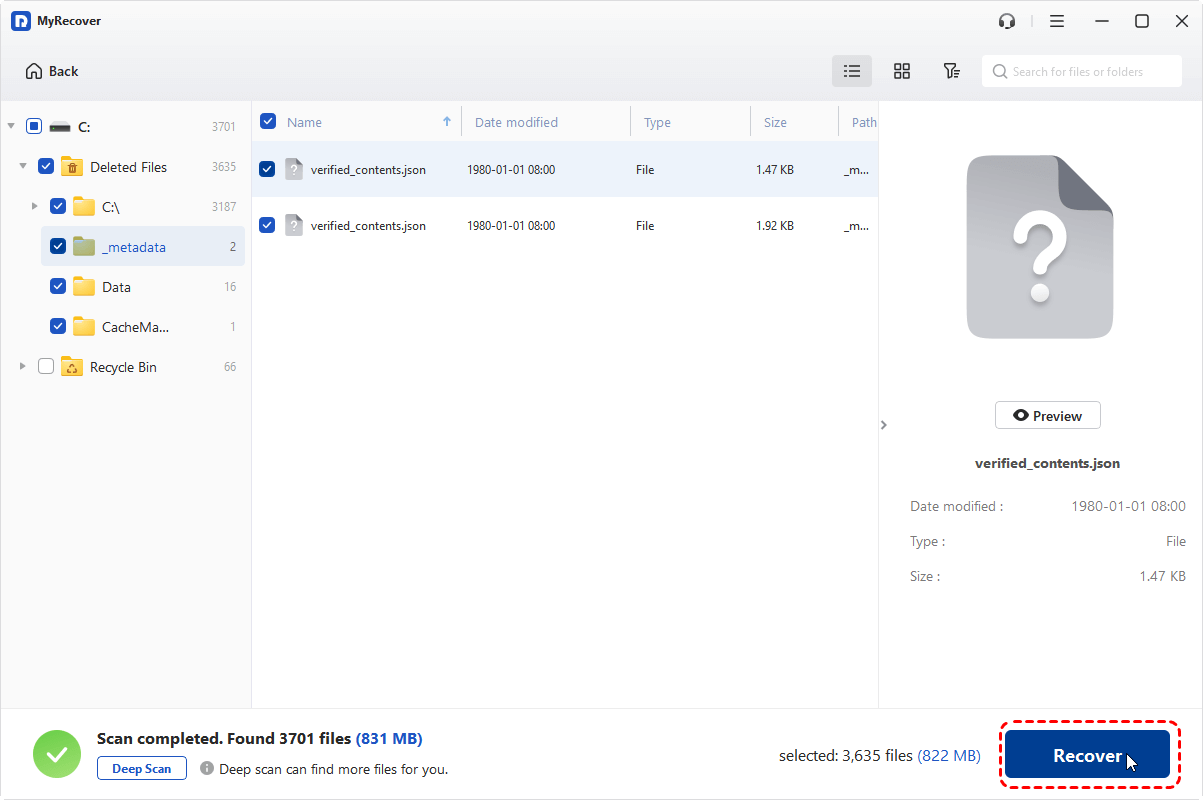
Step 3. Select a drive with lost files to scan and click "Scan".

Step 4. Choose the files you attempt to recover from the recoverable lists and click "Recover".
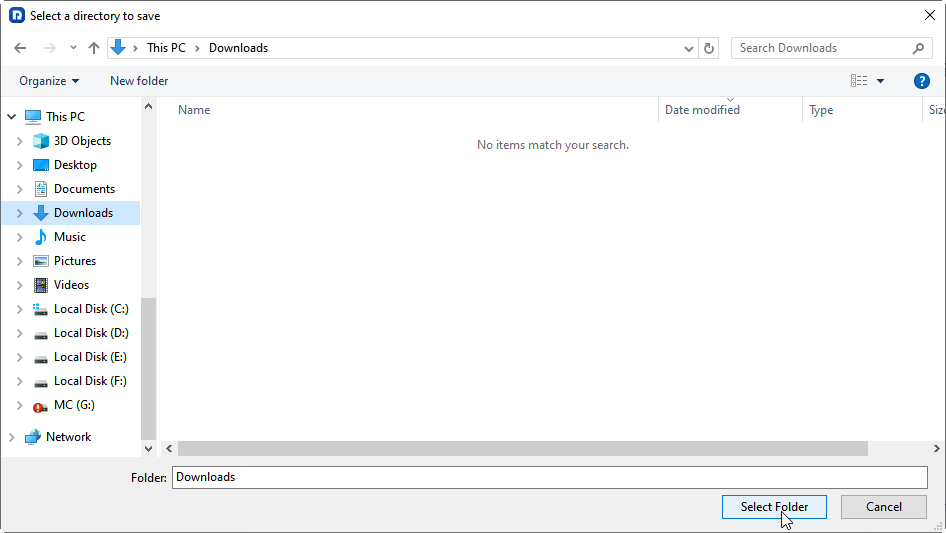
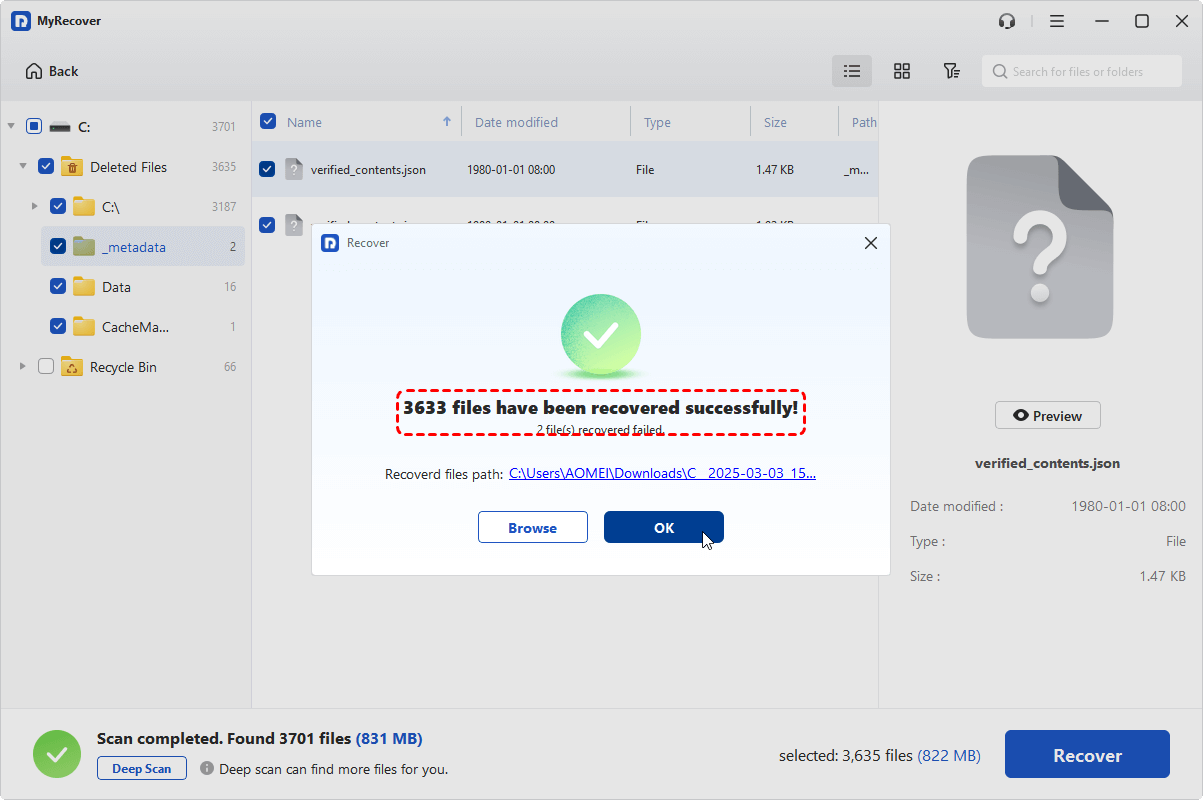
Step 5. Select a safe location to save the recovered files.
When the process is completed, you'll see the message "Files have been recovered successfully". Then you can check the recovered files in the destination folder path by clicking on the "Browse" button.
Conclusion
Creating a Windows Server 2019 recovery disk is one of the best proactive steps you can take to protect your system against future crashes or data loss. Whether you use the built-in recovery drive tool or ISO image, both methods ensure you have a reliable way to restore your server’s functionality in emergencies. For users who want to fully recover their data, the recovery disk created by MyRecover can meet your needs.
It not only meets the needs for personal data loss recovery but also offers a Technician Edition. This edition allows unlimited recoveries across multiple devices with a single license, catering specifically to IT professionals and MSPs. It’s the perfect companion for professionals managing Windows Server environments.


Stay Updated With Our
Latest Tips
Add us as a preferred source on Google to never miss helpful guides.