
How to Check Hard Drive Health on Windows 10: 8 Easy Methods
Hard drive health plays a critical role in system stability and data safety on Windows 10. This article will guide you through how to check hard drive health on Windows 10 without any additional tool, allowing you can quickly access whether your hard drive is functioning properly.
By Aria / Updated on January 20, 2026
Overview
A hard drive is the foundation of your operating system and personal data. When its health degrades, the consequences are not limited to slower performance. You may experience frequent system crashes, corrupted files, failed Windows updates, application errors, or even complete data loss. In severe cases, a failed hard drive can prevent Windows from booting at all, especially for a system drive.
If you can’t predict how much lifespan your hard drive has left, you should be alert when Windows or the hard drive shows unusual symptoms. When your hard drive or Windows exhibits the following signs, it means the drive may have developed some faults, and it’s time to check its health status:
- Drive not detected consistently in Windows or BIOS,
- Read/write errors and access denials,
- Frequent file system errors,
- Files disappearing or becoming corrupted,
- Slow system performance and freezing,
- Hard drive keeps beeping noise,
- Windows boot problems.
How to Check Hard Drive Health on Windows 10/11
Windows provides several native utilities that help assess disk condition from different perspectives. Each method focuses on specific indicators such as SMART status, file system integrity, bad sectors, driver state, or hardware communication. Using more than one method gives you a clearer overall picture. Let's explore them one by one.
Method 1: Check Disk Health Using WMIC (SMART Status)
WMIC command is useful to check hard drive SMART (Self-Monitoring, Analysis, and Reporting Technology) status, which reports whether the drive detects imminent failure. Based on the results returned by this command, you can directly determine whether your hard drive is healthy or not.
Step 1. Locate Command Prompt in Start menu and run it as administrator.

Step 2. Enter the following command "wmic diskdrive get status" and press "Enter".
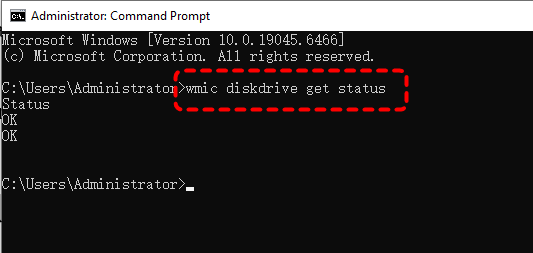
The command will return the two results below:
⭕OK: No critical SMART warnings detected.
⭕Pred Fail/Bad: The drive is at high risk of failure and immediate backup is recommended.
⭕Unknown: Hard drive controller driver malfunction. You need to check connection or compatibility.
Method 2. Run CHKDSK to Scan File System and Bad Sectors
While SMART checks hardware-level alerts, CHKDSK focuses on logical errors, file system corruption, and bad sectors that may indicate physical wear. If CHKDSK repeatedly finds errors, it may indicate progressive disk failure, which is an important sign when evaluating hard drive health in real-world scenarios.
Step 1. Run Command Prompt as administrator.
Step 2. Enter the following command "chkdsk G: /f /r" and hit the "Enter" key. Replace the drive letter "G" with your actual drive letter.

- Notes:✎...
- /f: fixes file system errors.
- /r: locates bad sectors and recovers readable data.
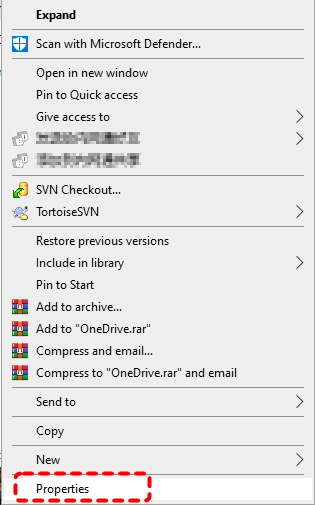
Alternatively, if you're uncomfortable with command-line tool, Windows also offer an GUI tool to check hard dirve file system error.
Step 1. Locate the hard drive in File Explorer and right click on it, then choose "Properties".
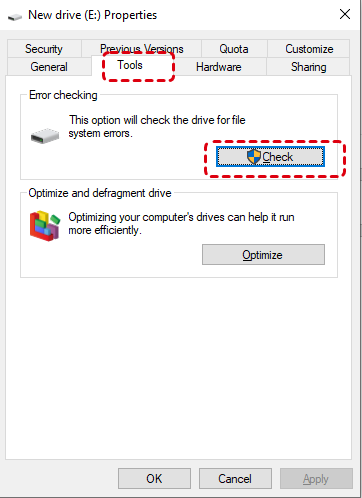
Step 2. Go to the "Tools" tab, click "Check" under the "Error checking" section to scan for logical errors.
Method 3. Review Disk Information in Disk Management
Disk Management helps identify partition-level anomalies such as unallocated space, RAW file systems, or offline disks. These issues will usually directly render your hard drive inaccessible or even completely unusable. So, if you encounter the problem of your hard drive not showing up in File Explorer or being inaccessible again, check whether there are any partition-level issues.
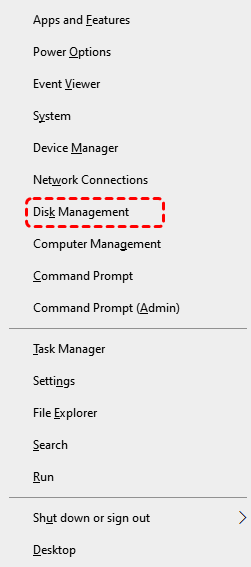
Step 1. Press "Win" + "X" and choose "Disk Management" to open it.
Step 2. Locate your hard drive and determine if it's functioning normally.
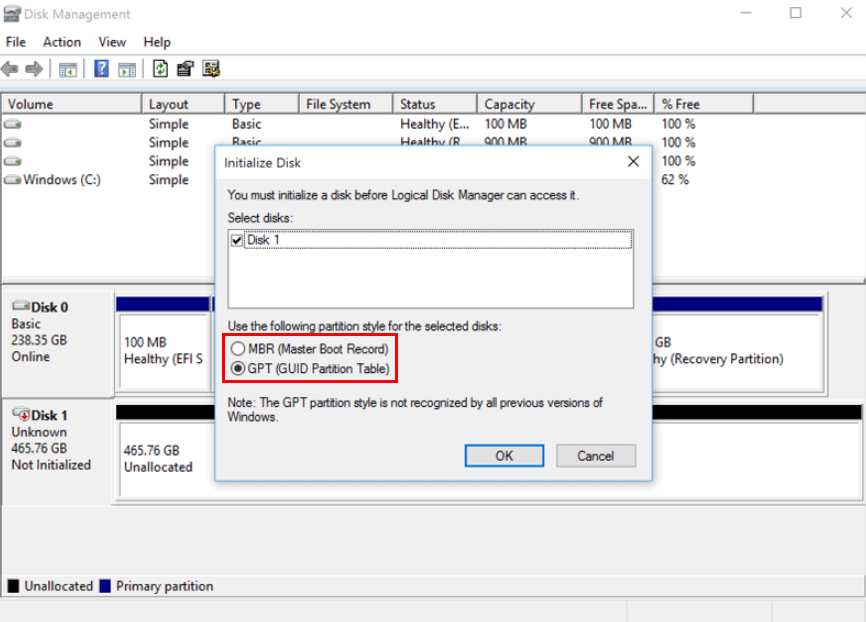
👉For Not Initialize/Unknow Disk:
Step 1. Right click on the disk and choose "Initialize".

Step 2. Choose a partition table based on your needs (MBR or GPT).
👉For Unallocated Drive:
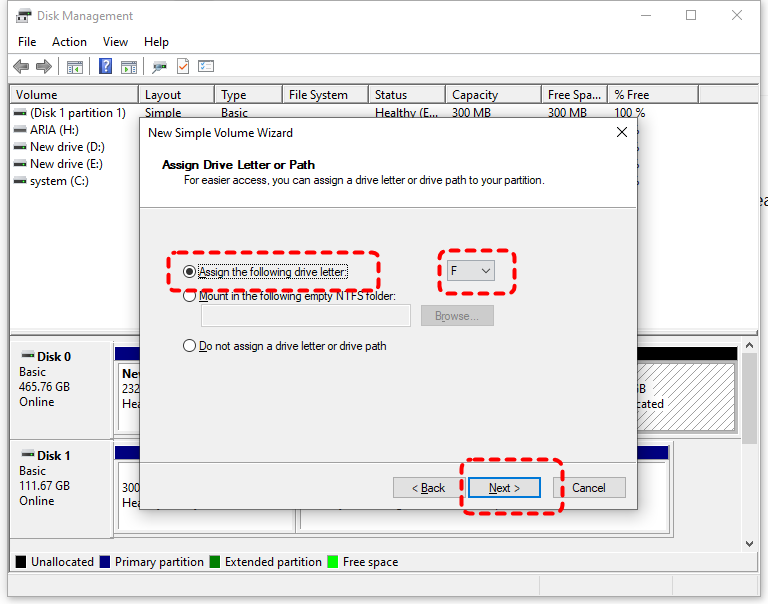
Step 1. Right click on the drive and choose "New Simple Volume".
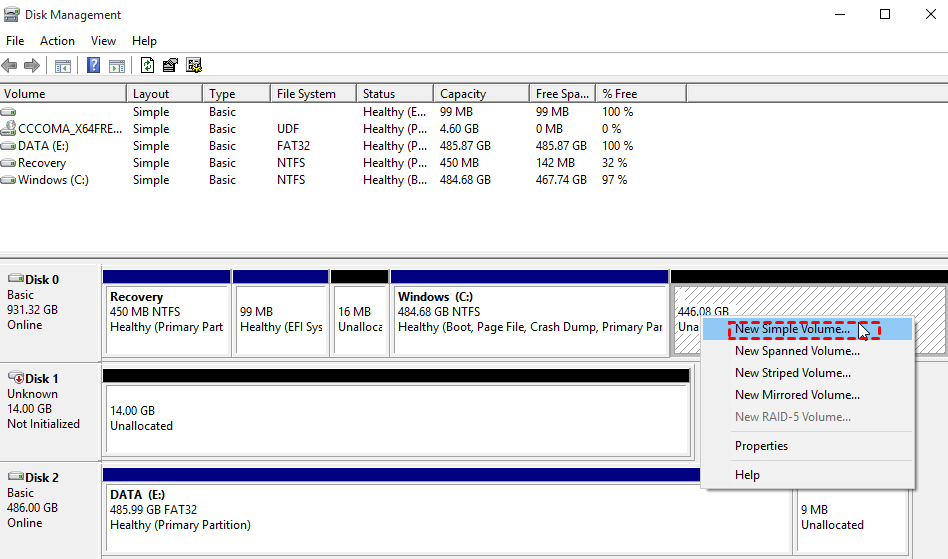
Step 2. Assign a new drive letter for the drive and click "Next".
Step 3. Choose whether you want to format the drive now. If you don't, it will be unusable until you format the volume.
👉For RAW Drive:
Step 1. Right click on the RAW drive and choose "Format".
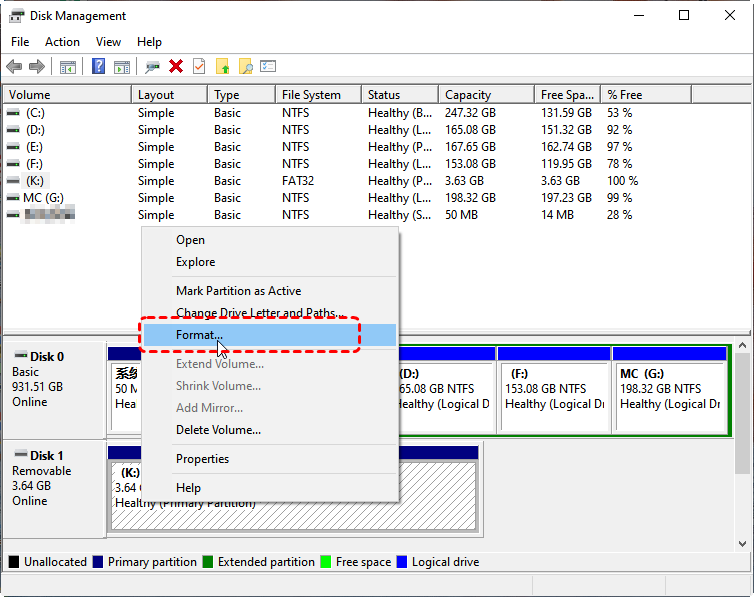
Step 2. Select a file system like NTFS and check the "Perform a quick format" option, then click "Start" to format the drive.

Method 4. Use PowerShell for SMART Health Prediction
PowerShell provides a more modern command for querying disk health. A status other than Healthy indicates potential reliability problems. It allows novice users and computer beginners to check the hard drive health status in a highly intuitive way.
Step 1. Press "Win" + "X" and choose "Windows PowerShell (Admin)" to open it.

Step 2. Type the command "Get-PhysicalDisk | Select FriendlyName, HealthStatus, OperationalStatus" and press "Enter" key.
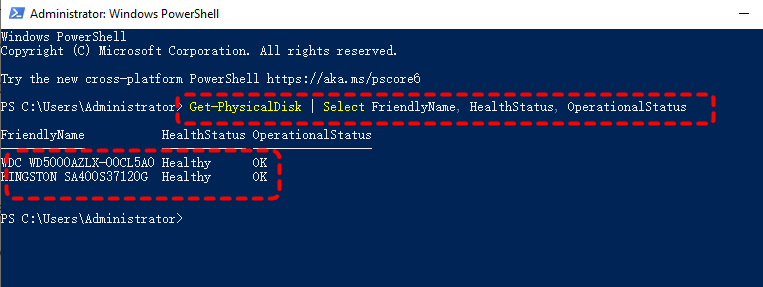
Step 3. Check the output to confirm whether your hard drive is healthy.
👉Healthy: The hard drive is functioning normally with no known issues.
👉Warning: The SMART report indicates anomalies, but the drive is still operational.
👉Unhealthy: The hard drive has failed or is about to fail.
Method 5. Use Defragment and Optimize Drives
This tool provides insight into fragmentation (HDDs) and trim status (SSDs), which indirectly reflects disk condition and performance. While this tool does not report failures directly, abnormal results may signal deeper issues and justify further diagnostics.
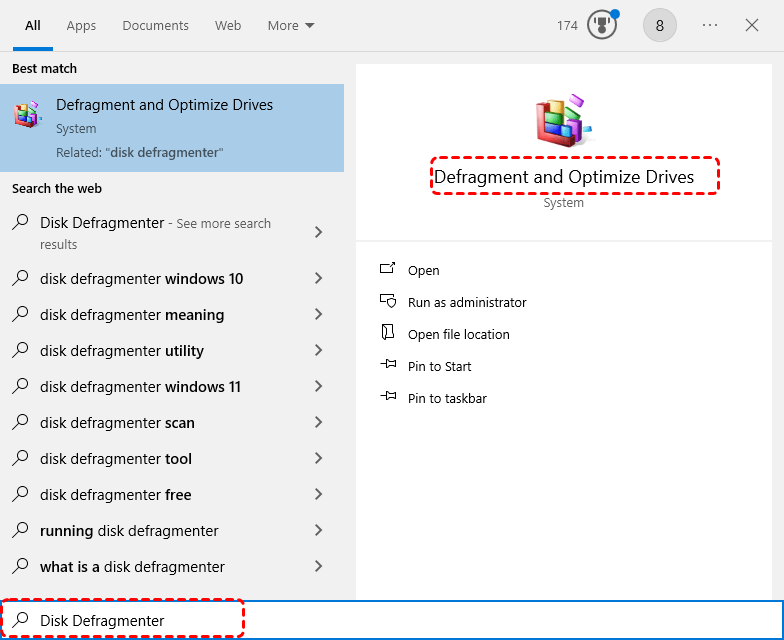
Step 1. Type "Disk Defragmenter" in the Start menu to open "Defragment and Optimize Drives".
Step 2. Select you hard drive and click "Optimize" to start the defragment.
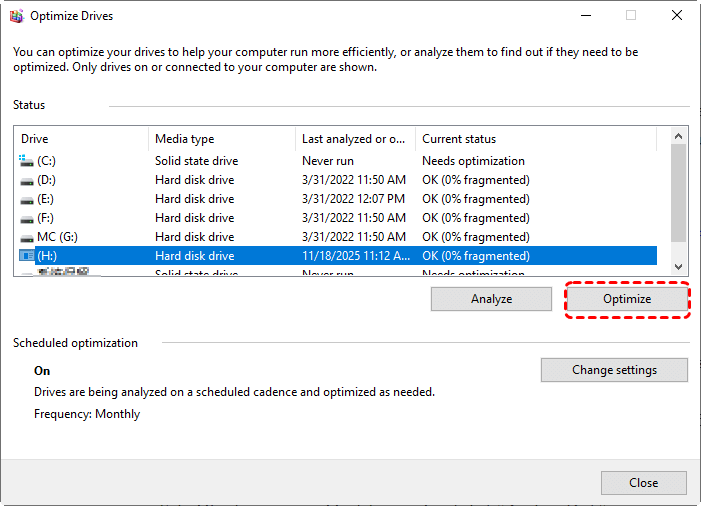
- ★Tips:
- Defragmentation is unnecessary if you’re using an SSD. In fact, performing this process can lead to unnecessary hardware wear and tear, which will shorten the drive’s overall lifespan.
Method 6. Check Drive Health in BIOS/UEFI
BIOS-level checks confirm whether the drive is detected reliably by the system firmware. If your hard drive cannot be detected in the BIOS, it indicates that the drive may have a serious hardware fault.
Step 1. Restart your computer, and as soon as your PC starts, press Del, F1 or F2 (depends on your computer brand) to enter BIOS.
Step 2. Navigate to "Settings" > "Advanced" > "NVME SSD Self - Test" to verify the health of NVME drives. The specific steps you need to follow will vary depending on your motherboard’s manufacturer.

Method 7. Check Disk Health with Windows Performance Monitor
Windows Performance Monitor (PerfMon) is an advanced built-in performance monitoring tool for Windows. It can collect, display, and analyze performance data for both the system and applications, including hard drive monitoring. It is capable of analyzing disk utilization rates and read/write operations per second to determine if there are any anomalies with the file system or the hard drive itself.
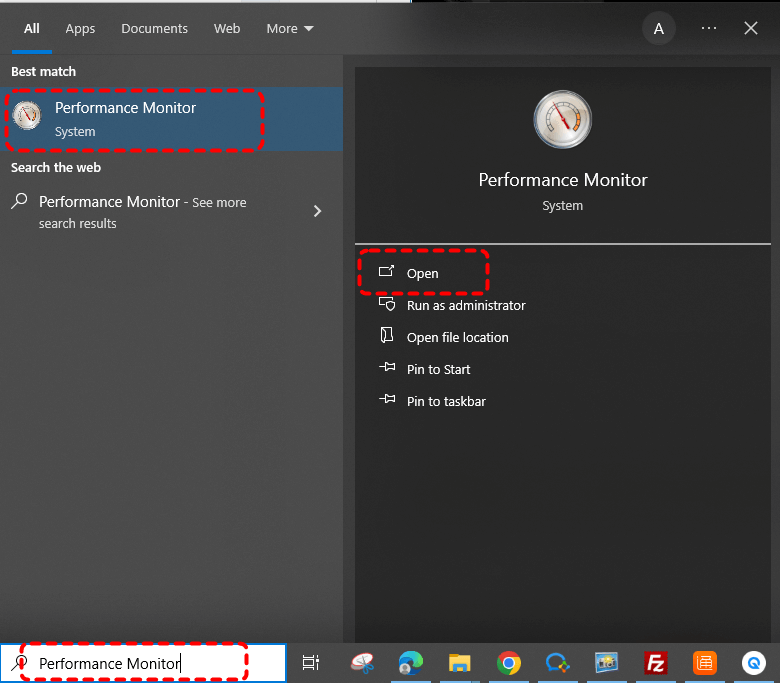
Step 1. Type "Performance monitor" in the Start menu and open it.
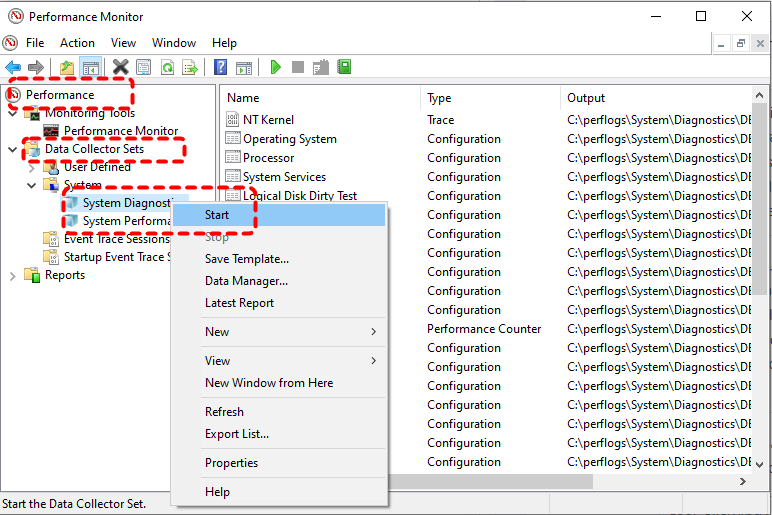
Step 2. Go to "Data Collector Sets" > "System" > "System Diagnostics" in the left panel.
Step 3. Right click on "System Diagnostics" and choose "Start".
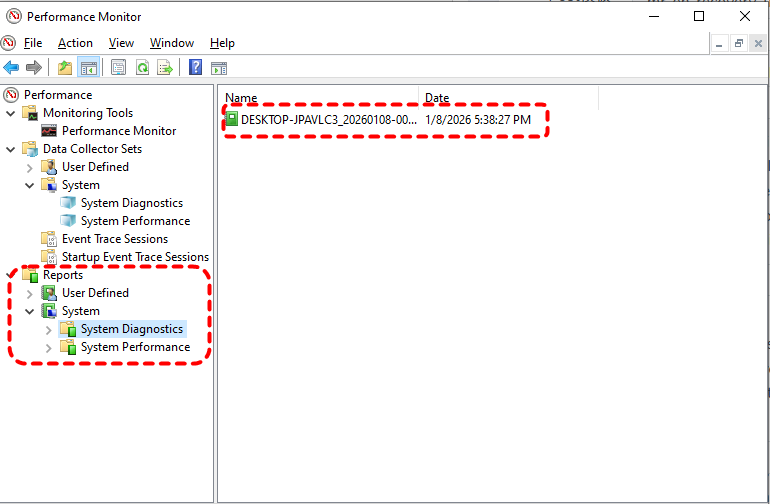
Step 4. Then, locate "Reports" > "System" > "System Diagnostics". Double click your device to check detailed system diagnostic report. Under the "Disk Checks" section, you will see the hard drive health status.
Method 8. Use Hard Drive Manufacturer Diagnostic Tools
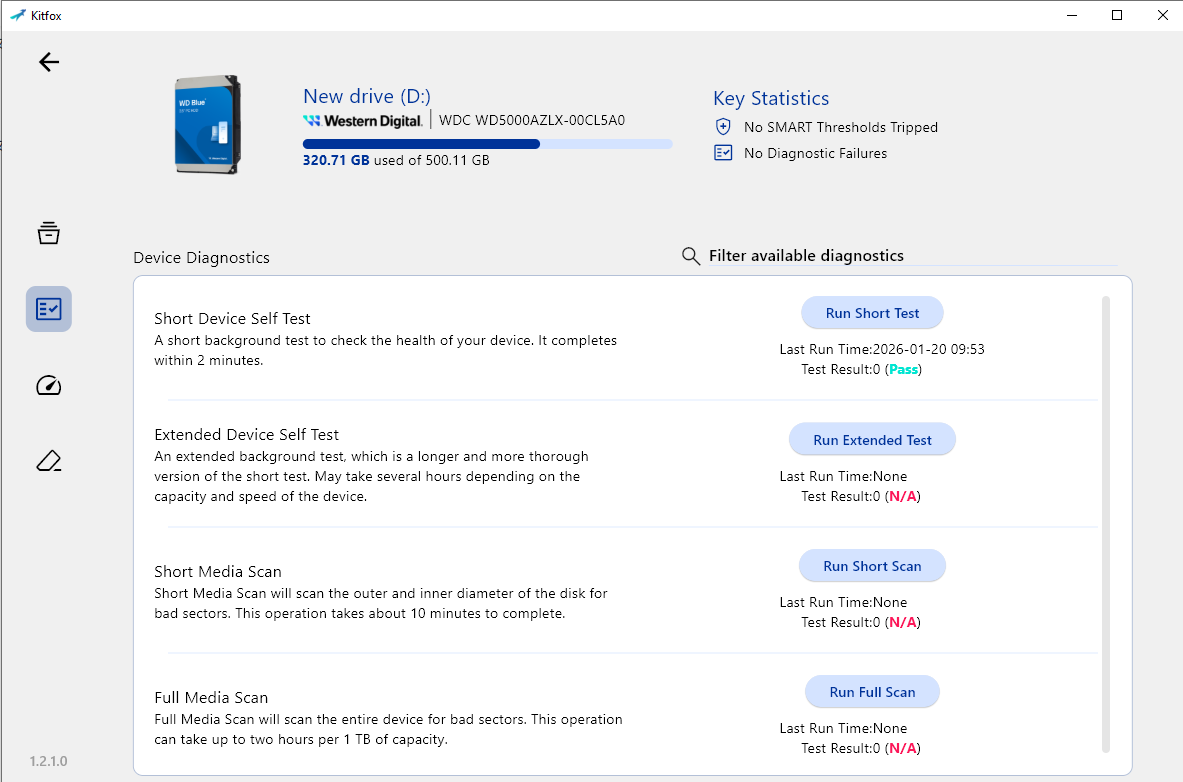
In addition to the built-in Windows tools, hard drive manufacturers also provide dedicated hard drive health check utilities. These tools can run extended surface tests and firmware checks, which are essential if you want deeper insight beyond standard to check hard drive health on Windows. Here, we take Western Digital’s Kitfox as an example.
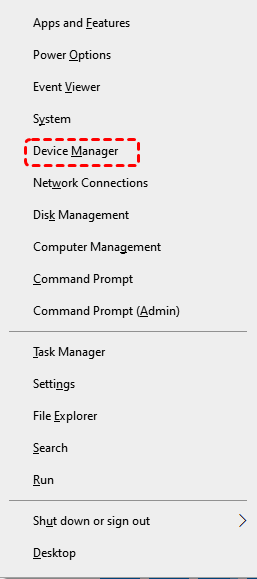
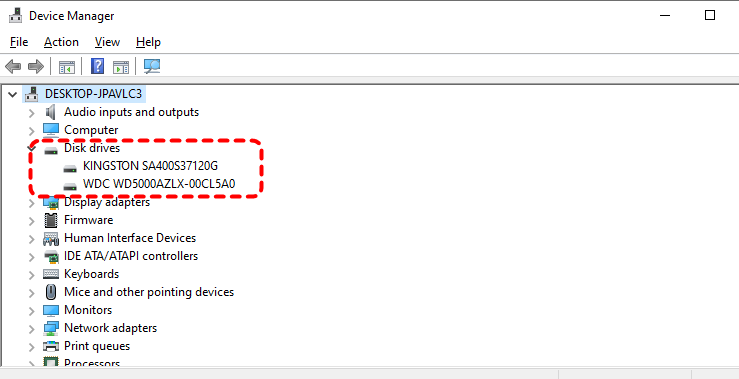
Step 1. Press "Win" + "X" to choose "Device Manager" to open it.
Step 2. Expand the "Disk drives" to check the brand and model of your storage device.
Step 3. Download and install the Manufacturer's tool to analyze hard drive healthy.
How to Recover Data from Failed Hard Drive
If disk health checks reveal serious issues or the drive has already become inaccessible, data recovery should be your immediate priority. Be sure to stop using the hard drive immediately before taking any measures. Avoid repeated writes or formatting attempts, as these can worsen data loss and drive damage. MyRecover, a dedicated data recovery software, is designed for such scenarios. It supports data recovery from failed, corrupted, RAW, or partially accessible drives, allowing you to preview files before recovery and safely extract critical data without stressing the disk further.

- 500+ Devices Supported | SSD, HDD, USB Flash Drive, SD Sard, etc.
- 1000+ File Formats Supported | PNG, MP4, MP3, TXT, ZIP, MSG, etc.
- 500+ Data Loss Scenarios | Deletion, Format, System Crash, Virus Attack, etc.
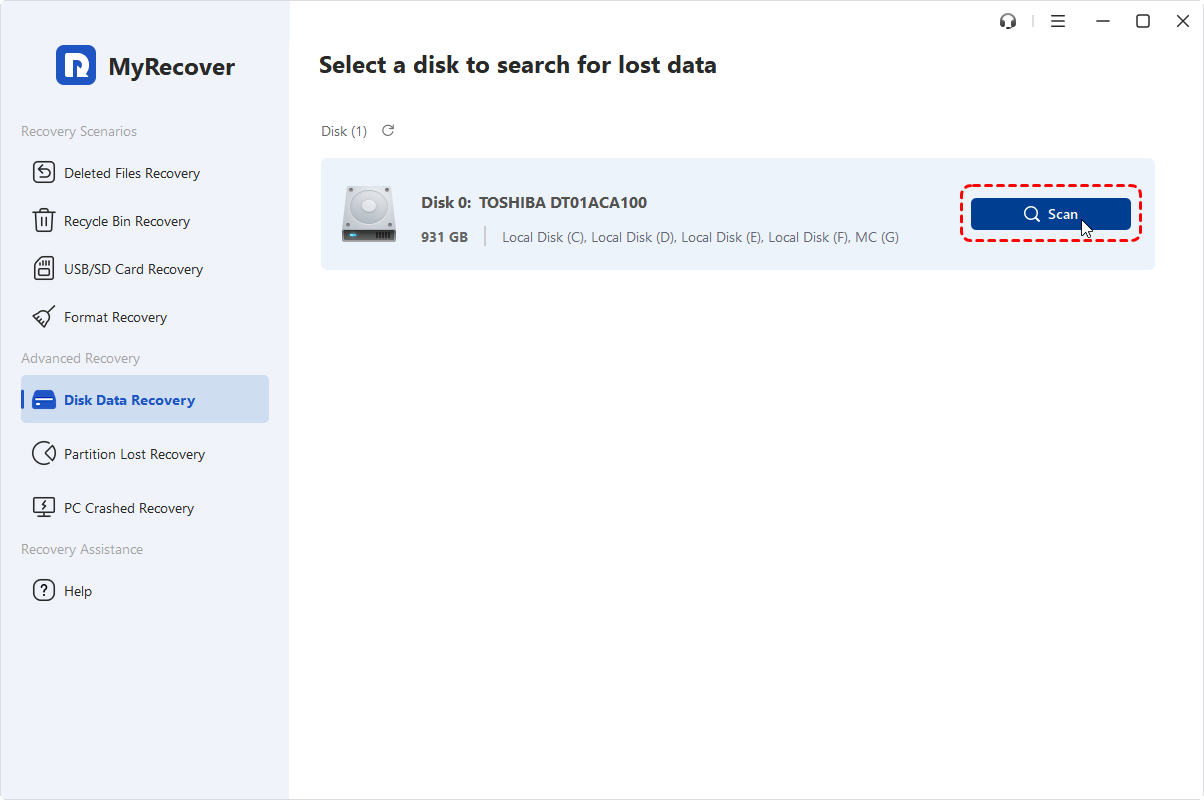
Step 1. Download and install MyRecover on your computer from Microsoft Store or its official site, avoid installing it on the drive with lost files.
Step 2. Launch the program and select the drive to scan for lost files, then click "Scan" to search for lost files.
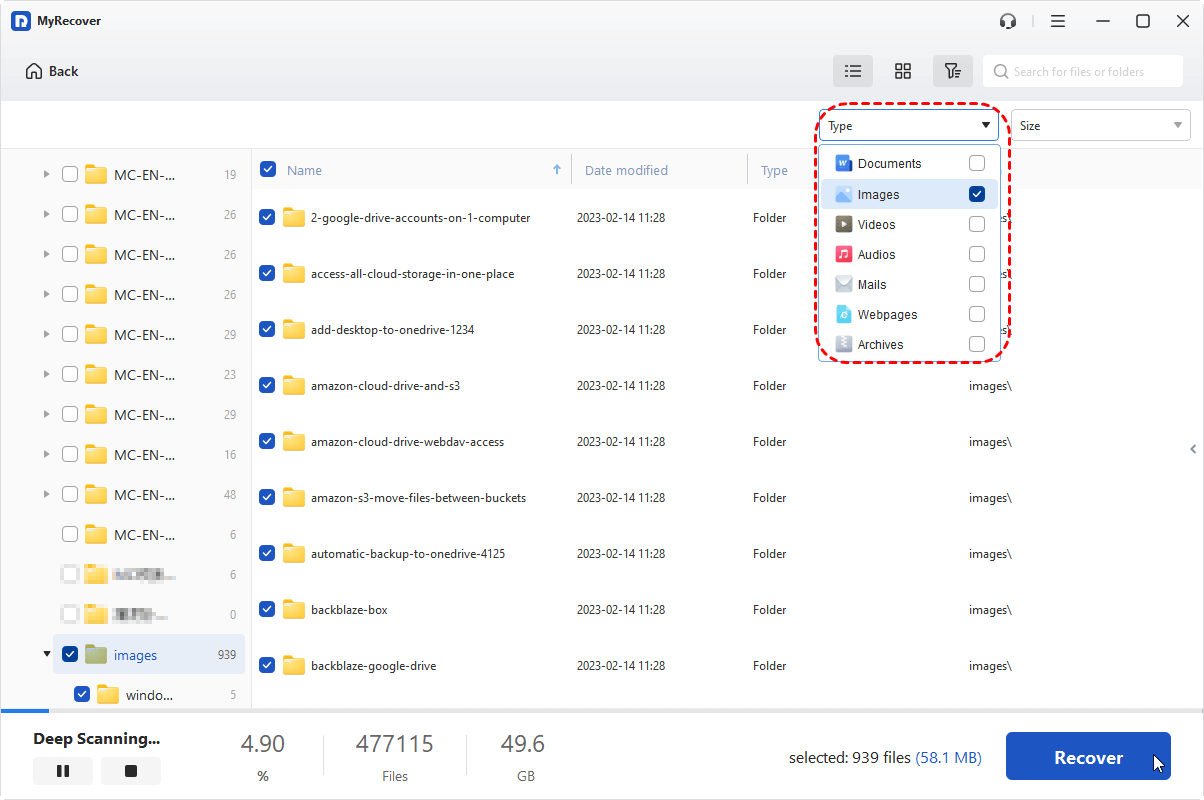
Step 3. After the scan is completed, choose the files you wish to recover from the recoverable lists and click "Recover".
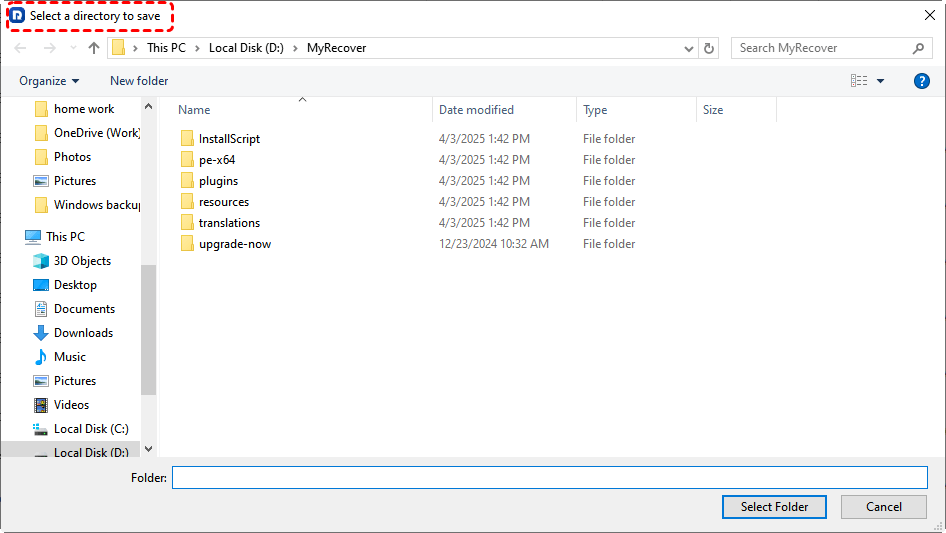
Step 4. Save the recovered files to a safe location.
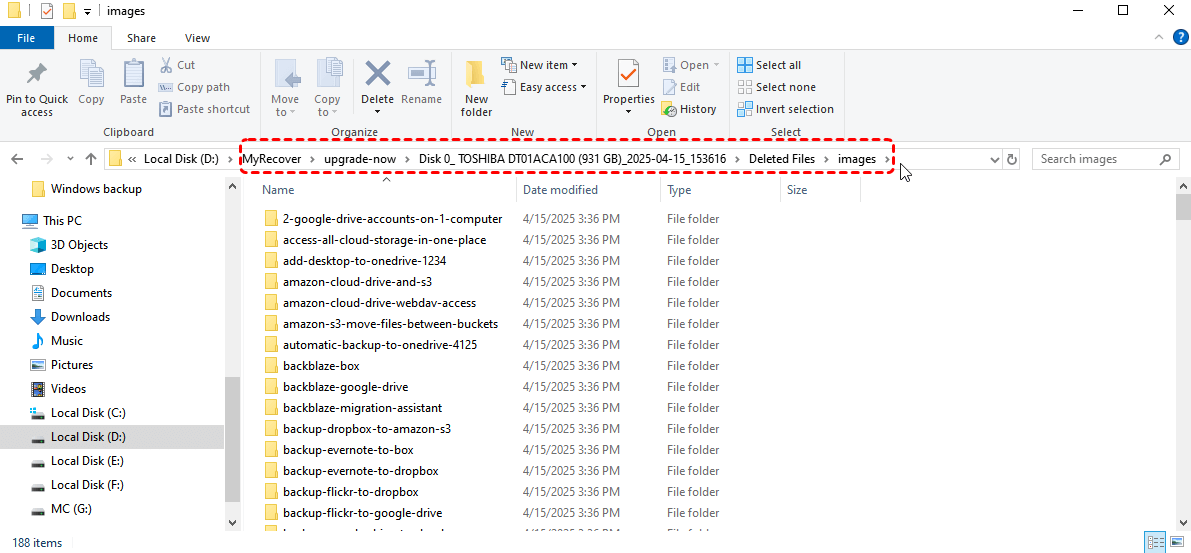
When the process is finished, you can verify the recovered files by clicking on the destination folder path or the "Browse" button.
The End
Monitoring disk health is not a one-time task but a preventive habit. By combining Windows tools, firmware checks, and manufacturer diagnostics, you can identify risks early and avoid catastrophic data loss. If failure does occur despite precautions, having a professional recovery solution like MyRecover ensures that your data still has a second chance, even when the hardware does not.
For IT admins, professionals, or businesses, MyRecover also offers a Technician Edition, a comprehensive business data recovery solution that supports unlimited devices with just one license. This makes it perfect not just for personal recovery but also for MSPs and enterprises needing a reliable tool.


Stay Updated With Our
Latest Tips
Add us as a preferred source on Google to never miss helpful guides.