
TestDisk SSD Recovery: Restore Your Lost SSD Data Now
Facing SSD data loss? Our tutorial explains the testdisk ssd recovery process in depth. You'll learn precisely how to testdisk recover ssd files, including preparing your drive, navigating the software, and correctly saving recovered data.
By Delores / Updated on February 4, 2026
Preface
It's frustrating when you need to recover files from an SSD, especially when it’s formatted. Unlike traditional hard drives (HDDs), SSDs play differently. SSDs follow a different, more intricate set of rules for data loss, which makes recovery a special challenge. So, it's more important to learn how to do TestDisk SSD recovery.
Although it's complex to run the commands, you have this guide for detailed steps. Just try the steps to recover files from SSD securely.
About TestDisk
TestDisk is a free, open-source command-line data recovery tool that restores lost partitions, repairs partition tables, and fixes unbootable drives. It addresses issues from software errors, viruses, or accidental damage across filesystems like FAT, NTFS, and Ext2/3/4.
Why Do You Need to Attempt SSD Recovery?
Solid-state drives aren't just faster; they handle data storage and deletion fundamentally differently. Once you lose the files on an SSD, you have to take action fast. The reasons for this digital disappearing act are numerous:
⭕ Partition loss or corruption. This can happen from power surges, faulty cables, or even software bugs. The partition table tells your computer where everything is stored. If it gets scrambled or erased, making your data seem invisible.
⭕ File system corruption. The file system (like NTFS or exFAT) is corrupted, and Windows cannot find the files correctly. This often manifests as errors like "file or directory is corrupted" or a drive that shows as "RAW" in Disk Management.
⭕ A failed SSD firmware update can brick a drive in a way that makes it unrecognizable to your computer.
⭕ Bad sectors on an SSD, though less common than on HDDs, do happen. When a memory cell wears out, it becomes unreliable. The drive marks it as bad, but if crucial system data was stored there, it can lead to broader accessibility issues.
⭕ Virus or malware attacks specifically target file systems and partition tables to hold your data hostage or simply destroy it.
So, with these scenarios painting a bleak picture, the quest to TestDisk recover SSD data begins. It’s a process that requires patience, a careful touch, and often, a clear guide on how to use TestDisk for data recovery.
How to Use TestDisk for SSD Recovery?
I'll guide you through the step-by-step process of recovering files from an SSD using TestDisk.
Preparations:
- Stop using the SSD immediately to prevent overwriting data.
- DO NOT install TestDisk on the affected SSD
- DO NOT save recovered files to the same SSD
- Connect the SSD as a secondary/external drive if possible
- Prepare a separate storage device for recovered files
Recover Lost Partitions from An SSD with Step-by-Step
If your partition gets lost or deleted from an SSD, and your SSD drive shows RAW or unallocated, you can use TestDisk to recover it, as well as the files.
Now, check the full guide on recovering SSD partitions and files with TestDisk:
1. RunTestDisk as Administrator: Download TestDisk, then run testdisk_win.exe as an administrator.
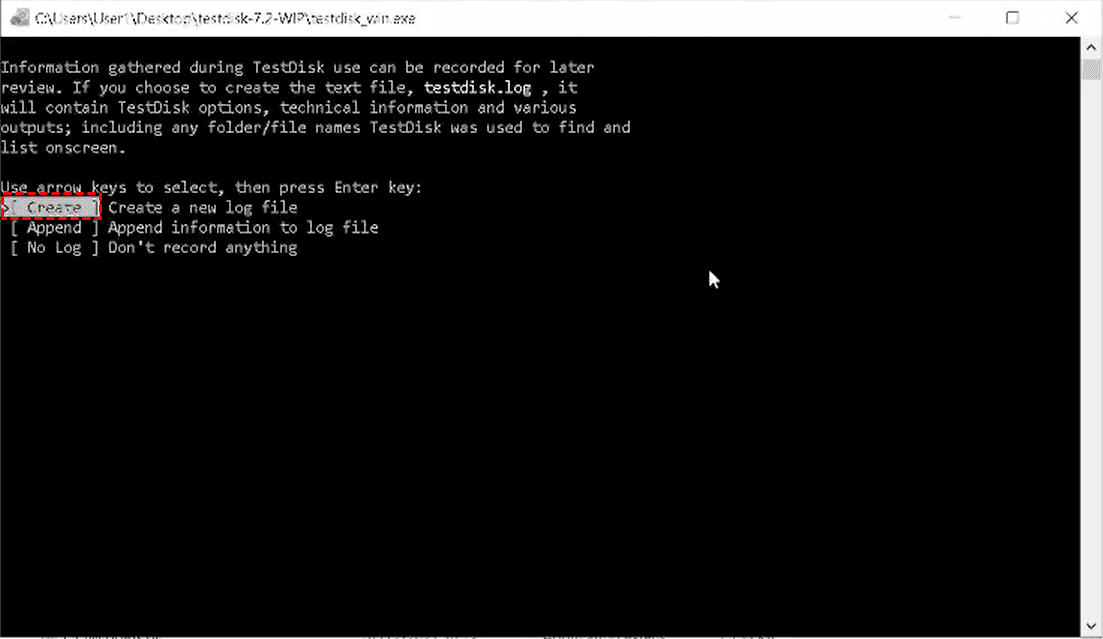
2. Create A Log File: Select Create to generate a log file of the recovery process.
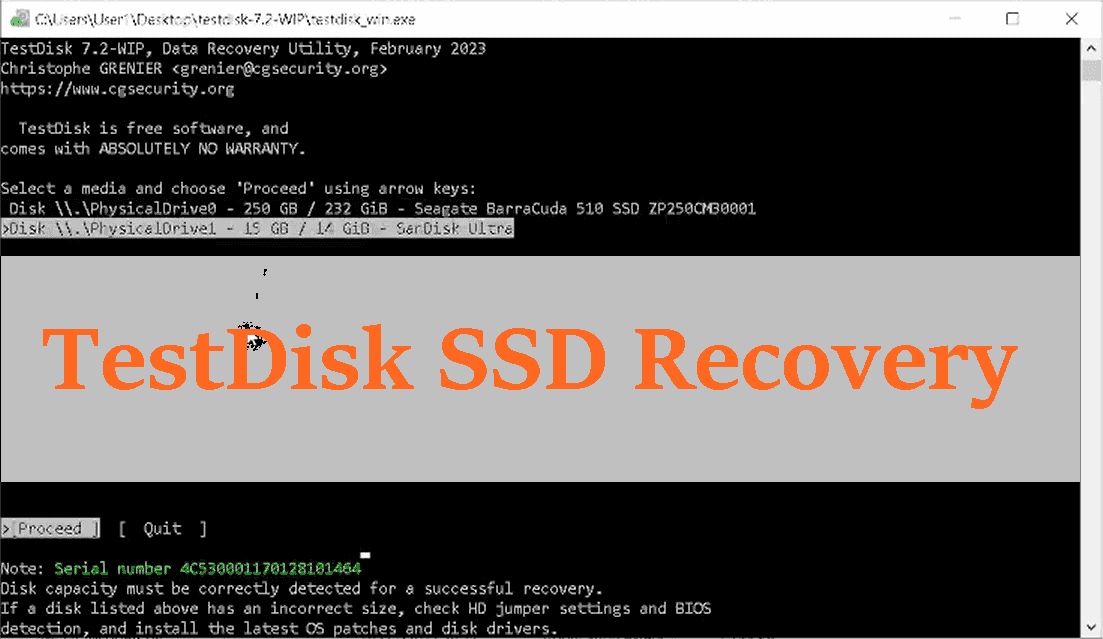
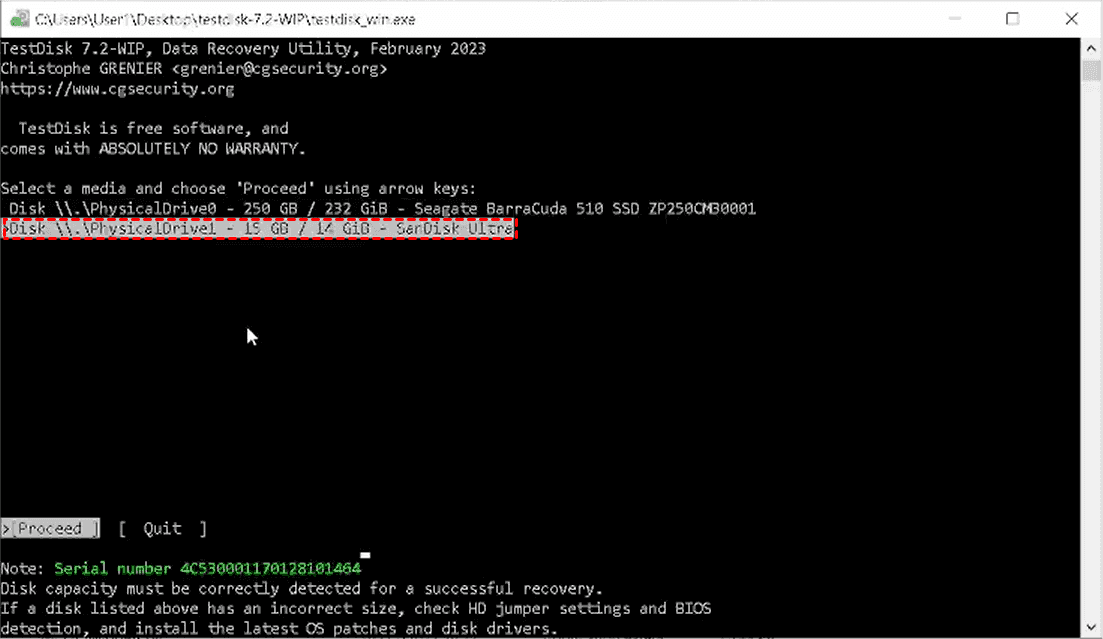
3. Choose Your SSD Drive: Use your arrow key to choose the affected SSD from the list of drives, and select Proceed.
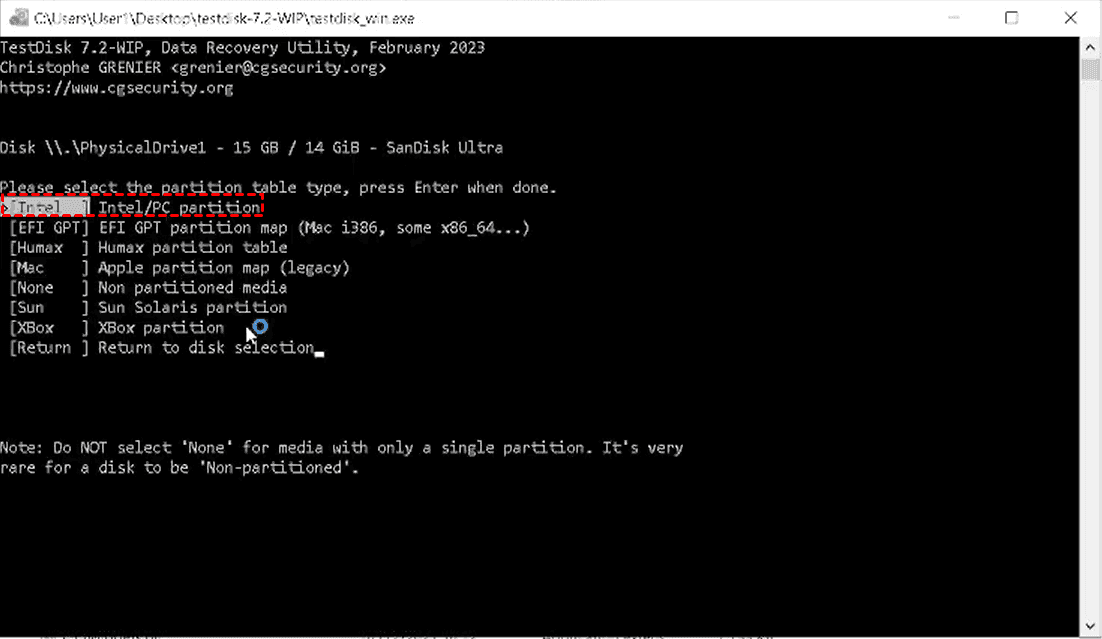
4. Then Check Partition Type: Usually Intel for MBR or EFI GPT for modern drives.
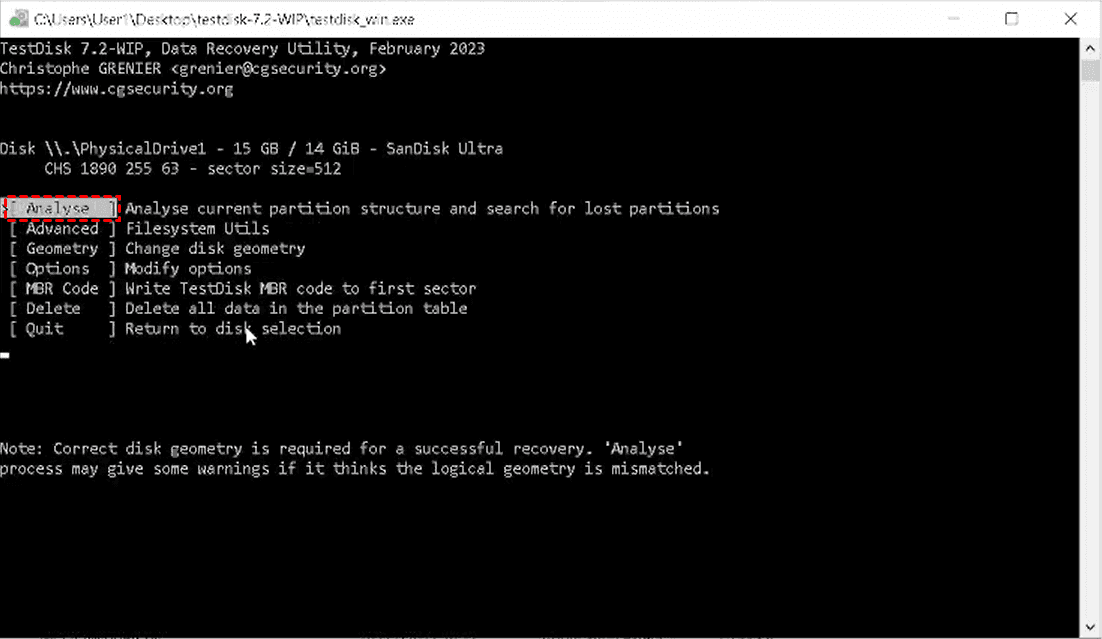
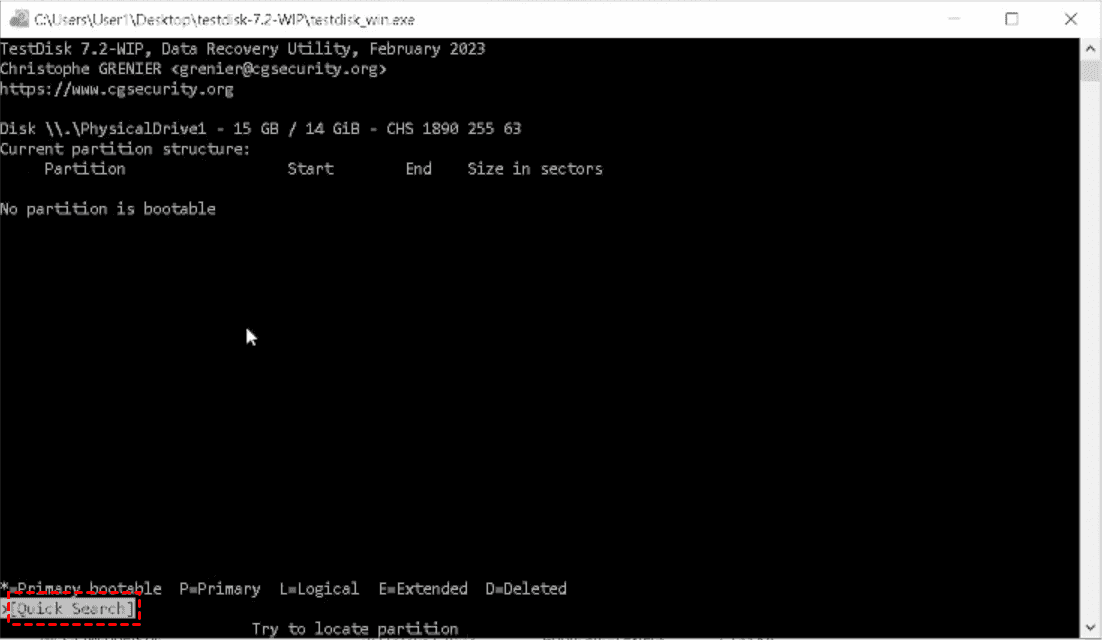
5. Analyze and Search: Choose Analyze to check the current partition structure, then choose Quick Search.
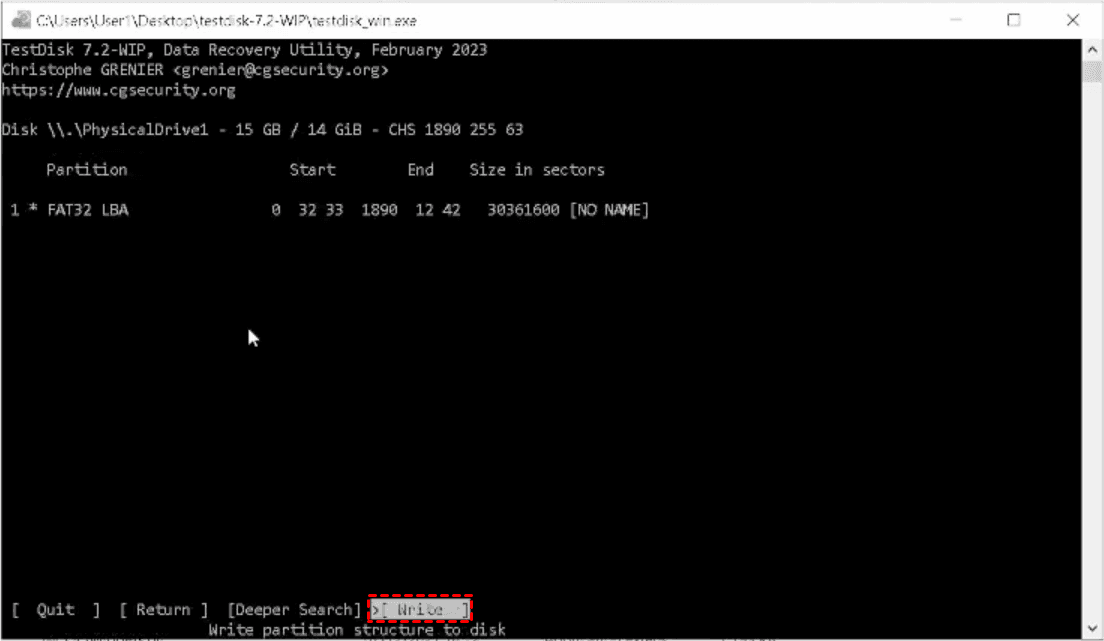
6. Recover/Write the Original Data to the SSD: If partitions are not found, run a Deeper Search to scan for lost partitions. Once the correct partition is found, use the Write option to save the partition table, or use Advanced to undelete specific files.
All your lost files from the SSD will be recovered successfully. Check them now.
How to Recover Missing Files from SSD with PhotoRec
Besides, you have another program, PhotoRec, to recover missing files from a hard drive if the drive gets corrupted or formatted, etc. This program provides a clean and easy-to-use interface. Here is how to use it:
1. Please download the TestDisk program, and it includes the PhotoRec software. Just run the qphotorec_win.exe (GUI) file as administrator.
Tip: Or you can try photorec_win.exe for the command-line interface.
2. Choose your affected SSD to recover from, and select No Partition to choose the whole SSD disk. If you choose a partition on the SSD, it recovers files from a part of the SSD.
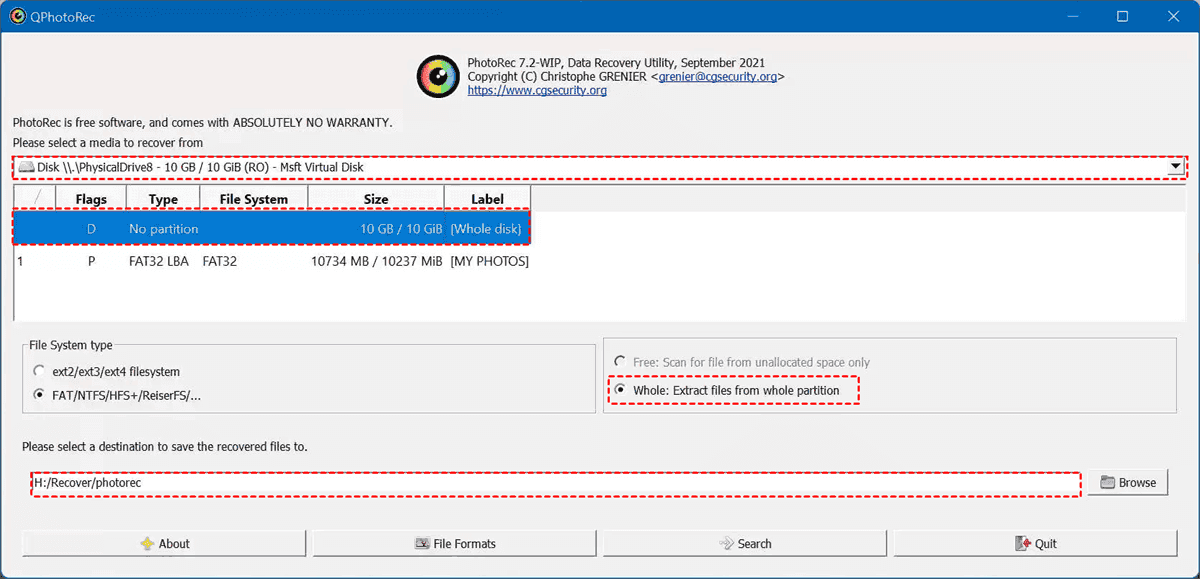
3. Tick Whole: Extract files from the whole partition.
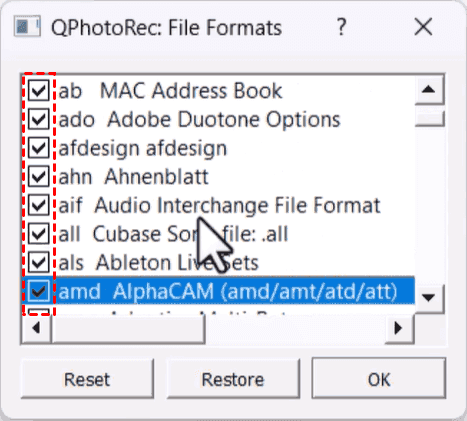
4. Tap File Formats to choose what file types to recover.
5. Select a destination to save these recovered files.
6. Hit Search to find all your missing files.
7. Once finished, click Quit. Then go to the destination to check your files.

Limitations of TextDisk and PhotoRec
TestDisk is a free, open-source tool for recovering lost partitions, repairing partition tables, and fixing boot issues across file systems like NTFS and ext4. However, its command-line interface can be difficult for non-technical users, and it lacks file previews or filters for selective recovery.
PhotoRec complements it by performing raw file recovery—recovering data based on file signatures—but it strips away original filenames and folder structures, leaving users with thousands of generically named files to sort through manually.
A Better Way to Recover Files from SSD
Fortunately, here comes the powerful Windows data recovery software, MyRecover, to overcome the above limitations.
It offers an intuitive graphical interface with file previews, search filters, and organized recovery that preserves original folder structures and filenames.
Additionally, such tools are better optimized for modern SSDs with TRIM support, provide faster scanning and sorting, and reduce the manual effort required, making data recovery more accessible and efficient for both casual users and professionals.
You can easily recover files from a formatted SSD drive, a deleted partition, even a crashed computer, etc.
Here is how to recover a deleted partition from an SSD with MyRecover:
1. Connect your SSD drive if it’s an external drive, and download MyRecover and install it.
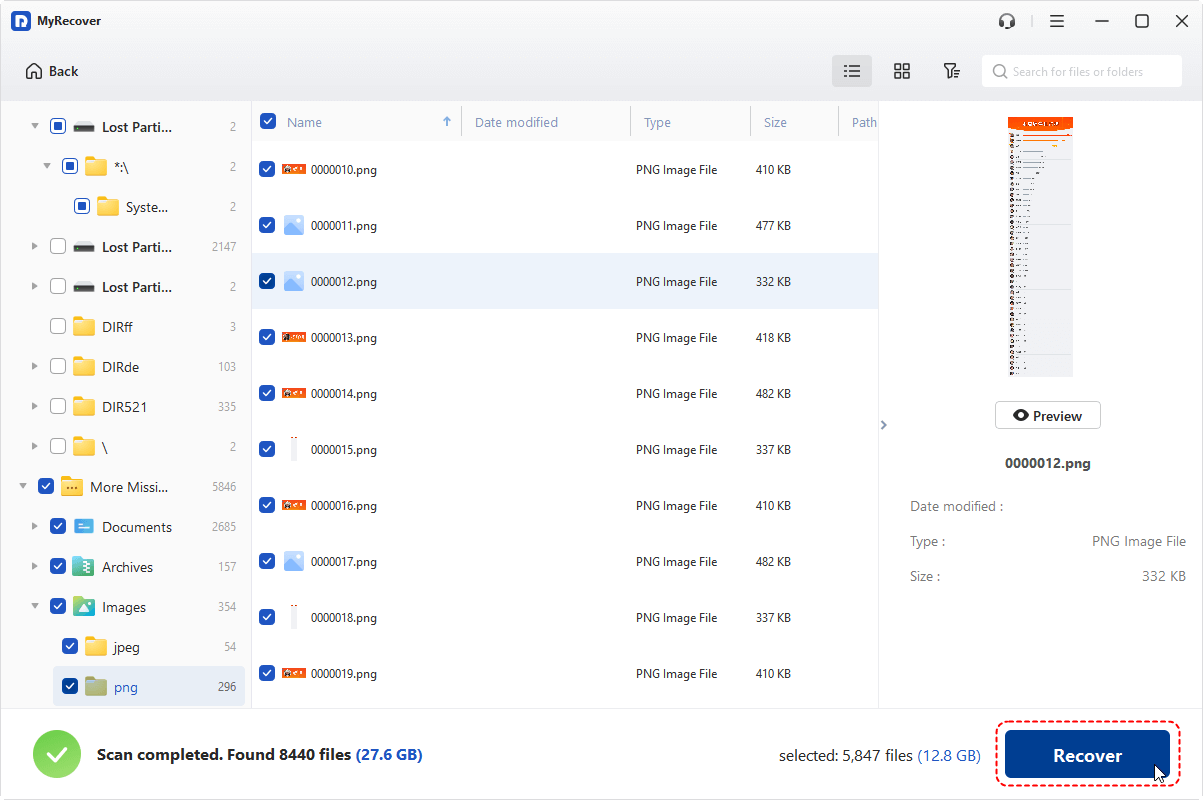
2. Launch MyRecover, tap Partition Lost Recovery, and hit Scan while showing the lost partition. Wait for the process to complete, and hit OK.

3. These files are sorted by file type by default; preview them to check if they are intact. Then choose the files you need, and hit Recover.
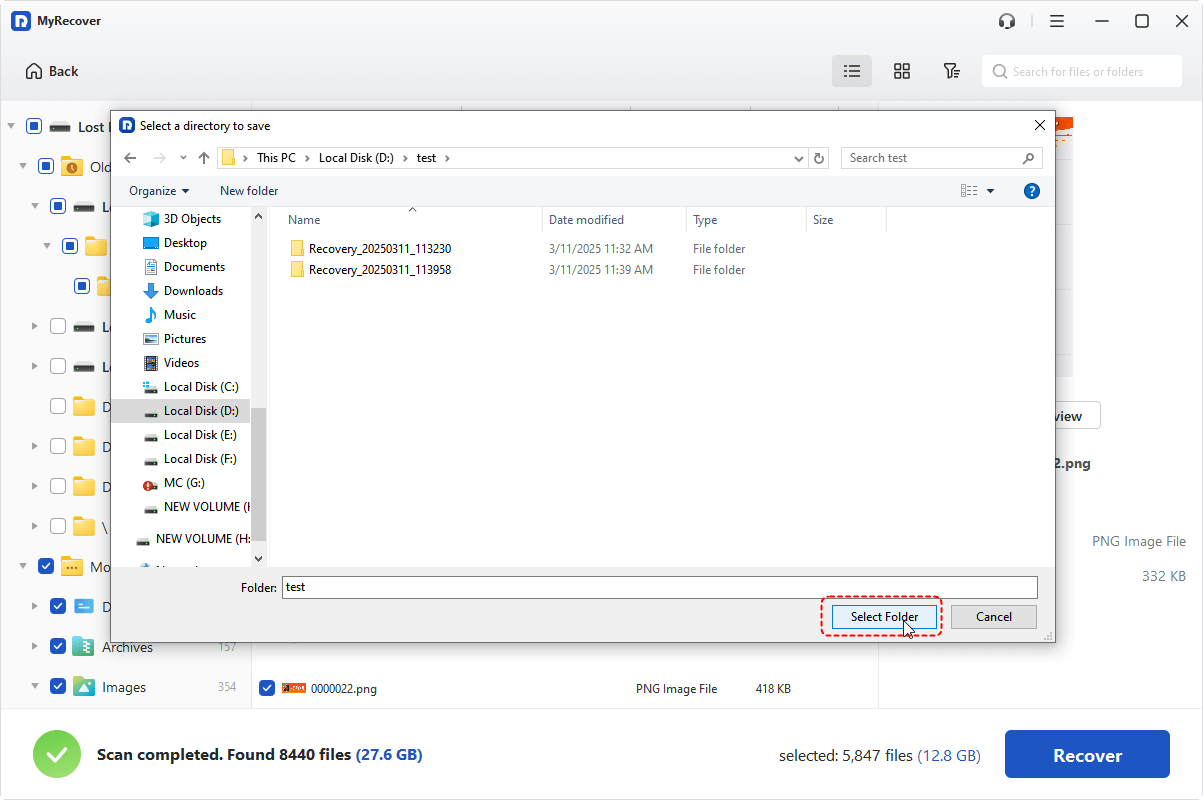
4. Opt for a safe location and hit Select Folder to keep them.
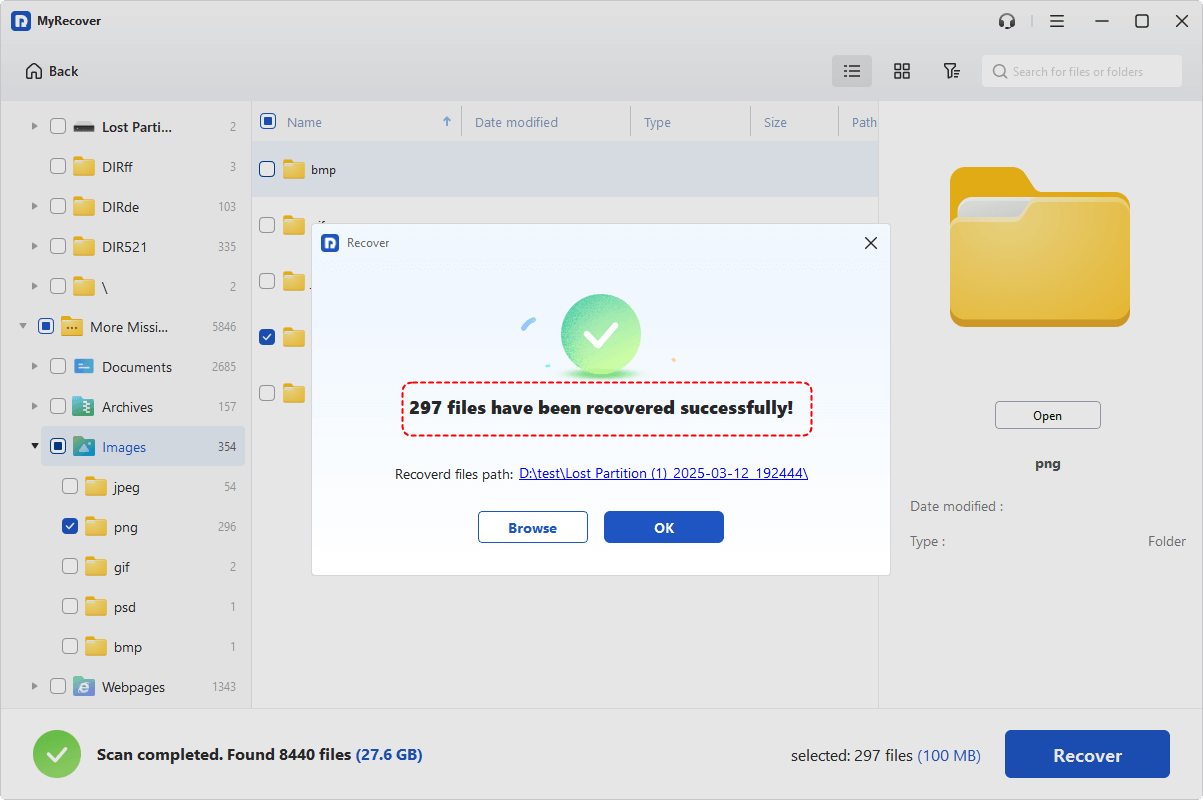
5. Then you can check the recovered files in the destination folder.
- Tips:✎...
- Once scanned, you can find and search files by file name, path, size, and modified date, etc.
- You can recover unlimited files at a time; it’s very convenient.
- If your computer won’t boot up, you can try MyRecover’s PC Crashed Recovery to create a bootable media to boot up the computer and recover files from it.
- To enjoy more powerful features, like recovering files from unlimited computers, please upgrade to MyRecover Technician to enjoy.

- Recover Deleted Files Easily with Simple Clicks
- 1000+ File Formats Supported
- Support HDD, SSD, External Hard Drive, USB Drive, SD Card, etc.
- Quickly Find Files Using File Types, Name, Size, etc.
- Preview Files Before Recovering
- Recover Unlimited Data
The End
Now, you must have recovered files from the SSD drive that are missing files, or something. Please back up files first in case of data loss. It’s the last resort to recover files from your hard drive. Having a backup for your important files makes it easy to restore, which does not require a recovery.
Moreover, you can use MyRecover to recover files from an emptied Recycle Bin, a corrupted SD card, etc. So, why not give it a try now?


Stay Updated With Our
Latest Tips
Add us as a preferred source on Google to never miss helpful guides.