
Should I Delete Temporary Files in Disk Cleanup? Get Answers Here
Temporary files are created by Windows and applications to store short-term data. Users often wonder it is safe to delete temp files on Windows 10 without causing issues. This article clarifies which temporary files can be safely removed and outlines best cleaning practices.
By Aria / Updated on March 6, 2026
What Are Temporary Files in Disk Cleanup
Is it ok to delete temporary files using disk clean up?
As I've checked, the temp files take up about 30GB of my disk space. I am currently using windows 7 home basic. I am trying to free up some space on my laptop coz it's been running slow lately. will it improve the performance of my laptop? Thanks! replies are much appreciated.
- Question from Anonymous
Temporary files in Disk Cleanup are short-term data created by Windows and applications to support routine operations such as installations, updates, browsing, and program execution. Their primary purpose is to speed up processes and store intermediate information that is not meant to be kept permanently.
In Disk Cleanup, the "Temporary files" category typically includes leftover setup files, cached data, and other expendable items that Windows no longer actively needs. Over time, these files can accumulate and occupy a noticeable amount of storage space, which is why many users ask whether they should delete temp files.
Should I Delete Temporary Files in Disk Cleanup
Yes, it is generally safe and recommended to delete temporary files using Disk Cleanup, especially when they are taking up a large amount of disk space. These files are designed to be disposable and removing them does not affect your personal documents or installed programs. Deleting temporary files can help free up storage, reduce clutter, and in some cases improve system performance, particularly if your disk is nearly full.
However, if an application is currently using certain temp data (which is uncommon in Disk Cleanup results), deleting those files may cause the program to recreate them later.
How to Delete Temporary Files Safely on Windows
Once you’ve decided to remove temporary files, there are several safe and effective methods to do so. Each method targets different types of temporary data, from system-generated temp files to browser caches, giving you flexibility depending on your needs. Follow the below solutions to delete temporary files safely, ensuring you can free space efficiently without risking important data.
Method 1. Delete Temporary Files from the Temp Folder
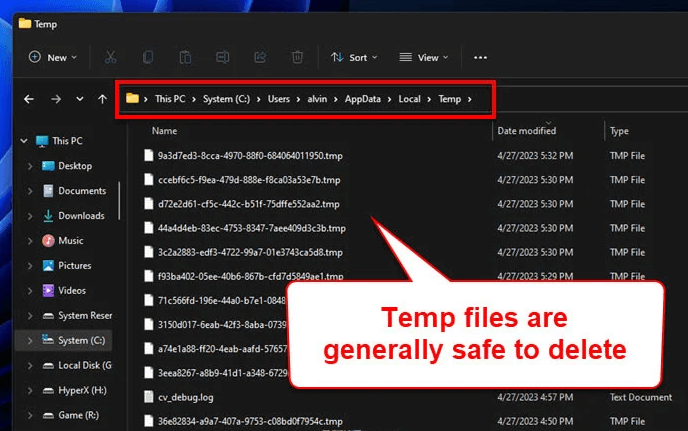
Windows stores profile temporary files in a dedicated folder (%USERPROFILE%\AppData\Local\Temp) that can be manually cleared to reclaim disk space. This method is quick and direct for files not in active use.
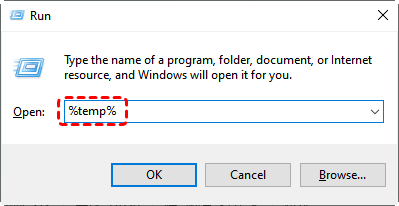
Step 1. Press "Win" + "R" to open the Run dialog and type "%temp%", then press "Enter".
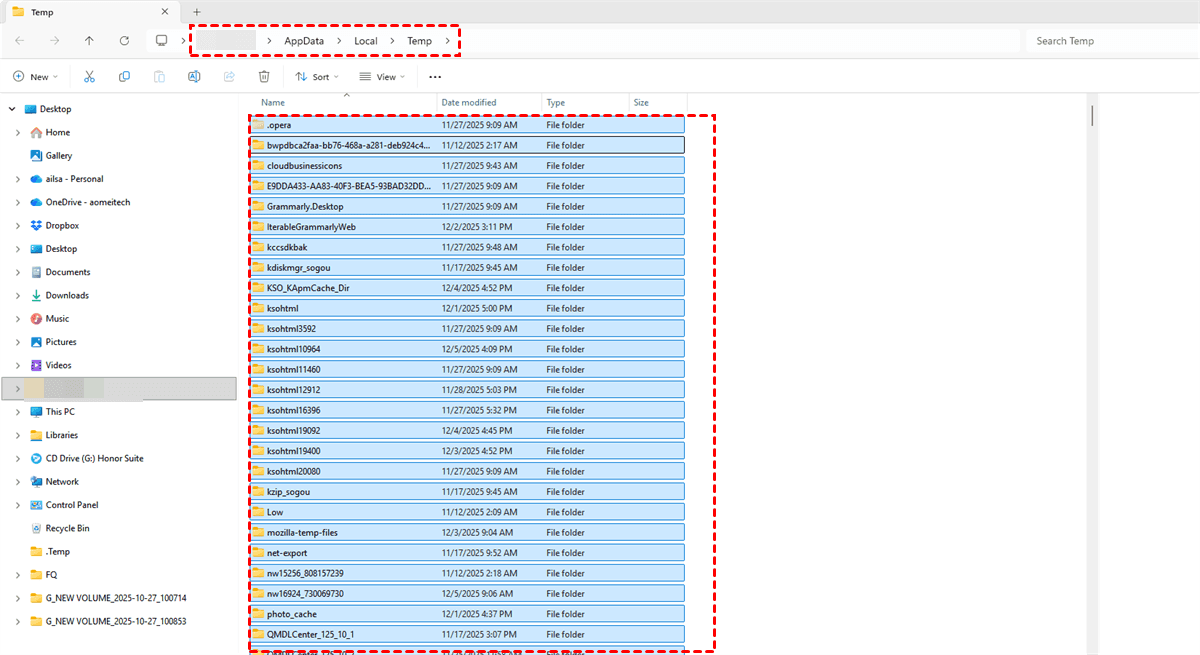
Step 2. This opens the Temp folder containing temporary files created by Windows and apps.
Step 3. Press "Ctrl" + "A" to select all files, then "Shift" + "Delete" to permanently remove them.
Step 4. Skip any files currently in use when prompted, they will be recreated automatically by Windows if needed.
Method 2. Use Disk Cleanup Tool
Disk Cleanup provides a safe, user-friendly interface to remove temporary files along with other unnecessary system data. Here's how:
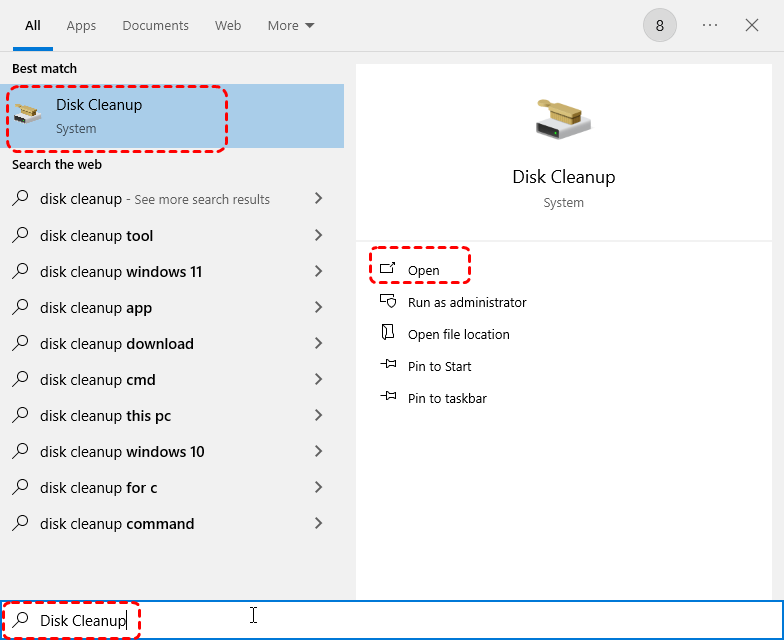
Step 1. Search for "Disk Cleanup" in the Start menu and launch the tool.
Step 2. Select the drive you want to clean (usually C:) and click "OK".
Step 3. Check the box next to "Temporary files" and other safe categories such as Recycle Bin or debug dump files under "Files to delete".
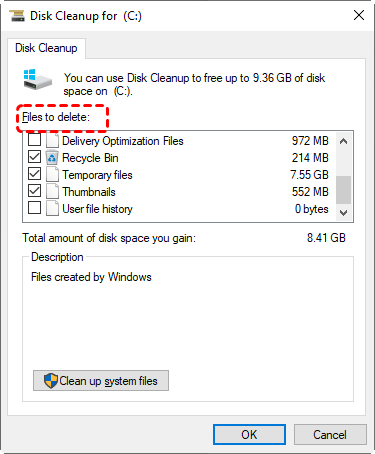
Step 4. Click "OK" to start cleanup.
Method 3. Clean Temporary Files via System Storage Settings (Windows 10/11)
Windows Storage Settings offers a modern interface for managing temporary files and system files. You can clean the temporary files with the following steps:
Step 1. Go to "Settings" > "System" > "Storage" > "Temporary files" to view all categories eligible for deletion.
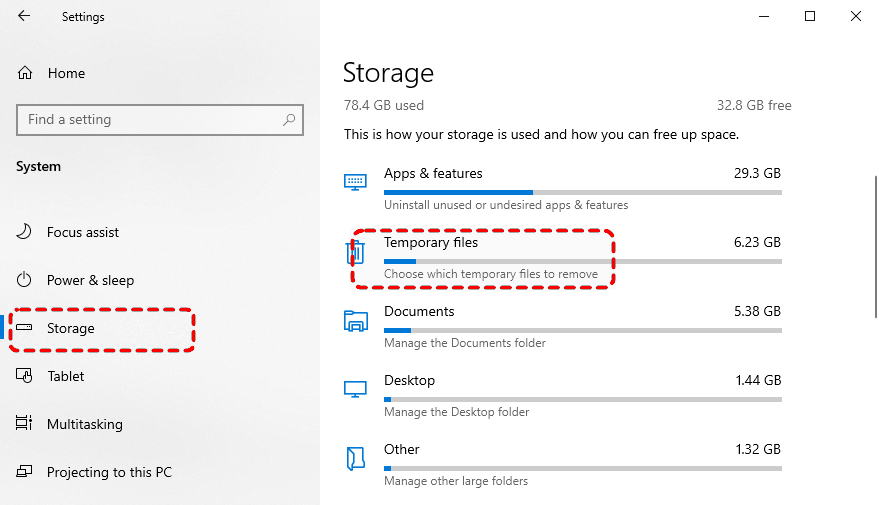
Step 2. Select the files you want to remove like Temporary files and click "Remove files".

You can also enable Storage Sense, which helps you clean up temporary files regularly. You can configure it to run daily, weekly, or monthly according to your needs.
Method 4. Use Command Prompt to Delete Temporary Files
For advanced users, delete temporary files can be simper with Command Prompt. It is a command line tool and allows precise deletion of temp files without relying on GUI tools. Here's how:
Step 1. Locate Command Prompt in the Start menu and right click on it, then choose "Run as administrator".

Step 2. Type the command "del /q/f/s %temp%\*" and press "Enter" to delete all files in the temp folder.
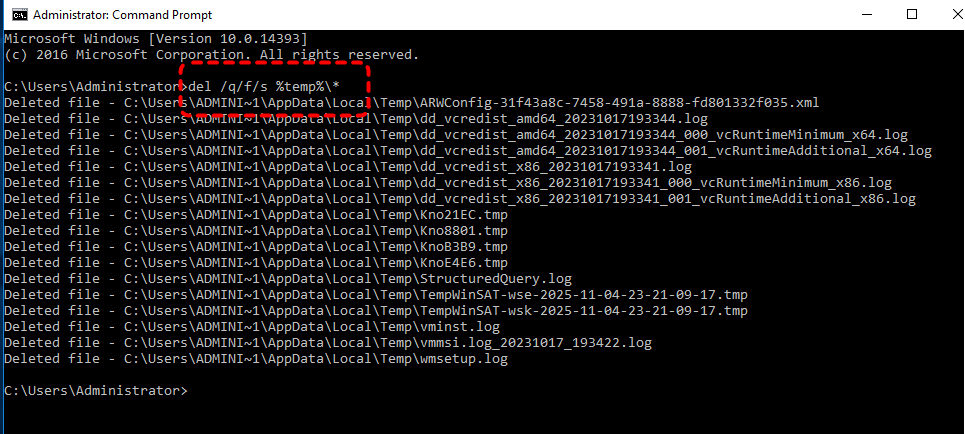
Once the command finishes, the temporary files in C:\Users\User Name\AppData\Local\Temp will be deleted entirely.
Method 5. Clear Browser Cache and Temporary Internet Files
Temporary files generated by browsers, commonly referred to as cache or temporary Internet files, are stored at two levels: some on the disk for persistent storage, and others in memory for temporary acceleration. Take Google Chrome as an example. Its disk cache is stored by default at: C:\Users[Username]\AppData\Local\Google\Chrome\User Data\Default\Cache. The memory cache is automatically cleared after closing the browser and requires no manual intervention.
Step 1. Launch Google Chrome, then click the menu button.
Step 2. Navigate to "Settings" > "Privacy and Security", click "clear browsing data".
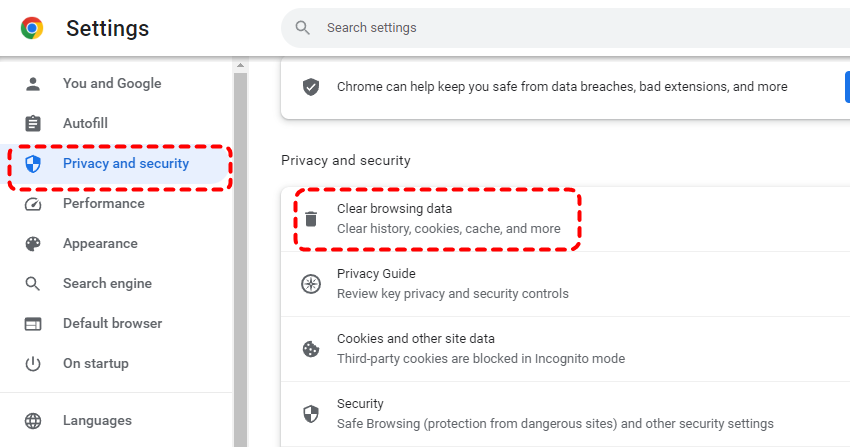
Step 3. In the pop-up window, select "All time" to clear all cache. Check "Cached images and files" (along with "Browsing history", etc., if you want to delete them as well).
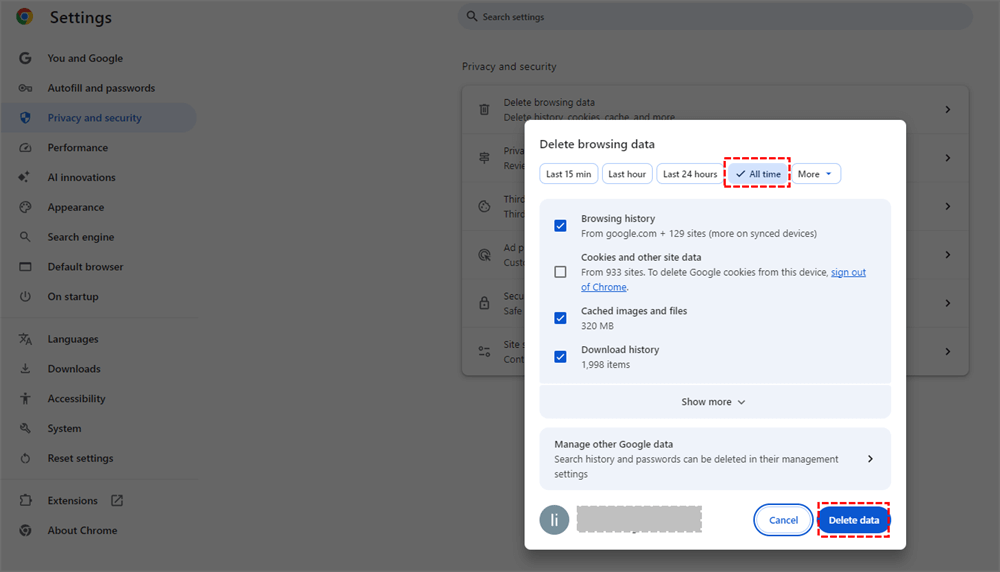
Step 4. Click "Delete data" to delete the Browser temporary files.
This method of clearing cache will not delete your bookmarks, saved passwords, or browsing history (unless you check these options separately). You can also navigate to the cache folder and manually delete its contents.
How to Recover Accidentally Deleted Files or Folders on Windows
Even when you carefully delete only temporary files, accidents can happen. Sometimes you might remove important documents or folders by mistake. In such cases, a professional data recovery software like MyRecover provides a safe and effective way to restore lost files. MyRecover is designed for both beginners and advanced users, combining powerful scanning algorithms with a simple, intuitive interface to ensure maximum recovery without risking further data loss.

- No Tech Skills Needed: User-friendly interface designed for beginners and non-tech-savvy users.
- Supports Over 1000 File Types: Recover photos, videos, documents, emails, ZIP files, and more.
- Supports Multiple Storage Devices: Works seamlessly with internal and external HDD, SSD drives, USB flash drives, SD/memory cards, digital cameras, and more.
- Safe & Read-Only Process: Your original data remains untouched during the scan and recovery process.
Step 1. Download and install MyRecover on your computer from Microsoft Store, avoid installing it on the drive where you deleted files from.
Step 2. Launch MyRecover, select the drive or folder where files were deleted, and click "Scan" to search for recoverable files.

Step 3. After scanning, select the files you want to restore from the list and click "Recover".
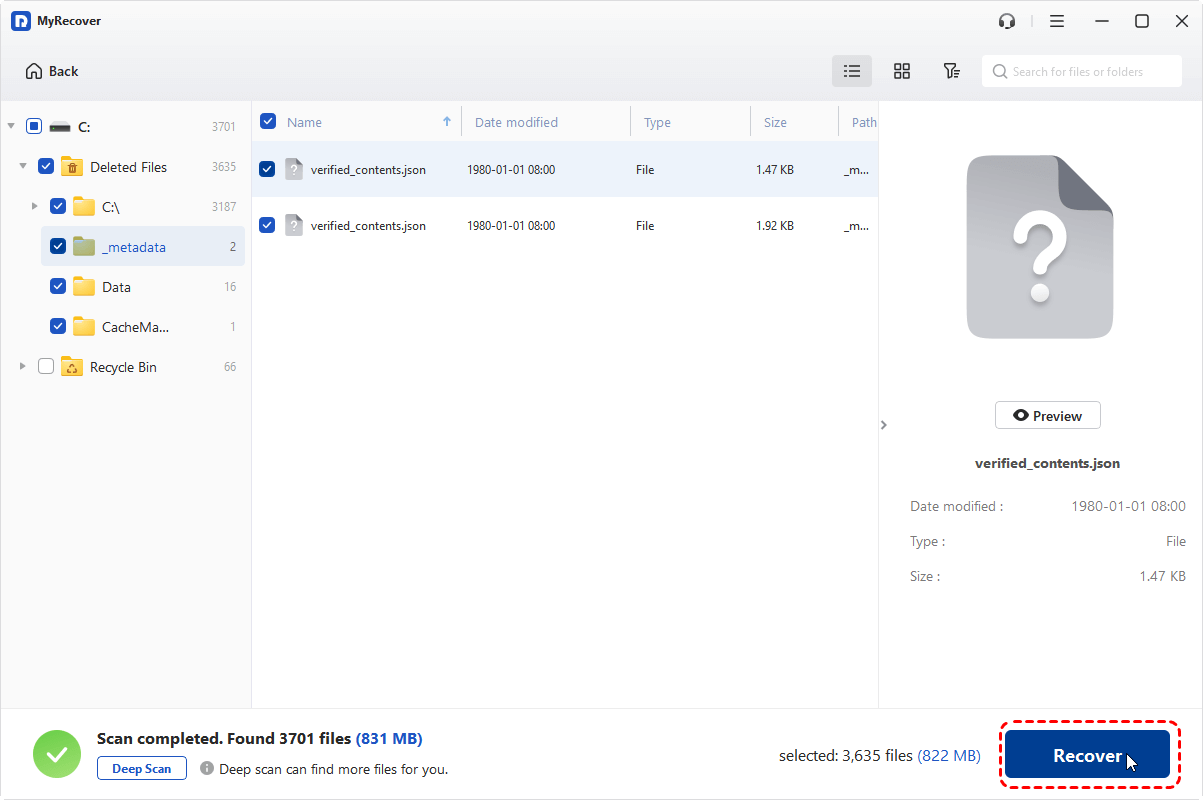
If you need unlimited recovery capacity and the ability to preview files before restoring them, MyRecover Professional edition is the perfect upgrade. It even helps you recover data from systems that won't boot.
Step 4. Select a different safe location to save the restored files.
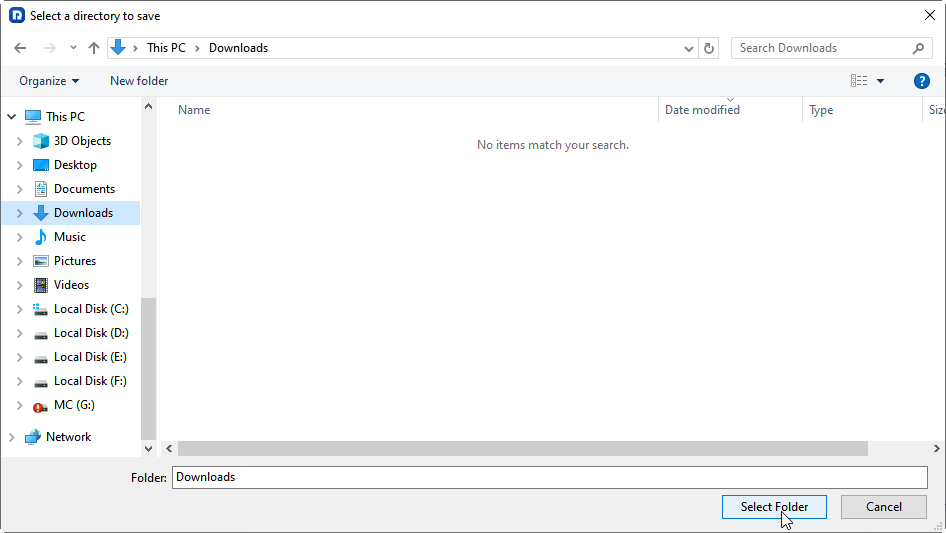
Once the process is done, the message "Files have been recovered successfully" will pop up. Then, you can access the recovered files by clicking on the "Browse" button or the destination folder path.
Summary
In a short, temporary files are disposable system and application data that can safely be deleted to free disk space, reduce clutter, and in some cases improve performance, especially on drives that are nearly full. Windows offers several methods to safely delete these temporary files.
While these deletions are generally safe, mistakes can happen, and important files may be accidentally removed. In such situations, using professional recovery software like MyRecover ensures lost files can be quickly and safely restored without risking further data loss.


Stay Updated With Our
Latest Tips
Add us as a preferred source on Google to never miss helpful guides.