
SanDisk SD Card Repair Tool Free Download: Fix Corrupted Cards Without Data Loss
A damaged or unreadable SD card can result in unexpected data loss, especially when storing photos, videos, or important documents. This article introduces a reliable SanDisk SD card repair tool designed to fix common issues such as corruption, formatting errors, and inaccessible storage devices and provides a clear, step-by-step guide on how to use the tool to repair your SD card without risking further data loss.
By Aria / Updated on May 9, 2026
Introduction
When a SanDisk SD card suddenly becomes unreadable, prompts you to format it, or shows missing files, it often indicates corruption or file system errors that can lead to data loss. These issues may appear after improper ejection, device incompatibility, or unexpected interruptions, leaving users unable to access important photos, videos, or documents.
To address this, using a reliable SanDisk SD card repair tool is critical. This article provides a focused guide on how to perform a safe SanDisk SD card repair tool download and use it to fix damaged or corrupted cards without losing data. You’ll learn practical methods to restore access, repair errors, and protect your files throughout the process, ensuring your SD card can be used normally again.
Common Signs of a Corrupted SanDisk SD Card
Before attempting any repair, it’s important to identify whether your SD card is actually corrupted. In most cases, a failing or damaged SanDisk SD card will show clear warning signs during normal use. Recognizing these symptoms early can help you take the right recovery steps and avoid further data loss. Here are the most common indicators:
🔌 Card not recognized by devices: The SD card does not appear on your computer, camera, or phone, or shows as an unknown device.
⚠️ Format prompt appears repeatedly: You receive messages like "You need to format the disk before you can use it", even though the card previously worked fine.
📂 Files missing or inaccessible: Photos, videos, or folders disappear, or display errors when you try to open them.
🖍️ Read/write errors: You cannot copy, move, or save files to the SD card, or the process fails midway.
💽 Incorrect storage display: The card shows 0 bytes, wrong capacity, or suddenly appears empty.
🖥️ Frequent disconnections: The SD card disconnects randomly during use, especially when transferring data.
How to Recover Data from a Damaged SanDisk SD Card
Once your SD card shows signs of corruption, trying to fix it blindly by formatting will erase all data on the card immediately. If you write new data after formatting, the lost files may become permanently unrecoverable. Therefore, the priority should be to recover your files from SanDisk SD card first, and only then proceed with repair operations. There are two solutions can help you recover data from SanDisk SD card.
1. SanDisk RescuePRO
SanDisk RescuePRO is an official data recovery tool developed by SanDisk. It supports recovering lost photos, videos, documents, and music from SD cards, USB drives, CFexpress cards, and more. However, it is not a completely free tool. The free version only allows you to scan and preview files to verify recoverability.
Step 1. Download and install SanDisk RescuePRO on your computer from its official website. Connect your SD card to the computer with a card reader.
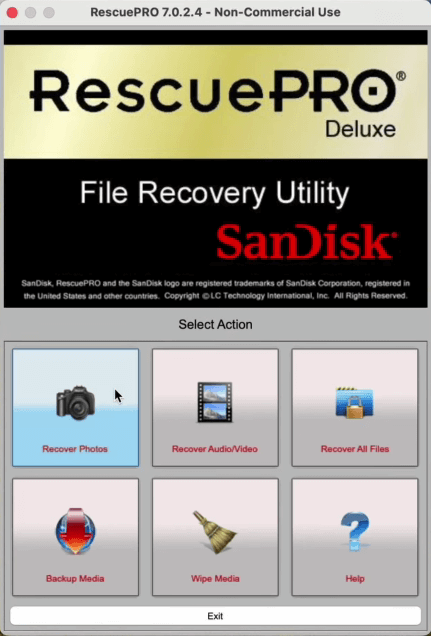
Step 2. Run the app and select what files you want to recover (photos, videos, or audios).
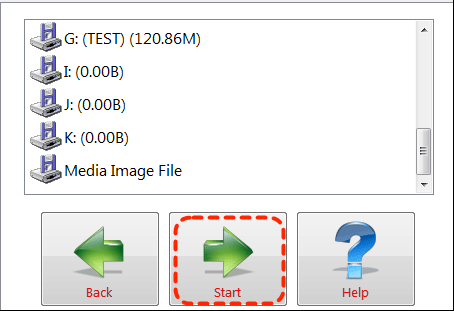
Step 3. Choose your SD card to scan and click "Start" to begin the process.
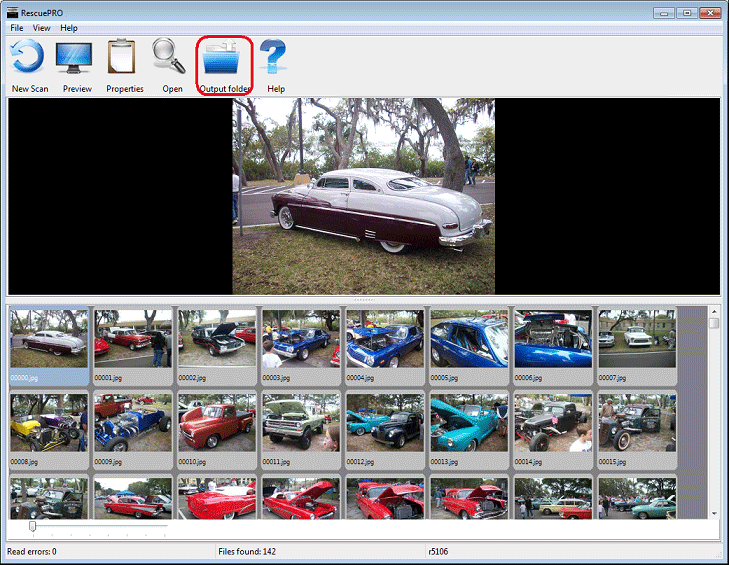
Step 4. Preview the scan results and select the files you wish to recover, then click "Output folder" to restore it.
👍 Pros:
- The free version allows you to preview the content of recoverable files.
- It supports creating memory card image files for safe data recovery.
- It comes bundled for free with some high-end SanDisk memory cards, such as the Extreme PRO series.
👎 Cons:
- No free data recovery quota available.
- The interface is not intuitive enough and prone to mis-operation.
- It cannot restore original file names and folder structure.
- Data recovery is only available in the paid version.
2. Free SanDisk SD Card Data Recovery Tool: MyRcover [Recommended]
If you prefer a free solution, opting for a dedicated professional data recovery tool like MyRecover is likely a better choice. It allows you to scan the damaged SanDisk SD card, locate recoverable files, and restore them before any structural changes are made to the storage device. It works with a wide range of storage devices from multiple brands such as SmartBuy, Sony, Lexar, Western Digital, etc. and supports the recovery of more than 1000 file types.
👍 Pros:
- Its free edition allows recover data up to 500MB.
- Supports over 1000 file formats with high recovery accuracy (99%).
- Compatible with all storage devices: USB drives, HDDs, SSDs, SD cards, etc.
- Handle 500+ data loss scenarios including deleted partition, formatted hard drive, emptied Recycle Bin, system crash, virus attack, etc.
- Dual scan modes: Quick Scan for speed, Deep Scan for thorough recovery.
👎 Cons:
- It only works on Windows.
- The free version does not support file content preview.
Step 1. Download and install MyRecover on your Windows from Microsoft Store or its official website.
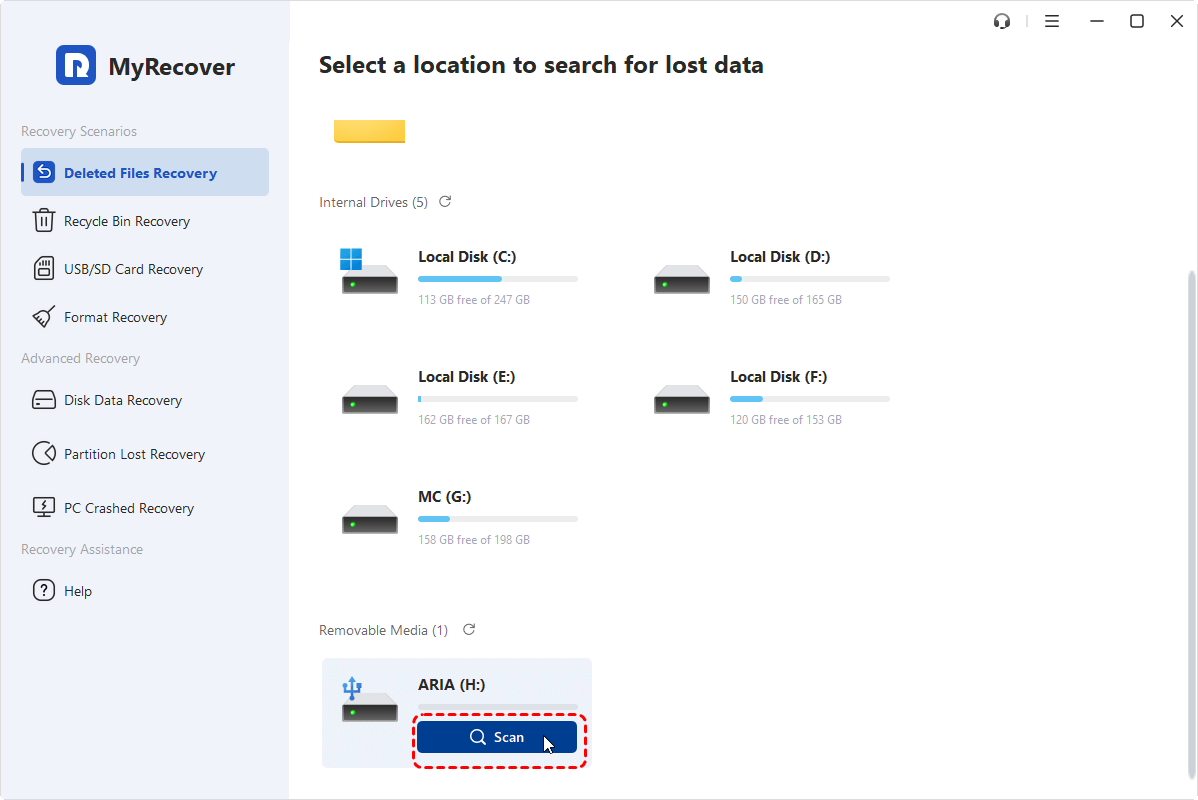
Step 2. Connect your SanDisk SD card to computer using slot or card reader.

Step 3. Run the program and select the SD card to scan, then click "Scan" to search for recoverable files.
Step 4. After the scanning process is finished, choose the files you wish to recover from the list and click "Recover". You can also locate the desired files quickly using the "Filter" feature or the "Type" tab.
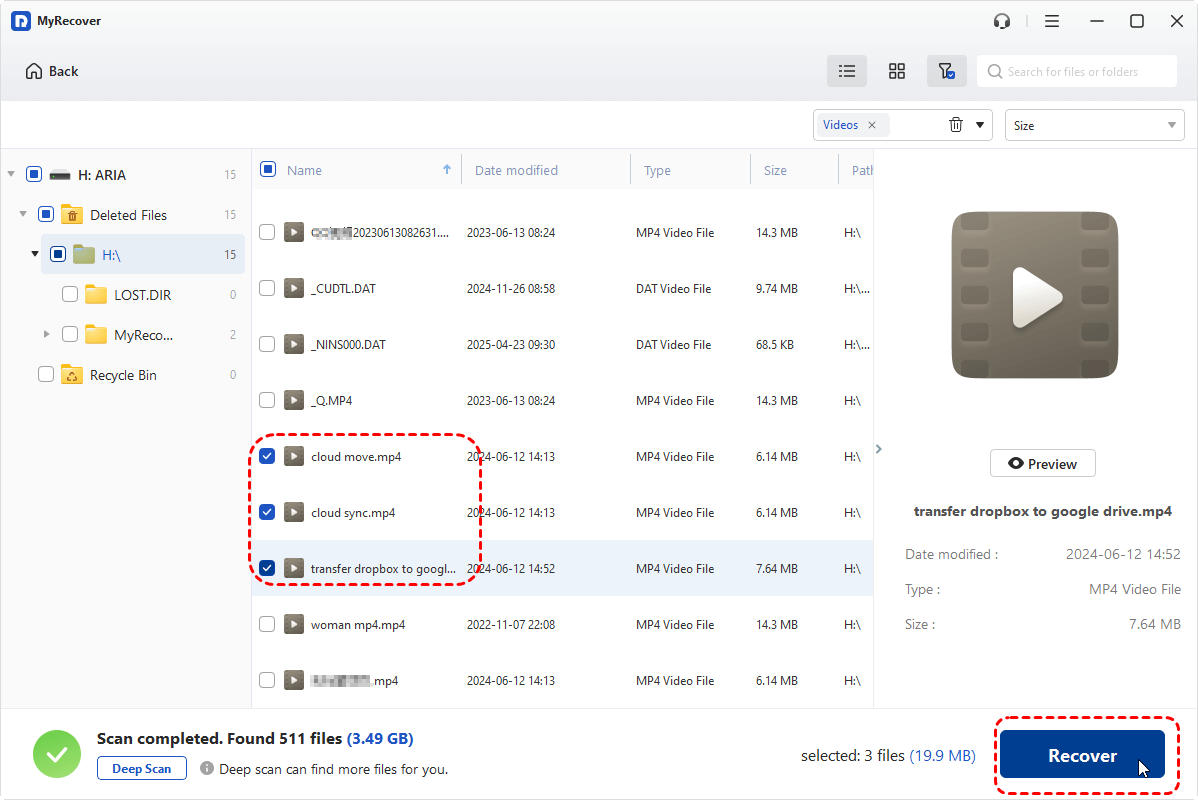
- If the data you want to recover on your SD card exceeds 500 MB, upgrading to the MyRecover Professional edition will give you unlimited data recovery and full file preview before restoration.
- You can extract all existing files from the SD card with one click: Under "Path" tab, select "Existing Files" folder and click "Recover".
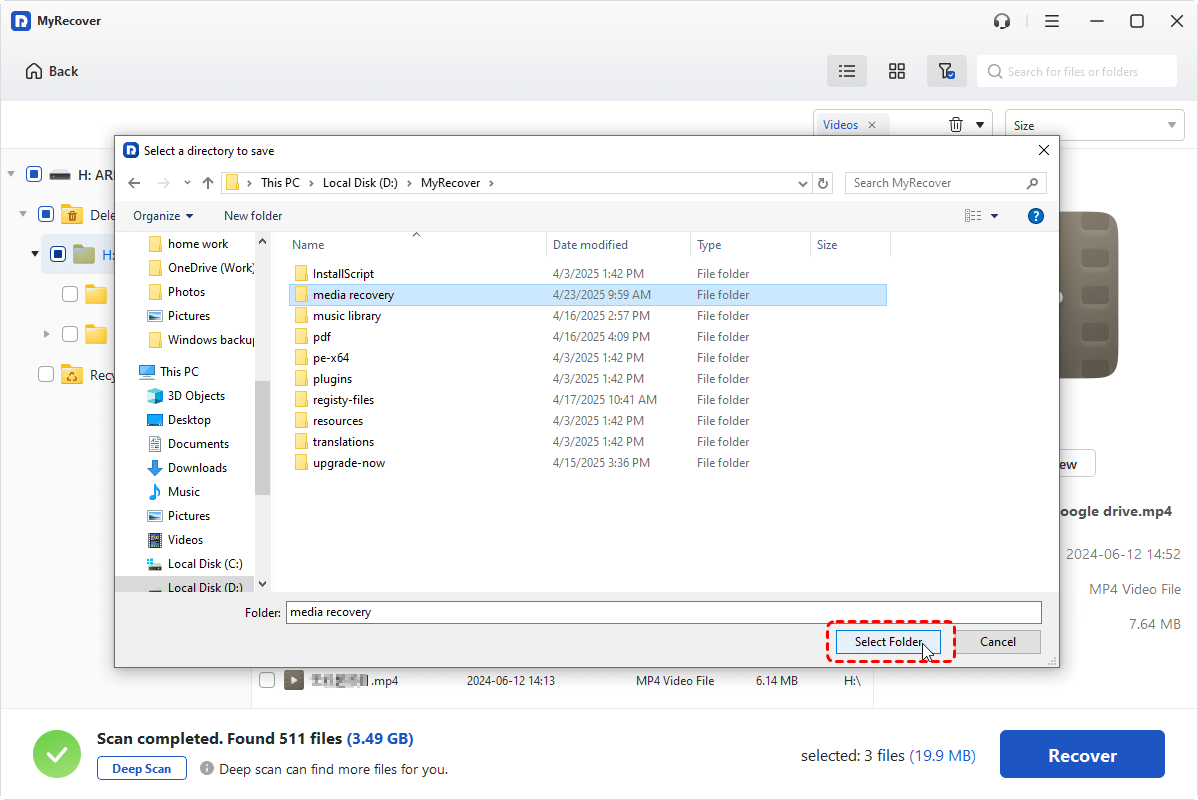
Step 5. Select a folder different from the original one to save the recovered files.
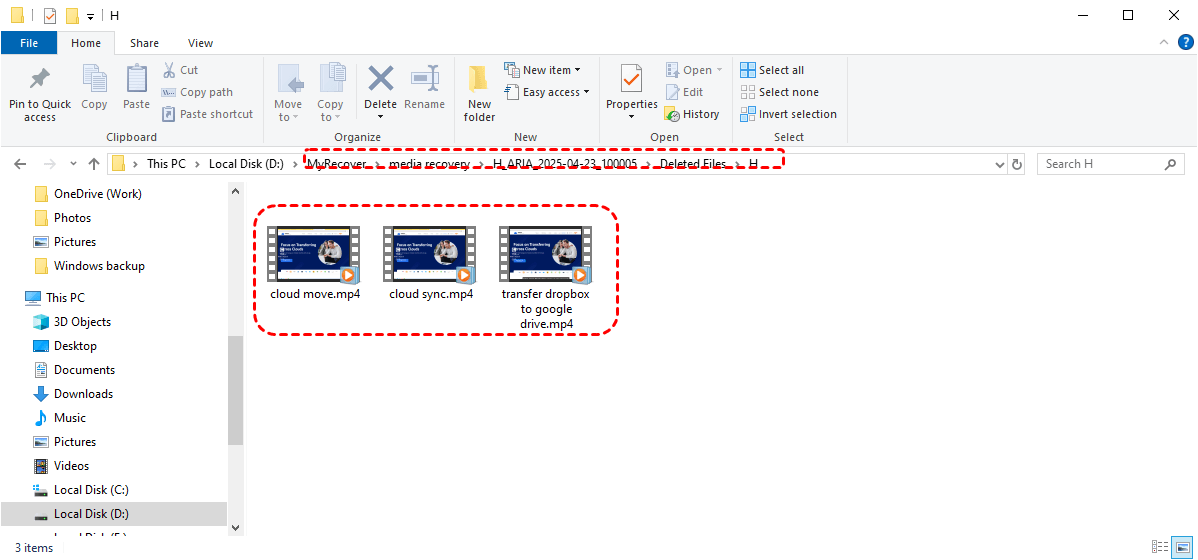
Once the process is done, you'll see a message saying "The Files have been Recovered Successfully". Then, you can check the recovered files by clicking on the "Browse" button in the prompt.
Top 6 SanDisk SD Card Repair Tools Free Download
After successfully recovering your important files, you can now proceed with repairing the SanDisk SD card itself. The following methods move from basic error checking to more advanced fixes, helping you restore normal functionality step by step while minimizing further risk.
| Tools | Use Case |
| Windows CHKDSK Tool | Repair logical file system errors, fix corrupted sectors on SD cards recognized by Windows |
| Disk Management | Initialize, format, or assign drive letters to SD cards; repair minor partition issues |
| DiskPart | Advanced disk management via command line; clean, format, or re-partition SD cards when GUI tools fail |
| TestDisk / PhotoRec | Recover lost partitions and deleted files; repair corrupted SD card structures |
| Windows File Explorer | Quick or full format to restore SD card functionality |
| SD Memory Card Formatter | Officially recommended formatting tool to fully format SD cards; resolves card-specific logical errors without damaging SD card structure |
Method 1. Windows CHKDSK Tool
The CHKDSK utility is a built-in Windows tool designed to detect and fix logical file system errors on storage devices. It works by scanning the SD card for bad sectors, repairing corrupted file system structures, and restoring accessibility. This method is suitable when the card is recognized but shows errors such as "file system corrupted" or "cannot read drive".
Step 1. Connect your SanDisk SD card to the computer and note its drive letter (e.g., E:).
Step 2. Locate Command Prompt in the Start menu and right click on it, then choose "Run as administrator".

Step 3. Enter the following command "chkdsk G: /f /r" and press "Enter". Replce the drive letter "G" with your SD card letter.

Step 4. Wait for the process to complete and check if the SD card becomes accessible.
Method 2. Disk Management
If the SD card is not functioning properly, Disk Management can help diagnose its status and reassign drive letters or initialize the disk. This method is effective when the card appears as unallocated, offline, or without a drive letter, preventing normal access through File Explorer.
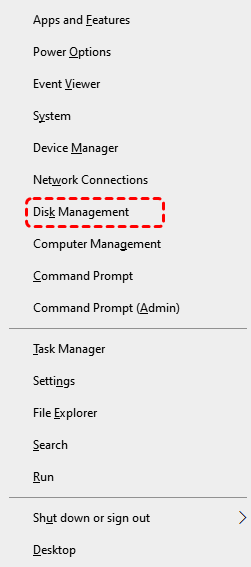
Press "Win" + "X" and select "Disk Management" to open it. Locate the drive in the disk list and check its status:
👉 For Missing/Conflicting Drive Letters:
Step 1. Right-click the SD card and select "Change Drive Letter and Paths".
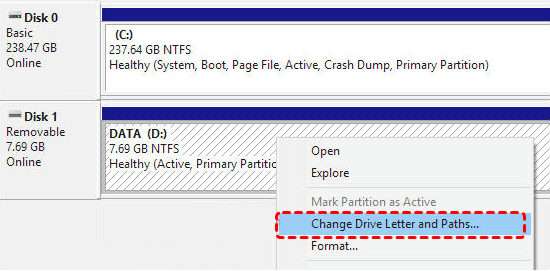
Step 2. Assign a new letter and confirm, then check if the card is accessible.
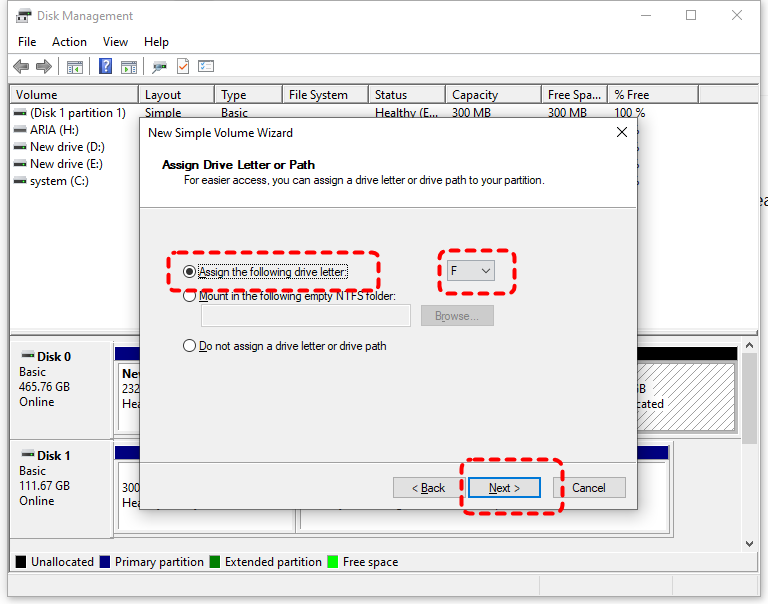
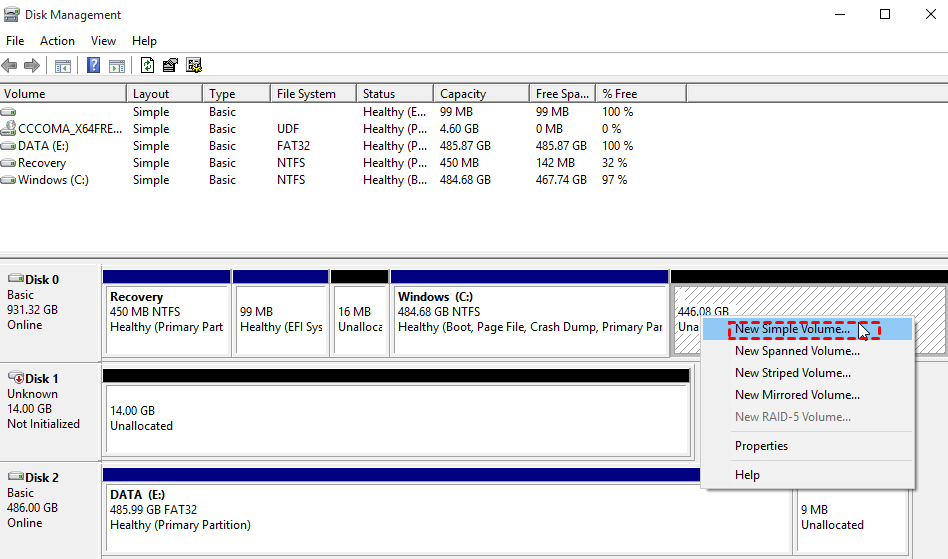
👉 For Unallocated Space:
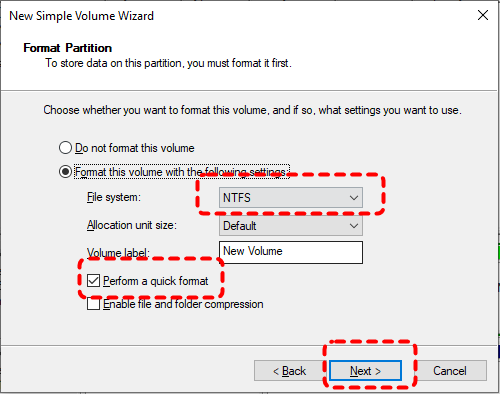
Step 1. Right click on the SD card and choose "New Simple Volume".
Step 2. Assign a drive letter for the SD card and choose whether you want to format it. However, the drive can only be used after formatting, which will erase all data. This is why we recommend recovering your data from the SD card first.
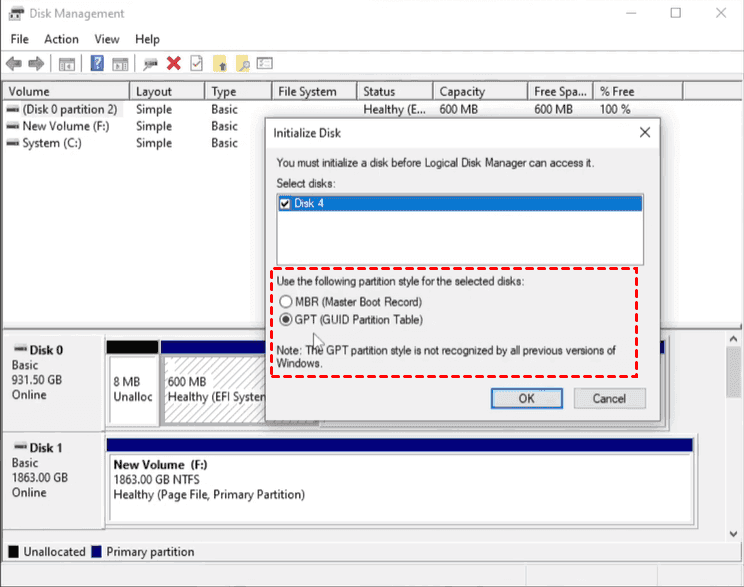
👉 For Uninitialized/Unknown Disk:
Step 1. Right click on the SD card and choose "Initialize Disk".

Step 2. Select a partition style (MBR or GPT) based on your needs.
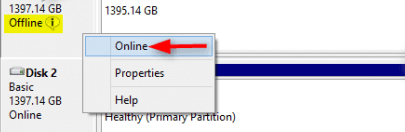
👉 For Offline Disk:
Right click on the SanDisk SD card and choose "Online".
Method 3. DiskPart
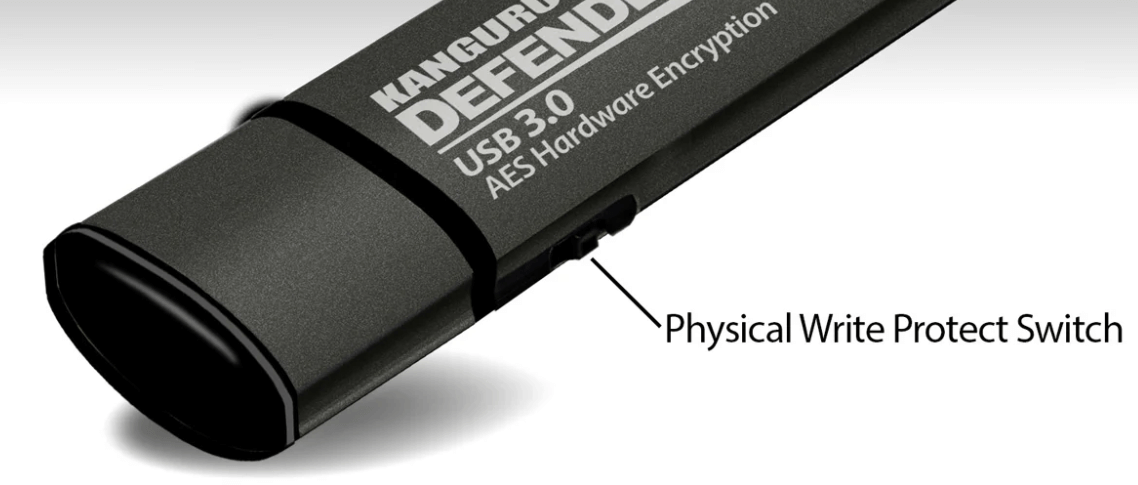
Write protection prevents any modifications to the SD card, which can block both repair and formatting attempts. This issue may be caused by a physical lock switch or system-level restrictions. Removing write protection with DiskPart can restore full access, allowing further repair operations to proceed normally.
Step 1. Check if your SD card adapter has a physical lock switch and slide it to the "Unlock" position.
Step 2. If no switch, you can remove write protection with Command Prompt. Connect the card to your computer and run Command Prompt as administrator.
Step 3. Type the following command and hit "Enter" after each one:
- diskpart
- list disk
- select disk X (select your SD card)
- attributes disk clear readonly
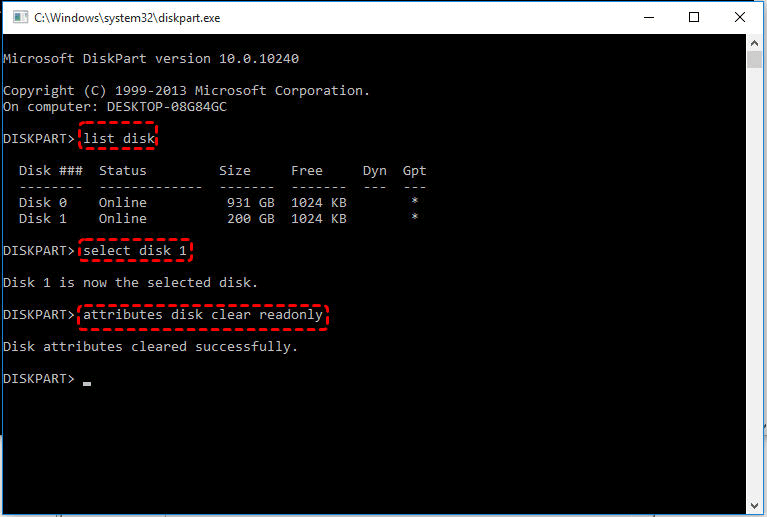
Wait for the process to complete, check if the SanDisk SD card is accessible.
Method 4. TestDisk/Photorec
TestDisk is a free, open-source command-line partition and boot repair tool. It can recover lost partitions, repair filesystem tables, fix boot sectors, and more. If your SanDisk SD card shows as RAW or unallocated, you can also use this tool to restore the SD card to a normal working state. Follow these steps:
Step 1. Download and install TestDisk/Photorec on your computer. Connect your SanDisk SD card to your computer with a card reader.
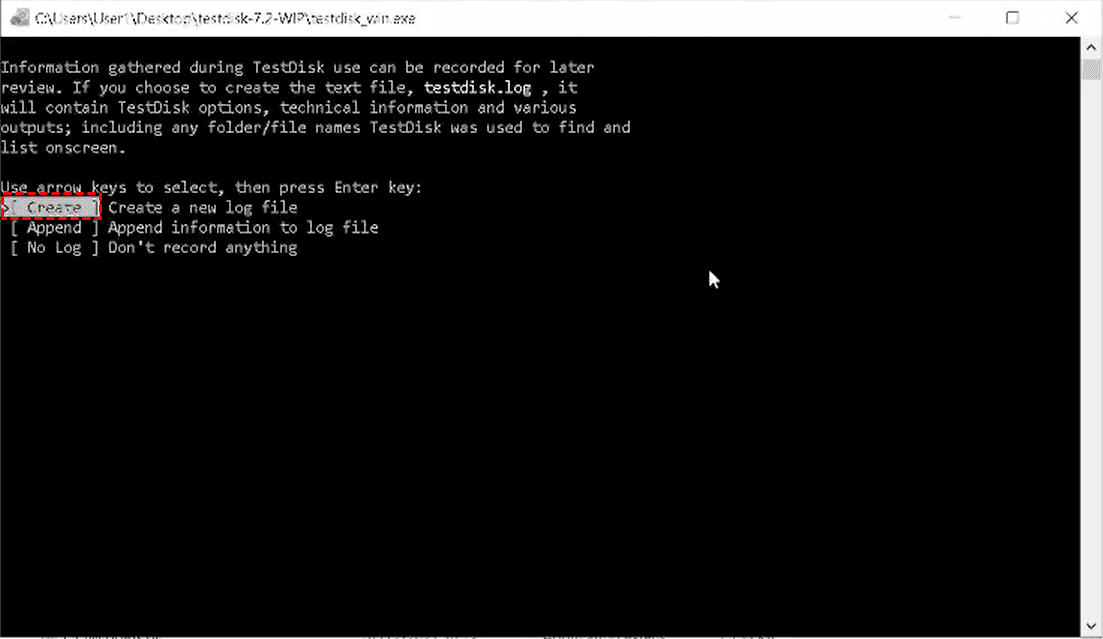
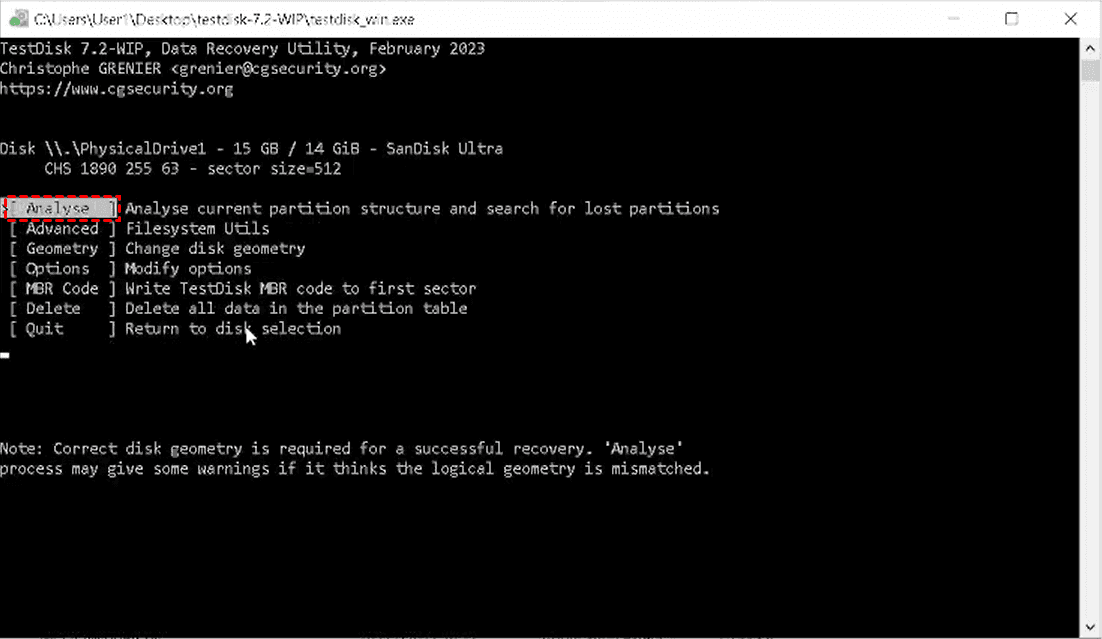
Step 2. Run "testdisk_win.exe" as an administrator to launch the tool.
Step 3. Select "Create" to create a new log file.
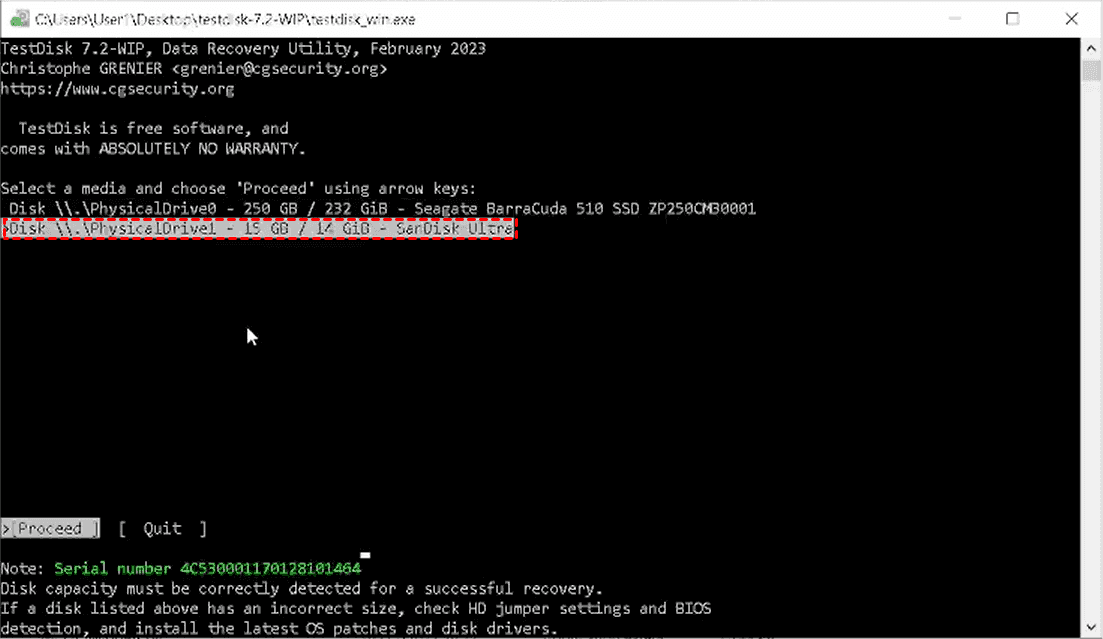
Step 4. Select your corrupted SanDisk SD card using the arrow key on keyboard and click "Proceed".
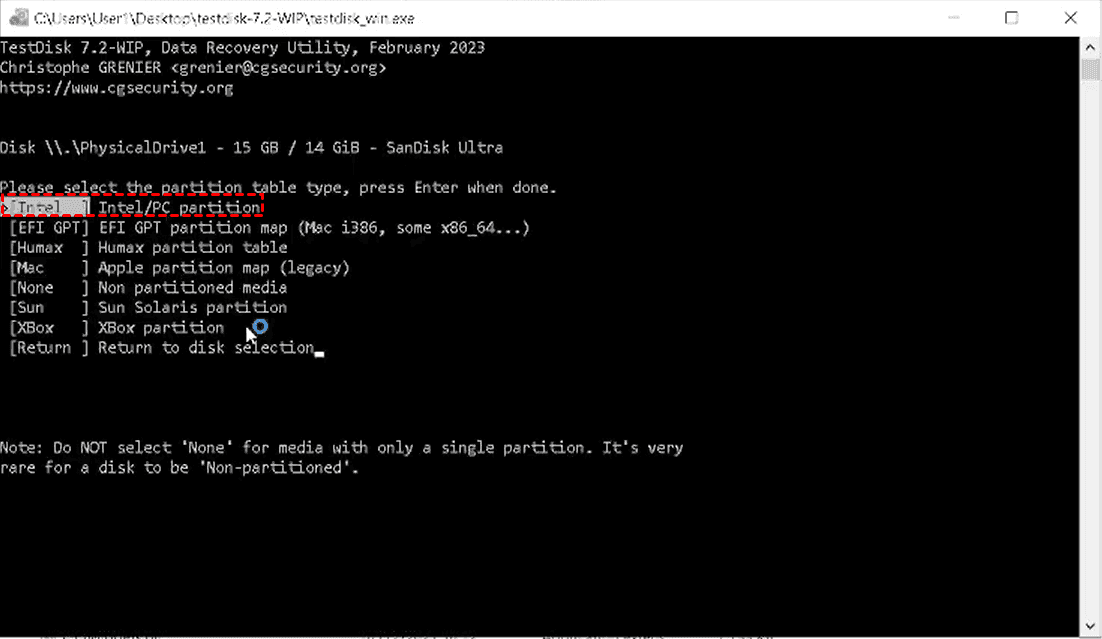
Step 5. Choose SD card partition table. Generally, SD cards use either the Intel/PC or EFI GPT. TestDisk will automatically detect and recommend the correct one.
Step 6. Choose "Analyze" to check the current partition structure.
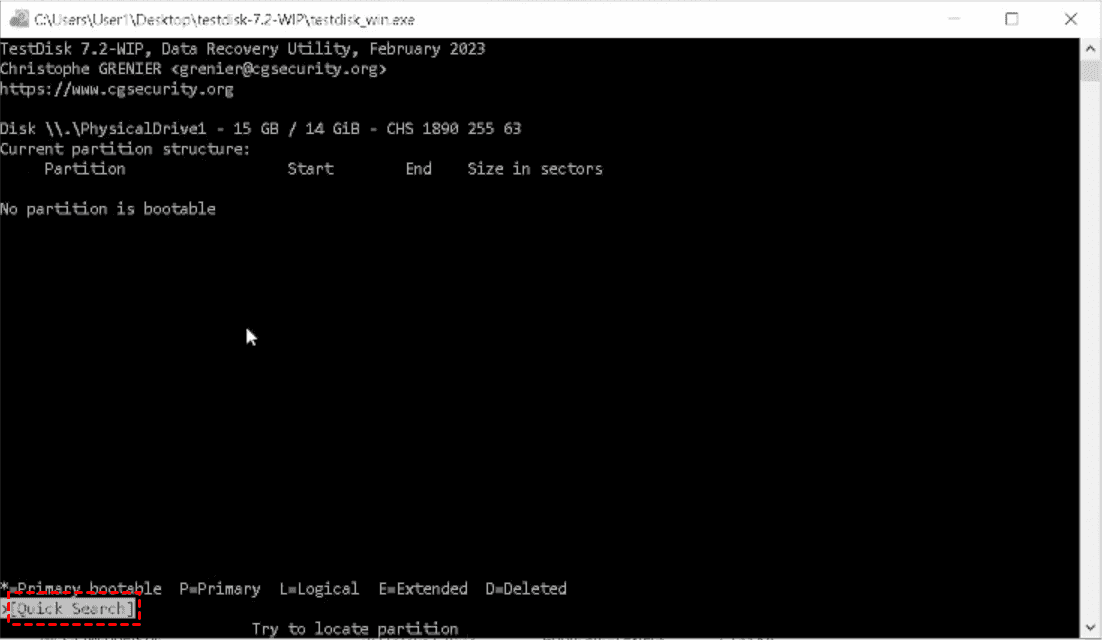
Step 7. Click "Quick Search" to search partition. If partitions are not found, run a "Deeper Search" to scan for lost partitions.
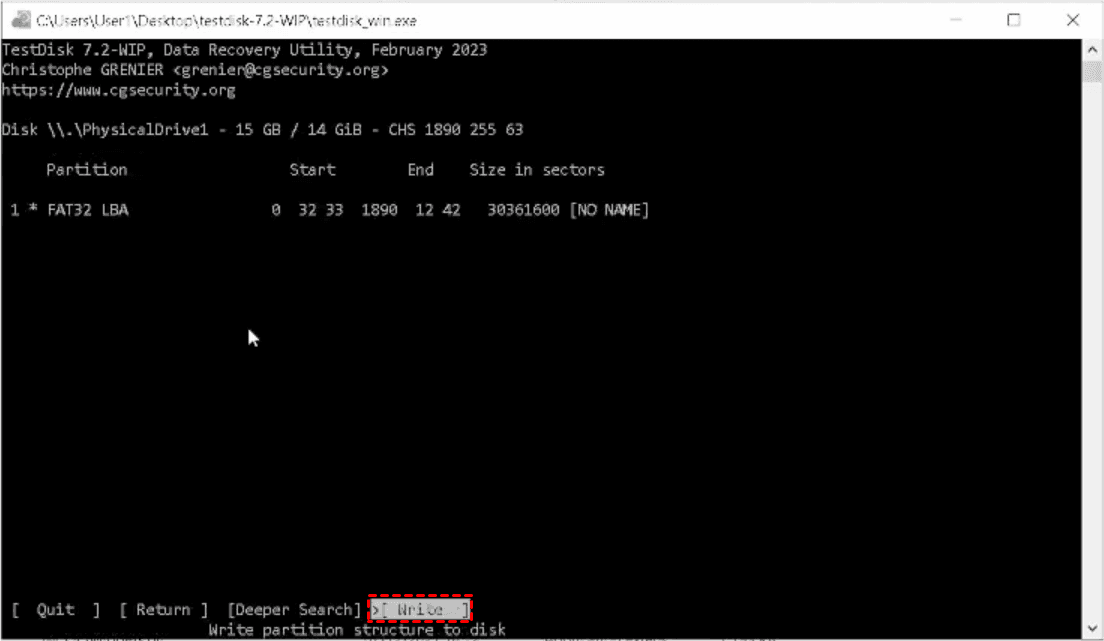
Step 8. Once the partition is found, you can click "Write" to save the partition table to the SanDisk SD card.
Method 5. Windows File Explorer
Formatting rebuilds the file system of the SD card, resolving severe corruption issues that cannot be fixed by repair tools. However, this process erases all existing data, which is why it should only be performed after data recovery. It is most effective when the card shows as RAW or repeatedly prompts for formatting.
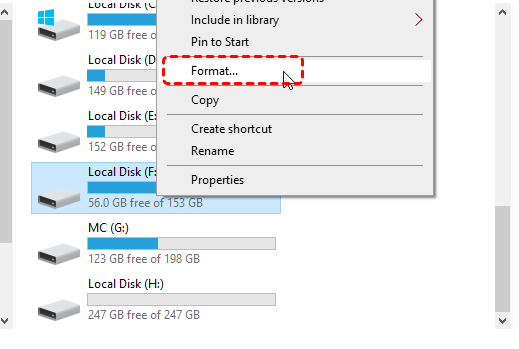
Step 1. Open "This PC" and right-click the SD card, and select "Format".
Step 2. Choose a file system (FAT32 or exFAT is recommended).
Step 3. Uncheck "Quick Format" for a more thorough process if needed.
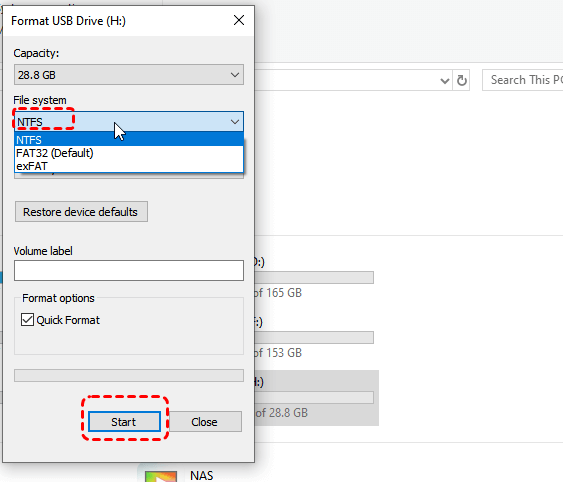
Step 4. Click "Start" and wait for the formatting to complete.
Method 6. SanDisk Official Recommended Tool: SD Memory Card Formatter
The SD Memory Card Formatter, provided by the SD Association, is a specialized tool optimized for SD cards. It formats the card according to official standards, ensuring better compatibility and performance compared to generic formatting tools. This method is especially useful if a host device formats a 64GB card that only supports a max 32GB capacity, resulting in the card being limited to 32GB (with only 30GB usable space).
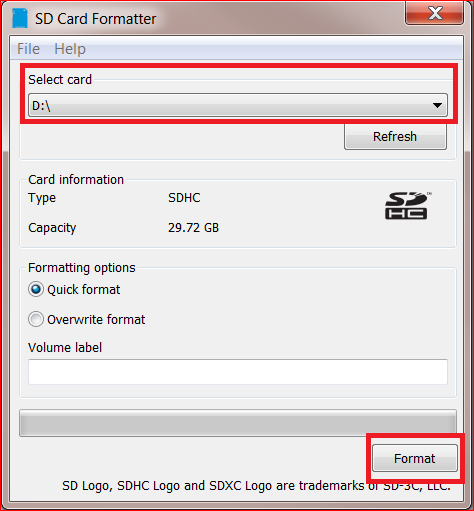
Step 1. Download and install SD Memory Card Formatter from the official SD Association website.
Step 2. Insert your SD card and launch the tool.
Step 3. Select the SanDisk SD card drive and click "Format".
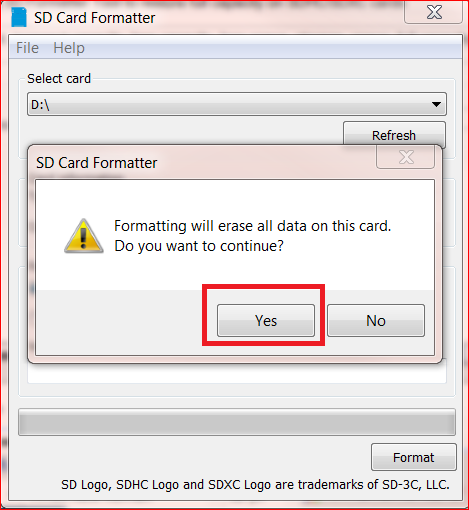
Step 4. Click "Yes" to confirm the process.
Summary
Dealing with a damaged or corrupted SanDisk SD card can be stressful, but with the right SanDisk SD card repair tool, both data recovery and repair are manageable. By first using a professional tool like MyRecover, you can safely retrieve important files and prevent permanent data loss. Once your data is secured, applying methods mentioned above to restore your SD card to normal functionality.


Stay Updated With Our
Latest Tips
Add us as a preferred source on Google to never miss helpful guides.